Introducing 3D Kitchen Backsplash Tile
Kitchen design has evolved significantly over the years, with homeowners seeking innovative ways to add personality and style to one of the most functional spaces in the home. Among the various design elements, the backsplash stands out as a prime opportunity to infuse creativity and practicality into the kitchen. One of the latest trends in kitchen decor is the use of 3D kitchen backsplash tiles. These tiles not only protect walls from spills and splatters but also add a striking visual element that can transform the look and feel of the kitchen.

The Aesthetic Appeal of 3D Backsplash Tiles
Visual Impact and Design Variety
3D kitchen backsplash tiles offer a unique visual impact that flat tiles cannot match. Their three-dimensional nature creates shadows and highlights, adding depth and interest to the kitchen walls. This can make even a small kitchen feel more dynamic and engaging. Available in various materials, patterns, and colors, these tiles can suit a wide range of design preferences, from sleek and modern to rustic and traditional.
The variety of designs available means that homeowners can find 3D tiles that complement their existing decor or serve as a focal point in a complete kitchen makeover. Patterns can range from geometric shapes and organic waves to intricate floral designs, each bringing its own unique charm and personality to the space.
Creating a Focal Point
In many kitchen designs, the backsplash serves as a key focal point. 3D tiles excel in this role, drawing the eye and creating a sense of drama and sophistication. Whether used behind the stove, the sink, or across an entire wall, these tiles can make a bold statement. They can be paired with simple, understated cabinetry and countertops to ensure the backsplash remains the star of the show.
The ability to create a focal point with 3D tiles also allows homeowners to express their style. A carefully chosen tile can reflect individual tastes and preferences, making the kitchen a more personalized and enjoyable space.

Enhancing Lighting Effects
The three-dimensional nature of these tiles can enhance lighting effects in the kitchen. When natural or artificial light hits the textured surface, it creates varying shades and shadows that add to the room’s overall ambiance. This interplay of light and shadow can make the kitchen appear brighter and more spacious, adding a sense of warmth and welcome.
Incorporating 3D tiles in a well-lit area, such as under-cabinet lighting or near windows, maximizes their impact. The tiles can reflect light in different directions, creating a captivating and constantly changing visual experience throughout the day.
Versatility in Applications
While traditionally used on walls, 3D tiles are versatile enough to be used in various applications around the kitchen. They can be applied to island fronts, bar backsplashes, or even as accent pieces within larger tiled areas. This versatility opens up numerous design possibilities, allowing for creative and unexpected uses of texture and pattern.
In open-plan living spaces, 3D tiles can also help define the kitchen area, creating a distinct visual boundary without the need for physical barriers. This can be particularly useful in contemporary homes where seamless transitions between living spaces are desired.
Combining Function and Beauty
While the aesthetic appeal of 3D tiles is undeniable, they also serve a functional purpose. Like traditional backsplash tiles, they protect walls from moisture, grease, and food stains, making them a practical choice for the kitchen. The added texture can also help to disguise minor imperfections or wear over time, maintaining a fresh and clean look with minimal effort.
Combining functionality with beauty, 3D kitchen backsplash tiles offer a winning solution for homeowners looking to elevate their kitchen design. Their unique characteristics make them a standout choice for those who want both style and substance in their home decor.
Choosing the Right 3D Tile Material
Ceramic and Porcelain Tiles
Ceramic and porcelain tiles are popular for 3D kitchen backsplashes due to their durability and ease of maintenance. These materials are resistant to water, stains, and heat, making them ideal for the kitchen environment. Ceramic and porcelain tiles come in a vast array of colors and finishes, allowing for creative freedom in design.
One of the advantages of ceramic and porcelain tiles is their affordability. They offer a cost-effective way to achieve a high-end look without breaking the bank. Additionally, these materials are relatively easy to cut and install, making them a favorite among DIY enthusiasts.
The durability of ceramic and porcelain tiles ensures they will stand up to the rigors of a busy kitchen. They can withstand frequent cleaning and heavy use without losing their luster or integrity. This makes them a practical choice for homeowners who want both beauty and longevity in their kitchen backsplash.
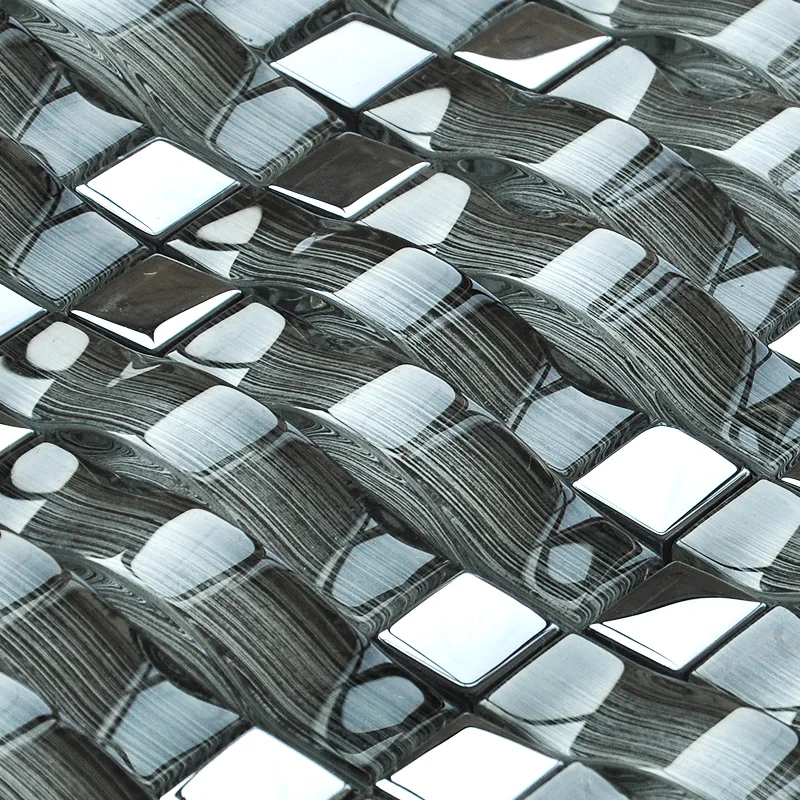
Glass Tiles
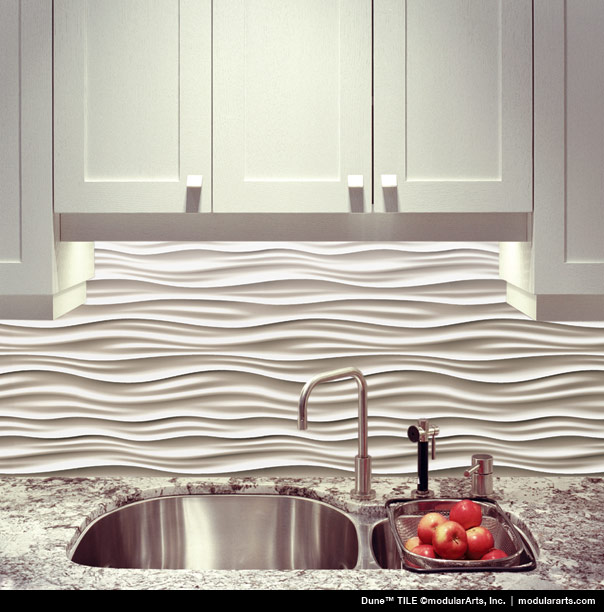
Glass tiles bring a sleek and modern look to any kitchen. Their reflective surface can enhance the sense of space and light in the room, making them an excellent choice for smaller kitchens or those with limited natural light. 3D glass tiles can feature various textures and patterns, adding a touch of elegance and sophistication.
One of the key benefits of glass tiles is their ability to resist stains and moisture. This makes them exceptionally easy to clean, requiring only a simple wipe-down to maintain their pristine appearance. Glass tiles are also highly durable, with a scratch-resistant surface that can handle the demands of a busy kitchen.
The versatility of glass tiles allows for creative combinations with other materials. For example, glass tiles can be mixed with stone or metal accents to create a customized backsplash. This flexibility in design makes them a popular choice for contemporary kitchens.
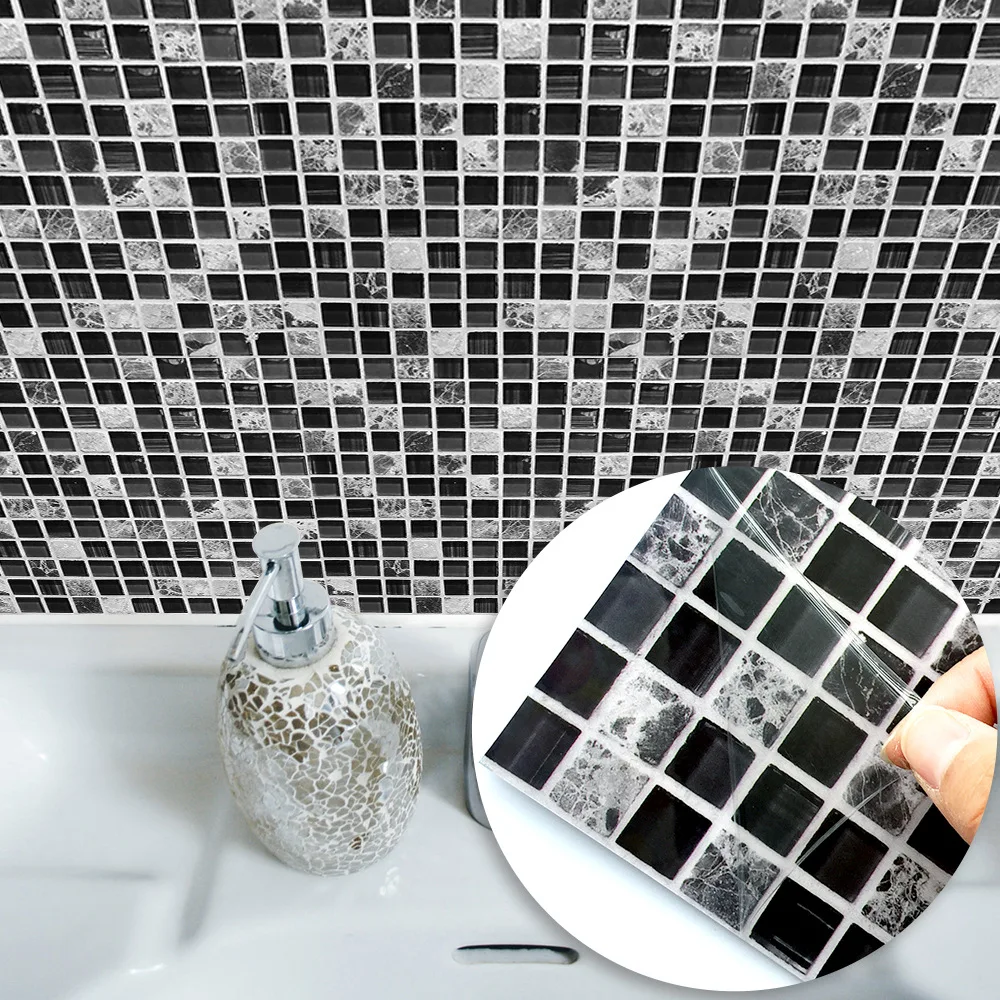
Natural Stone Tiles
For a more rustic and organic look, natural stone tiles are an excellent option. Materials such as marble, granite, and travertine offer a timeless appeal and a sense of luxury. The natural variations in color and texture give each tile a unique appearance, adding depth and character to the kitchen.
Natural stone tiles are known for their durability and longevity. They can withstand high temperatures and heavy use, making them a practical choice for kitchen backsplashes. However, they do require regular sealing to protect against stains and moisture.
The inherent beauty of natural stone tiles makes them a statement piece in any kitchen. Their rich textures and colors can complement a variety of design styles, from traditional to modern. The tactile quality of stone adds an extra dimension to the kitchen, making it a more engaging and inviting space.
Metal Tiles
Metal tiles offer a contemporary and industrial look that can add a touch of modernity to any kitchen. Materials such as stainless steel, copper, and aluminum are commonly used for 3D backsplash tiles. These tiles are highly durable, resistant to heat and moisture, and easy to clean.
One of the standout features of metal tiles is their reflective surface, which can enhance the lighting in the kitchen and create a sense of depth and dimension. They are particularly effective in modern and minimalist designs, where their sleek appearance can add a touch of sophistication.
Metal tiles can also be used in combination with other materials to create a unique and customized backsplash. For example, a mix of metal and glass tiles can add an interesting visual contrast and texture. This flexibility in design makes metal tiles a versatile choice for contemporary kitchens.
Composite Materials
Composite materials, such as engineered stone and resin-based tiles, offer a blend of natural and synthetic elements. These materials are designed to mimic the appearance of natural stone or other high-end materials while offering enhanced durability and ease of maintenance.
One of the key benefits of composite materials is their versatility in design. They can be manufactured in a wide range of colors, patterns, and textures, allowing for endless customization options. Composite tiles are also resistant to stains, moisture, and heat, making them a practical choice for kitchen backsplashes.
The cost-effectiveness of composite materials makes them an attractive option for homeowners looking to achieve a high-end look on a budget. They offer the beauty and elegance of natural materials without the associated maintenance and cost. This makes them a popular choice for modern and contemporary kitchens.

Installation Process of 3D Backsplash Tiles
Preparing the Surface
The first step in installing 3D kitchen backsplash tiles is preparing the surface. The wall must be clean, dry, and smooth to ensure proper adhesion. Any existing wallpaper or paint should be removed, and the surface should be sanded to create a rough texture for better grip.
It’s essential to check for any imperfections or damage on the wall before starting the installation. Holes, cracks, or uneven areas should be repaired with spackle or filler. Once the repairs are dry, the wall should be cleaned again to remove any dust or debris.
For areas exposed to moisture, such as behind the sink or stove, it’s recommended to apply a waterproof membrane or primer. This additional step helps protect the wall and ensures the longevity of the backsplash tiles.
Measuring and Planning
Accurate measurement and planning are crucial for a successful installation. Start by measuring the height and width of the area to be tiled. This will help determine the number of tiles needed and the layout pattern. It’s important to account for any cuts or adjustments required for outlets, switches, or other obstacles.
Creating a layout plan on paper can help visualize the final result and identify any potential issues. It’s also helpful to lay out the tiles on a flat surface before installation to see how they fit together and make any necessary adjustments.
Dry-fitting the tiles on the wall can also be beneficial. This involves temporarily placing the tiles without adhesive to ensure the layout is correct and to make any final adjustments. This step helps avoid mistakes and ensures a smooth installation process.
Applying Adhesive and Setting Tiles
Once the surface is prepared and the layout is planned, it’s time to apply the adhesive. Use a notched trowel to spread a thin, even layer of adhesive on the wall. Start at the bottom and work your way up, applying adhesive to small sections at a time to prevent it from drying out.
Carefully press the 3D tiles into the adhesive, following the layout plan. Use spacers between tiles to ensure consistent spacing and alignment. It’s important to press firmly but gently to avoid damaging the tiles or displacing the adhesive.
Continue setting the tiles until the entire area is covered. Use a level to check for evenness and make any necessary adjustments. It’s essential to clean any excess adhesive from the tile surface and joints before it dries.
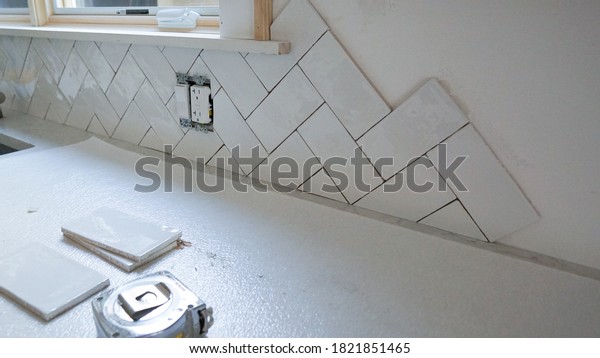
Cutting and Fitting Tiles
Cutting tiles to fit around edges, corners, and obstacles is a crucial part of the installation process. A tile cutter or wet saw can be used to make precise cuts. It’s important to measure and mark the tiles accurately before cutting to ensure a perfect fit.
When cutting 3D tiles, it’s important to take extra care to avoid chipping or cracking the textured surface. Using a wet saw with a diamond blade can help achieve clean and smooth cuts. For intricate cuts, such as around outlets or switches, a tile nipper or hole saw can be used.
After cutting, the tiles should be dry-fitted again to ensure they fit correctly. Any final adjustments can be made before setting the cut tiles into the adhesive. It’s important to clean the cut edges and remove any debris before installation.
Grouting and Finishing
Once the tiles are set and the adhesive is fully cured, it’s time to apply the grout. Grouting fills the gaps between the tiles and provides a finished look. Choose a grout color that complements the tile design and enhances the overall appearance of the backsplash.
Mix the grout according to the manufacturer’s instructions and apply it using a rubber float. Press the grout into the joints, making sure to fill all gaps. Wipe off any excess grout from the tile surface with a damp sponge before it dries.
After the grout has been set, it’s important to seal the grout lines to protect against stains and moisture. Use a grout sealer according to the manufacturer’s instructions. This additional step helps maintain the appearance and longevity of the backsplash.
Maintenance and Cleaning of 3D Backsplash Tiles
Regular Cleaning Routine
Maintaining the beauty and integrity of 3D kitchen backsplash tiles requires regular cleaning. A simple routine can keep the tiles looking fresh and new. Wipe down the tiles with a soft cloth or sponge and mild detergent to remove any grease, food splatters, or dust.
Avoid using abrasive cleaners or scrubbers that can damage the textured surface of the tiles. For tougher stains, a mixture of baking soda and water can be used to gently scrub the affected area. Rinse thoroughly with clean water and dry with a soft cloth.
Regular cleaning not only keeps the tiles looking their best but also helps prevent the buildup of grime and bacteria. This is especially important in the kitchen, where cleanliness is essential for food safety and hygiene.
Deep Cleaning and Stain Removal
Occasionally, a deeper cleaning may be required to remove stubborn stains or buildup. For deep cleaning, use a non-abrasive tile cleaner or a mixture of vinegar and water. Apply the cleaner with a soft brush or cloth and gently scrub the tiles.
For grout lines, a toothbrush or small scrub brush can be used to clean hard-to-reach areas. It’s important to rinse thoroughly with clean water to remove any residue from the cleaning solution. Dry the tiles with a soft cloth to prevent water spots.
For particularly stubborn stains, a commercial tile and grout cleaner may be necessary. Follow the manufacturer’s instructions and test the cleaner on a small, inconspicuous area first to ensure it does not damage the tiles.
Sealing and Protecting
Sealing the grout lines and, in some cases, the tiles themselves is an important step in maintaining 3D kitchen backsplash tiles. Sealing helps protect against stains, moisture, and bacteria. It’s recommended to seal the grout lines at least once a year, or more frequently in high-use areas.
To seal the grout lines, apply a grout sealer with a small brush or applicator. Follow the manufacturer’s instructions for drying time and any additional steps. For natural stone tiles, a stone sealer may also be required to protect the surface and enhance the color.
Regularly inspecting the backsplash for any signs of damage or wear can help identify areas that may need resealing. Keeping the tiles and grout well-sealed ensures the longevity and beauty of the backsplash.
Repairing and Replacing
Over time, 3D kitchen backsplash tiles may become damaged or require replacement. Chips, cracks, or loose tiles should be addressed promptly to prevent further damage. Small chips or cracks can often be repaired with a matching tile filler or epoxy.
For larger areas of damage or loose tiles, it may be necessary to remove and replace the affected tiles. Carefully remove the damaged tile using a chisel and hammer, being careful not to damage the surrounding tiles. Clean the area and apply fresh adhesive before setting the new tile.
Regular maintenance and prompt repairs can extend the life of the backsplash and keep it looking its best. Addressing issues as they arise prevents more extensive damage and ensures the backsplash remains a beautiful and functional part of the kitchen.
Preventing Damage
Preventing damage to 3D kitchen backsplash tiles involves a combination of careful use and regular maintenance. Avoiding harsh chemicals, abrasive cleaners, and heavy impact can help preserve the tiles’ appearance and integrity. Using cutting boards, trivets, and splash guards can also protect the backsplash from damage.
Regularly inspecting the backsplash for signs of wear or damage allows for early intervention and prevents more extensive repairs. Keeping the tiles clean, sealed, and well-maintained ensures they remain a stunning and durable feature in the kitchen.

Common Mistakes to Avoid
Skipping Surface Preparation
One of the most common mistakes in installing 3D kitchen backsplash tiles is skipping proper surface preparation. A clean, dry, and smooth surface is essential for ensuring the tiles adhere correctly and remain in place. Failing to prepare the wall can lead to tiles falling off or uneven installation.
Inaccurate Measurements
Inaccurate measurements can lead to a host of problems, from insufficient tile supply to poor fit around edges and obstacles. It’s crucial to measure the area accurately and account for any cuts or adjustments needed. Double-checking measurements before purchasing and cutting tiles can save time and prevent costly mistakes.
Using the Wrong Adhesive
Using the wrong adhesive can compromise the installation’s durability and longevity. It’s important to choose an adhesive suitable for the specific type of 3D tiles being used. Consulting the tile manufacturer’s recommendations and seeking advice from professionals can help ensure the right adhesive is selected.
Ignoring Grout Sealing
Failing to seal the grout lines can lead to stains, moisture damage, and mold growth. Sealing the grout is a vital step in protecting the backsplash and ensuring it remains hygienic and easy to clean. Regularly resealing the grout lines maintains their protective barrier and extends the life of the backsplash.
Neglecting Regular Maintenance
Neglecting regular maintenance can result in a buildup of grime, stains, and damage to the tiles and grout. Establishing a routine cleaning schedule and performing deep cleaning as needed keeps the backsplash looking its best. Promptly addressing any issues or damage prevents more extensive repairs and ensures the backsplash remains a beautiful and functional feature in the kitchen.
What are the benefits of using 3D kitchen backsplash tiles?
3D kitchen backsplash tiles offer several benefits, including enhanced visual appeal, depth, and texture. They create a striking focal point in the kitchen, adding a sense of sophistication and drama. These tiles also enhance lighting effects by reflecting light and creating shadows, making the space feel brighter and more dynamic. Additionally, 3D tiles provide a durable and protective surface that is easy to clean and maintain, combining beauty with practicality.
How do I choose the right material for 3D backsplash tiles?
Choosing the right material for 3D backsplash tiles depends on various factors, including budget, design preference, and maintenance requirements. Ceramic and porcelain tiles are durable and affordable, making them a popular choice. Glass tiles offer a sleek and modern look with easy maintenance. Natural stone tiles provide a rustic and luxurious appeal but require regular sealing. Metal tiles add a contemporary touch and are highly durable. Composite materials offer versatility and cost-effectiveness. Consider these factors and consult with professionals to select the material that best suits your needs and preferences.
Can I install 3D backsplash tiles myself, or should I hire a professional?
While DIY installation is possible, hiring a professional ensures a higher quality finish and minimizes the risk of mistakes. Professionals have the experience and tools necessary to handle the complexities of installing 3D tiles, including cutting, fitting, and ensuring proper adhesion. However, if you have experience with tile installation and feel confident in your skills, DIY can be a cost-effective option. Just be sure to follow all preparation and installation guidelines carefully.
How do I clean and maintain 3D kitchen backsplash tiles?
Regular cleaning and maintenance are essential to keep 3D kitchen backsplash tiles looking their best. Use a soft cloth or sponge and mild detergent for daily cleaning. Avoid abrasive cleaners and scrubbers that can damage the tiles. For deeper cleaning, use a non-abrasive tile cleaner or a vinegar-water solution. Seal grout lines annually to protect against stains and moisture. Promptly repair any chips or cracks to prevent further damage. Regular inspections and timely maintenance ensure the backsplash remains a beautiful and functional part of the kitchen.
What are some design tips for incorporating 3D backsplash tiles in my kitchen?
When incorporating 3D backsplash tiles in your kitchen, consider the overall design and color scheme. Choose tiles that complement your cabinetry, countertops, and flooring. Use 3D tiles to create a focal point, such as behind the stove or sink. Experiment with different patterns and textures to add visual interest. Consider mixing materials, like combining glass and metal tiles, for a unique look. Use lighting strategically to highlight the 3D effect and enhance the ambiance. Lastly, ensure the design aligns with your personal style and enhances the functionality of your kitchen.
Peel and stick tile backsplash – Yellow: Tools & Home Improvement Backsplash

Kitchen Wall Tile Designs, Ideas Design Trends
![]()
How To Install A Mosaic Tile Backsplash In The Kitchen : Mosaic Tile Backsplash 3D High Gloss
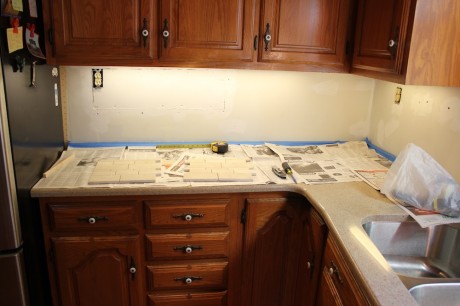
Installing a Kitchen Tile Backsplash
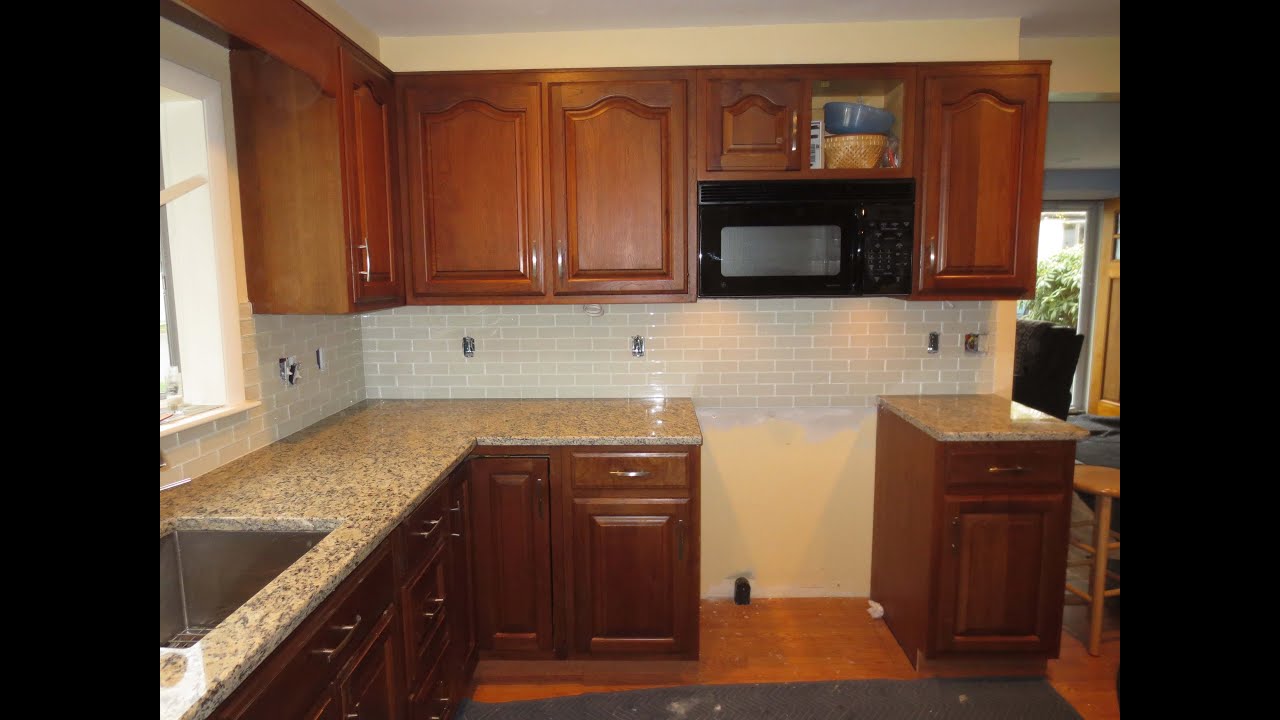
Backsplash tile project in the kitchen
3D Kitchen Backsplash Tile
Related Posts:
- Installing Subway Tile Kitchen Backsplash
- Aqua Backsplash Kitchen
- Limestone Kitchen Backsplash
- Ceramic Tiles For Kitchen Backsplash Pictures
- Black Kitchen Cabinets Backsplash
- Arts And Crafts Style Kitchen Backsplash
- How To Grout Kitchen Backsplash
- Kitchen Backsplash Plaques
- Slate Subway Tile Kitchen Backsplash
- Kitchen Backsplash Prices