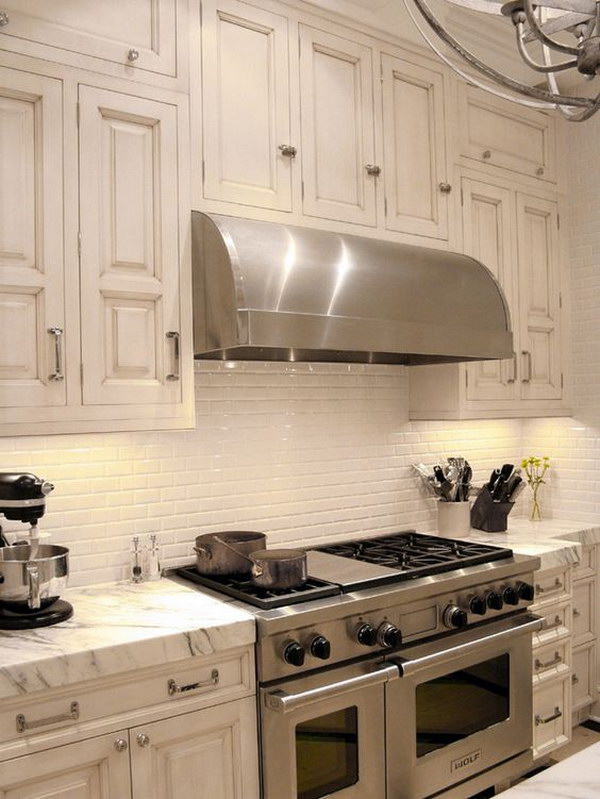
A kitchen backsplash is a functional and decorative element in your kitchen, protecting the walls from splashes and spills while adding visual interest and personality to the space. When choosing a timeless and versatile option, cream subway tile backsplash stands out for its classic appeal and ability to complement a variety of kitchen styles. This comprehensive guide will explore the benefits of using cream subway tile for your kitchen backsplash, design considerations, installation tips, and maintenance advice to help you achieve a stylish and practical kitchen design.

Benefits of Cream Subway Tile Backsplash
Timeless Elegance: Cream subway tile backsplash exudes timeless elegance and sophistication, making it a versatile choice for various kitchen styles, from traditional to contemporary. The classic rectangular shape and neutral cream color create a clean and cohesive look that complements any color scheme and decor, providing a timeless backdrop for your kitchen design.
Versatile Design: Cream subway tile backsplash offers endless design possibilities, allowing you to customize the look of your kitchen to suit your style and preferences. Whether you prefer a sleek and modern aesthetic with glossy subway tiles or a rustic and vintage vibe with matte subway tiles, there are various options to choose from to achieve the desired look and feel for your kitchen.
Light-Enhancing: Cream subway tile backsplash has the added benefit of reflecting light and brightening up the kitchen space. The light color and glossy finish of cream subway tiles help bounce natural and artificial light around the kitchen, making the space feel more open, airy, and inviting. This light-enhancing quality is especially beneficial for kitchens with limited natural light or small spaces.
Easy Maintenance: Cream subway tile backsplash is not only stylish but also practical and easy to maintain. The smooth and non-porous surface of subway tiles makes them resistant to stains, water damage, and bacteria growth, making them an ideal choice for kitchen backsplashes. Simply wipe down the tiles with a mild detergent and water solution to keep them clean and looking like new.

Design Considerations
Tile Size and Layout: When choosing cream subway tiles for your kitchen backsplash, consider the size and layout of the tiles to achieve the desired look. Standard subway tiles typically measure 3 inches by 6 inches, but you can also find larger or smaller sizes to suit your preferences. Experiment with different tile layouts, such as traditional brick bond or herringbone patterns, to add visual interest and texture to your backsplash.
Grout Color: The color of the grout can significantly impact the overall appearance of your cream subway tile backsplash. Opt for a grout color that complements the cream tiles and enhances their natural beauty. Lighter grout colors, such as white or light gray, create a seamless and cohesive look, while darker grout colors add contrast and depth to the backsplash design.
Finish: Cream subway tiles are available in various finishes, including glossy, matte, and textured. Consider the finish of the tiles to achieve the desired look and feel for your kitchen backsplash. Glossy subway tiles offer a sleek and modern aesthetic, while matte or textured tiles add a rustic and vintage charm to the space. Choose a finish that complements your overall kitchen design and personal style.
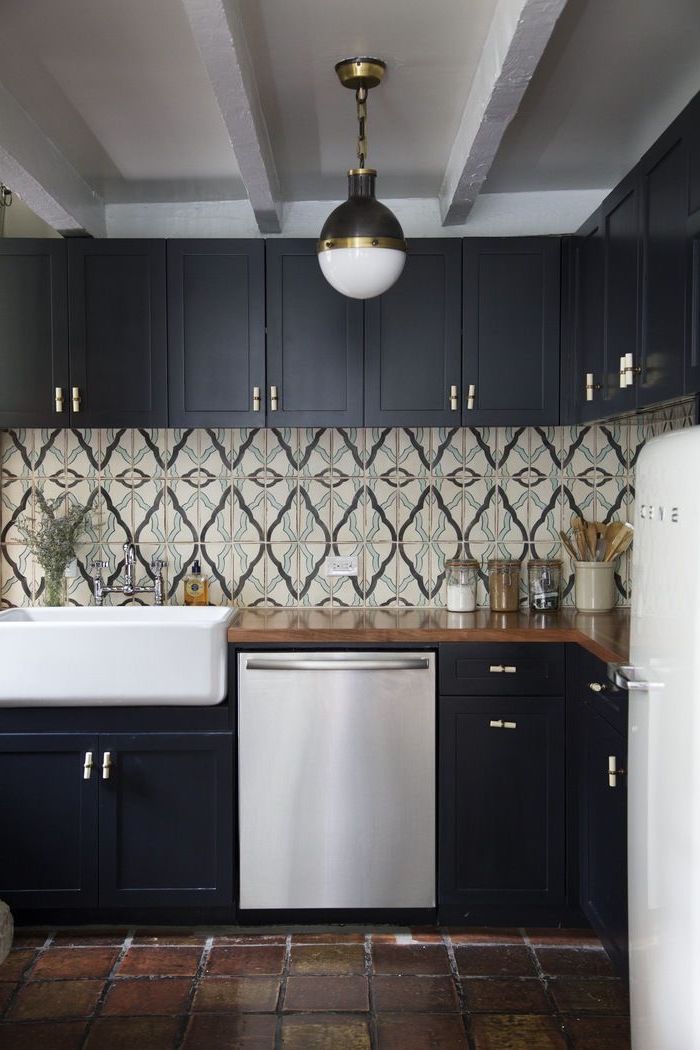
Accent Tiles: For added visual interest and personality, consider incorporating accent tiles into your cream subway tile backsplash design. Mix and match different tile materials, shapes, and colors to create a unique focal point or border within the backsplash. Whether you prefer glass mosaic tiles, metallic accents, or patterned ceramic tiles, accent tiles can elevate the look of your cream subway tile backsplash and add a touch of personality to your kitchen design.

Installation Tips
Surface Preparation: Proper surface preparation is crucial for a successful cream subway tile backsplash installation. Ensure that the wall surface is clean, dry, and smooth before applying the tiles. Remove any existing tiles, wallpaper, or debris, and patch any cracks or holes in the wall to create a flat and even surface for tile installation.
Tile Adhesive: Use a high-quality tile adhesive specifically designed for kitchen backsplashes to ensure strong and durable adhesion of the cream subway tiles. Apply the adhesive evenly to the wall surface using a notched trowel, and press the tiles firmly into place, leaving a small gap between each tile for grout.
Grouting: Once the cream subway tiles are securely in place, allow the tile adhesive to dry completely before grouting. Choose a grout color that complements the cream tiles and enhances their natural beauty. Mix the grout according to the manufacturer’s instructions, and use a grout float to apply the grout evenly between the tiles, ensuring full coverage and filling in any gaps.
Sealing: After the grout has dried, seal the cream subway tile backsplash to protect it from stains, water damage, and bacteria growth. Choose a high-quality grout sealer and apply it evenly to the grout lines using a small brush or roller. Allow the sealer to dry completely before using the kitchen backsplash.

Maintenance Advice
Regular Cleaning: To maintain the beauty and longevity of your cream subway tile backsplash, clean it regularly with a mild detergent and water solution. Use a soft sponge or cloth to gently wipe down the tiles and remove any dirt, grease, or food residue. Avoid using abrasive cleaners or scrubbing pads that could scratch or damage the tiles.
Grout Maintenance: Periodically inspect the grout lines of your cream subway tile backsplash for any signs of wear, discoloration, or damage. Clean the grout lines with a grout cleaner and a grout brush to remove any dirt, mold, or mildew buildup. Seal the grout lines regularly to protect them from stains and moisture penetration.
Avoid Harsh Chemicals: Avoid using harsh chemicals or acidic cleaners on your cream subway tile backsplash, as they can damage the tiles and grout over time. Stick to mild detergents and non-abrasive cleaning products to preserve the appearance and integrity of the tiles.
Preventive Measures: To prevent stains and damage to your cream subway tile backsplash, avoid placing hot pots and pans directly on the tiles, as they can cause discoloration and heat damage. Use trivets or hot pads to protect the tiles from heat and scratches, and wipe up spills and splashes promptly to prevent them from staining the grout or tiles.

Common Mistakes to Avoid
Poor Surface Preparation: One common mistake is neglecting proper surface preparation before installing cream subway tile backsplash. Ensure that the wall surface is clean, dry, and smooth to achieve a successful and long-lasting tile installation.
Incorrect Tile Adhesive: Using the wrong type or amount of tile adhesive can result in poor adhesion and tile failure over time. Use a high-quality tile adhesive specifically designed for kitchen backsplashes, and follow the manufacturer’s instructions for application.
Improper Grouting: Another mistake is applying grout incorrectly or using the wrong grout color for your cream subway tile backsplash. Ensure that the grout lines are filled evenly and completely, and choose a grout color that complements the cream tiles and enhances their natural beauty.
Neglecting Sealing: Neglecting to seal the grout lines of your cream subway tile backsplash can leave them vulnerable to stains, water damage, and bacteria growth. Seal the grout lines regularly to protect them and prolong the lifespan of your backsplash.

Are cream subway tiles suitable for all kitchen styles?
Yes, cream subway tiles are versatile and can complement various kitchen styles, from traditional to contemporary. Their classic and neutral appearance makes them a timeless choice for any kitchen design.
Can I install cream subway tiles myself?
Yes, cream subway tiles can be installed as a DIY project, but it’s essential to follow proper installation techniques and guidelines to achieve professional results. Consider hiring a professional installer for complex or large-scale projects.
How do I choose the right grout color for cream subway tiles?
Consider the overall aesthetic and design of your kitchen when choosing a grout color for cream subway tiles. Lighter grout colors create a seamless and cohesive look, while darker grout colors add contrast and depth to the backsplash design.
Are cream subway tiles easy to clean and maintain?
Yes, cream subway tiles are relatively easy to clean and maintain. Regular cleaning with a mild detergent and water solution, along with periodic grout maintenance and sealing, will help preserve the appearance and longevity of your backsplash.
Can I use cream subway tiles for other areas besides the kitchen backsplash?
Yes, cream subway tiles can be used for various other areas in the home, such as bathroom walls, shower surrounds, and fireplace surrounds. Their timeless and versatile design makes them a popular choice for a wide range of interior applications.

beige marble subway tile backsplash RE: Subway tile w/ cream cabinets??

Beige Subway Tile Backsplash

Cream Subway Tile Backsplash Design Ideas

Subway Ceramic Tiles Kitchen Backsplashes : Modern White Gray Subway Marble Backsplash Tile

Taupe Glass Subway Tile Herringbone, Kitchen backsplash and Stove

Ideas for Stylish Subway Tile Kitchen Backsplash Designs

Related Posts:
- Backsplash Photos Kitchen Ideas
- Handmade Tiles For Kitchen Backsplash
- Images Of Tile Backsplash In Kitchen
- Kitchen Backsplash Glass Tile Design Ideas
- Large Glass Tile For Kitchen Backsplash
- Kitchen Backsplash Tile With White Cabinets
- How To Make Backsplash For Your Kitchen
- Calacatta Marble Kitchen Backsplash
- Ceramic Subway Tiles For Kitchen Backsplash
- Kitchen Backsplash Marble Tiles