DIY Kitchen Backsplashes On Budget
A kitchen backsplash is more than just a protective barrier for your walls; it’s a canvas for creativity that can transform the entire look and feel of your kitchen. When it comes to home improvement projects, installing a DIY kitchen backsplash is a cost-effective way to give your kitchen a fresh, updated appearance without breaking the bank. With various materials and styles available, you can create a backsplash that reflects your taste and complements your kitchen décor.
One of the primary benefits of a DIY kitchen backsplash is its affordability. By choosing budget-friendly materials and doing the work yourself, you can achieve a high-end look at a fraction of the cost of professional installation. Many materials, such as peel-and-stick tiles, vinyl, and even paint, offer easy application methods that are perfect for DIY enthusiasts. These options not only save money but also provide the satisfaction of completing a project with your own hands.

In addition to being cost-effective, a DIY backsplash project allows for a high degree of customization. You have the freedom to select colors, patterns, and materials that suit your personal style and the overall aesthetic of your kitchen. Whether you prefer a sleek, modern look with subway tiles or a rustic, farmhouse vibe with reclaimed wood, there are countless possibilities to explore. This level of personalization can make your kitchen truly unique and a reflection of your personality.
Another advantage of a DIY kitchen backsplash is the relatively short time commitment required. Unlike more extensive renovation projects, installing a backsplash can often be completed over a weekend or even in a single day, depending on the size of your kitchen and the complexity of the design. This makes it an ideal project for homeowners who want to see quick results and enjoy the immediate impact of their efforts.

Moreover, a DIY kitchen backsplash can increase the value of your home. Potential buyers often look for updated, stylish kitchens, and a well-executed backsplash can make a significant impression. Even if you’re not planning to sell your home in the near future, enhancing your kitchen with a beautiful backsplash can improve your daily living experience and boost your home’s overall appeal.
Finally, undertaking a DIY backsplash project can be a fun and rewarding experience. It offers an opportunity to develop new skills, spend quality time with family or friends, and create something beautiful and functional. Whether you’re a seasoned DIYer or a novice looking to try your hand at home improvement, installing a kitchen backsplash is a manageable and enjoyable project that can bring lasting satisfaction.

Choosing the Right Materials
Selecting the right materials for your DIY kitchen backsplash is crucial for achieving the desired look and ensuring the durability of your project. Here are some popular options to consider, each with its own set of advantages and drawbacks:
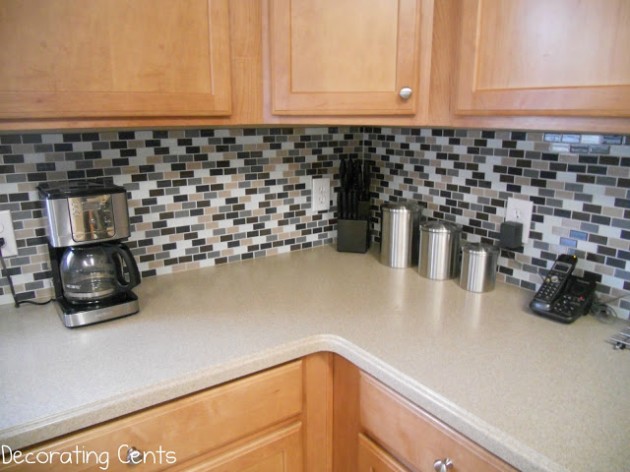
Peel-and-Stick Tiles: Peel-and-stick tiles are an excellent choice for a DIY backsplash because they are easy to install and relatively inexpensive. These tiles come with an adhesive backing that sticks directly to the wall, eliminating the need for messy grout or mortar. They are available in various designs, including classic subway tiles, mosaics, and even faux stone. Peel-and-stick tiles are ideal for renters or those looking for a quick, temporary update.
Vinyl Wallpaper: Vinyl wallpaper is another budget-friendly option that can mimic the look of more expensive materials like tile or brick. It is water-resistant, easy to clean, and simple to install with basic tools. Vinyl wallpaper comes in a wide range of patterns and colors, allowing you to achieve a custom look without the hassle of traditional tile installation. This material is perfect for those who want a low-maintenance and easily changeable backsplash.
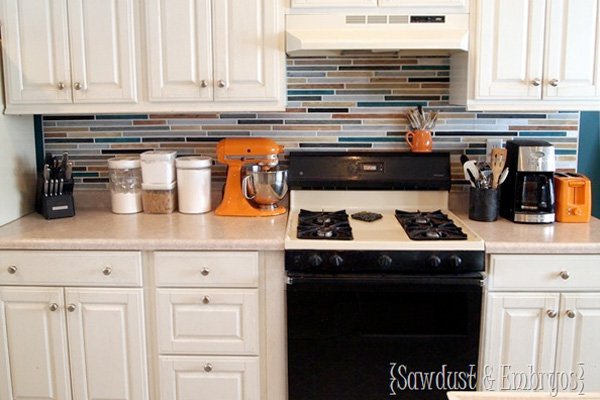
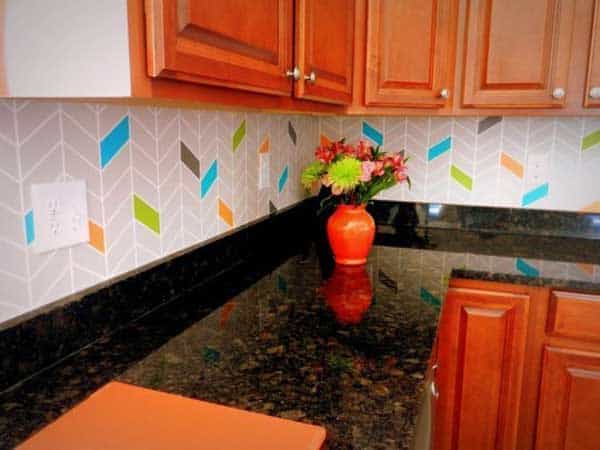
Paint: For a truly cost-effective and customizable backsplash, consider using paint. With the right type of paint, you can create a durable and washable surface that adds a splash of color or a unique design to your kitchen. Chalkboard paint, for example, allows you to write recipes or notes directly on your backsplash, adding a functional and playful element to your kitchen. Stenciling or freehand painting can also create intricate patterns that mimic the look of tile or wallpaper.
Beadboard: Beadboard is a type of wainscoting that can add a charming, cottage-style look to your kitchen. It is typically made of wood or MDF and can be painted to match your kitchen’s color scheme. Beadboard is relatively easy to install with basic carpentry tools and provides a durable, easy-to-clean surface. This material is a great option for those looking to add texture and visual interest to their kitchen without spending a lot of money.
Reclaimed Wood: For a rustic or farmhouse-style kitchen, reclaimed wood can be a beautiful and eco-friendly backsplash material. You can source wood from old pallets, barns, or other structures, giving your kitchen a unique, one-of-a-kind look. Reclaimed wood requires a bit more effort to prepare and install, but the results can be stunning. Be sure to treat the wood to protect it from moisture and stains, ensuring its longevity in a kitchen environment.
Metal Sheets: Stainless steel or aluminum sheets can create a sleek, modern backsplash that is both durable and easy to clean. These materials are typically used in commercial kitchens but can also be adapted for residential use. Metal sheets are relatively easy to cut and install, making them a viable DIY option. They reflect light, which can help brighten up your kitchen, and they are resistant to heat and moisture, making them a practical choice for behind the stove.
Tools and Preparation
Before you start your DIY kitchen backsplash project, it’s essential to gather the necessary tools and properly prepare the workspace to ensure a smooth and successful installation. Here’s a comprehensive guide to help you get started:
Gathering Tools and Supplies: The specific tools you’ll need will depend on the material you choose for your backsplash. However, some common tools include a measuring tape, level, utility knife, adhesive or tile mastic, grout (if applicable), notched trowel, sponge, bucket, painter’s tape, and a caulking gun. Having all your tools and supplies ready before you begin will help the project go more smoothly.
Measuring the Area: Accurate measurements are crucial for ensuring that you purchase the right amount of material and that your backsplash fits perfectly. Measure the length and height of the area where you plan to install the backsplash, taking into account any windows, electrical outlets, or other obstacles. Double-check your measurements to avoid any mistakes.
Preparing the Surface: Before installing your backsplash, ensure the wall surface is clean, dry, and smooth. Remove any existing backsplash or wall coverings, and sand down any rough spots or imperfections. Clean the wall with a mild detergent and water to remove any grease or dirt, and allow it to dry completely. If you’re installing tiles, you may also need to apply a primer or bonding agent to help the tiles adhere better.
Planning the Layout: Take some time to plan the layout of your backsplash, especially if you’re using tiles with a specific pattern or design. Lay out the tiles on a flat surface to get a sense of how they will fit together and to determine the best starting point. This step is particularly important for achieving a balanced and professional-looking result.
Cutting Materials: Depending on the material you choose, you may need to cut tiles, wood, or metal sheets to fit around outlets, windows, or other obstacles. Use appropriate tools, such as a tile cutter, saw, or metal snips, to make precise cuts. Always wear safety gear, such as goggles and gloves, when cutting materials to protect yourself from injury.
Dry Fitting: Before applying adhesive, dry-fit your materials to ensure everything lines up correctly. This step allows you to make any necessary adjustments without the pressure of wet adhesive. Dry fitting is particularly useful for tiles, as it helps you see how the pattern will look on the wall and identify any pieces that need to be trimmed.

Step-by-Step Installation Guide
Installing a DIY kitchen backsplash can be straightforward if you follow these step-by-step instructions. Here’s how to approach the installation process for some common materials:
Peel-and-Stick Tiles:
- Start by marking a level line on the wall where you want the first row of tiles to go.
- Peel the backing off the first tile and press it firmly onto the wall, starting at the bottom and working your way up.
- Continue applying tiles, ensuring each one is aligned with the previous tile and the level line.
- Use a utility knife to trim tiles as needed around outlets and edges.
- Press all tiles firmly to ensure a good bond and smooth out any air bubbles.
Vinyl Wallpaper:
- Measure and cut the wallpaper to fit the height of the backsplash area.
- Apply wallpaper adhesive to the wall or the back of the wallpaper, depending on the manufacturer’s instructions.
- Starting at one corner, align the wallpaper with the top of the backsplash area and smooth it down, working from the center outwards to remove any air bubbles.
- Trim any excess wallpaper with a utility knife.
- Continue applying sections of wallpaper, matching the pattern at the seams.
Paint:
- Apply painter’s tape to protect areas adjacent to the backsplash, such as countertops and cabinets.
- Apply a primer suitable for kitchen environments to the wall and let it dry.
- Use a roller or brush to apply your chosen paint color, starting with a thin coat and building up as needed.
- If you’re creating a design, use stencils or painter’s tape to outline the pattern before painting.
- Allow the paint to dry completely between coats and before removing the painter’s tape.
Beadboard:
- Cut the beadboard panels to fit the height of the backsplash area.
- Apply construction adhesive to the back of each panel and press it onto the wall, starting at one corner.
- Use a level to ensure the panels are straight, and secure them with finishing nails if necessary.
- Fill any nail holes with wood filler and sand smooth.
- Apply a coat of paint or sealant to protect the beadboard and enhance its appearance.
Reclaimed Wood:
- Clean and prepare the reclaimed wood by sanding it and applying a wood sealant to protect against moisture.
- Cut the wood to fit the height of the backsplash area.
- Apply construction adhesive to the back of each wood piece and press it onto the wall.
- Secure the wood with finishing nails or screws, ensuring each piece is level and fits snugly against the others.
- Fill any gaps with wood filler and touch up with paint or stain if needed.
Metal Sheets:
- Measure and cut the metal sheets to fit the backsplash area.
- Apply construction adhesive to the back of each sheet and press it firmly onto the wall.
- Use a level to ensure the sheets are straight and aligned.
- Secure the sheets with screws or nails if necessary.
- Seal the edges with silicone caulk to prevent moisture from getting behind the metal.
Tips for Achieving a Professional Look
Achieving a professional-looking DIY kitchen backsplash is all about attention to detail and careful execution. Here are some tips to help you get the best results:
Take Your Time: Rushing through the installation process can lead to mistakes and a less polished result. Take your time to measure accurately, cut materials precisely, and apply adhesive evenly.
Use Quality Materials: Even if you’re working with a tight budget, it’s worth investing in quality materials. Higher-quality materials will look better, last longer, and be easier to work with.
Pay Attention to Alignment: Keeping tiles, wood pieces, or other materials aligned is crucial for a professional finish. Use a level and spacers to ensure everything is straight and evenly spaced.
Seal Edges and Joints: Sealing the edges and joints of your backsplash helps prevent water damage and gives the installation a finished look. Use silicone caulk or another appropriate sealant for your chosen material.
Clean as You Go: Cleaning up adhesive spills, paint drips, and other messes as you work helps maintain a tidy workspace and prevents issues later on. A clean installation area makes it easier to spot and fix any mistakes.
Follow Manufacturer Instructions: Different materials and products have specific installation requirements. Always follow the manufacturer’s instructions for best results and to ensure your installation is covered by any warranties.
Common Mistakes to Avoid
Avoiding common pitfalls can make your DIY kitchen backsplash project smoother and more successful. Here are some mistakes to watch out for:
Skipping Surface Preparation: Not properly cleaning and preparing the wall can result in poor adhesion and a less durable backsplash. Always clean, sand, and prime the wall as needed.
Inaccurate Measurements: Failing to measure accurately can lead to buying too much or too little material and can cause issues with fitting tiles or panels correctly. Double-check all measurements before cutting or purchasing materials.
Improper Adhesive Application: Applying too much or too little adhesive can affect the stability of your backsplash. Follow the manufacturer’s guidelines for the correct amount and method of adhesive application.
Neglecting to Plan the Layout: Starting the installation without a clear plan can result in a mismatched pattern or uneven tiles. Lay out your design on a flat surface before committing to the wall.
Using Incorrect Tools: Using the wrong tools can make the installation process more difficult and lead to mistakes. Ensure you have the right tools for your chosen material and know how to use them properly.
Ignoring Safety Precautions: Not wearing protective gear or failing to follow safety guidelines can result in injuries. Always wear appropriate safety equipment and follow recommended safety practices when cutting and installing materials.
What are the most affordable materials for a DIY kitchen backsplash?
Some of the most affordable materials for a DIY kitchen backsplash include peel-and-stick tiles, vinyl wallpaper, and paint. Peel-and-stick tiles are particularly popular because they are easy to install and come in a variety of designs that mimic more expensive materials. Vinyl wallpaper is another budget-friendly option that can create a stylish look with minimal effort. Paint is the most cost-effective choice, allowing you to completely customize the backsplash with colors and patterns that suit your taste.
How difficult is it to install a DIY kitchen backsplash?
The difficulty of installing a DIY kitchen backsplash depends on the material you choose and your level of DIY experience. Materials like peel-and-stick tiles and vinyl wallpaper are relatively easy to install and suitable for beginners. These options require minimal tools and preparation. More advanced materials, such as tile or reclaimed wood, may require additional tools, precise cutting, and more detailed installation steps. However, with proper preparation and following instructions, even more complex materials can be managed by DIY enthusiasts.
How do I maintain and clean my DIY kitchen backsplash?
Maintaining and cleaning your DIY kitchen backsplash will depend on the material you choose. For peel-and-stick tiles and vinyl wallpaper, a simple wipe with a damp cloth and mild detergent is usually sufficient to keep them looking clean. Painted backsplashes can be cleaned with a gentle cleaner and a soft sponge. For materials like beadboard or reclaimed wood, you may need to use specific wood cleaners or sealants to maintain their appearance and protect them from moisture. Regular cleaning and avoiding abrasive cleaners will help prolong the life and look of your backsplash.

Can I remove a DIY backsplash if I want to change it later?
Yes, many DIY backsplash materials are designed to be removable, making it easy to update your kitchen’s look in the future. Peel-and-stick tiles and vinyl wallpaper can typically be peeled off without damaging the wall beneath, though it may take some effort to remove any adhesive residue. Painted backsplashes can be repainted over or sanded down if needed. More permanent materials, such as tile or beadboard, will require more effort to remove but can still be replaced with proper tools and techniques.
What should I do if my DIY backsplash starts to peel or come loose?
If your DIY backsplash starts to peel or come loose, the first step is to identify the cause. It could be due to improper surface preparation, insufficient adhesive, or exposure to moisture. For peel-and-stick tiles or vinyl wallpaper, you can try reapplying adhesive to the affected areas and pressing them firmly back into place. If the issue persists, you may need to remove the affected section, clean the surface, and reapply new material. Ensuring the wall is clean, dry, and properly primed can help prevent future issues.
How can I ensure a professional-looking finish on my DIY kitchen backsplash?
To achieve a professional-looking finish on your DIY kitchen backsplash, take the time to plan and prepare thoroughly. Measure accurately, cut materials precisely, and use the appropriate tools for your chosen material. Pay attention to alignment, use spacers if necessary, and seal edges and joints to prevent water damage. Clean as you go to maintain a tidy workspace and address any mistakes immediately. Following these steps, along with the manufacturer’s instructions, will help you achieve a polished and professional result.

Cute And Bold DIY Mosaic Kitchen Backsplashes
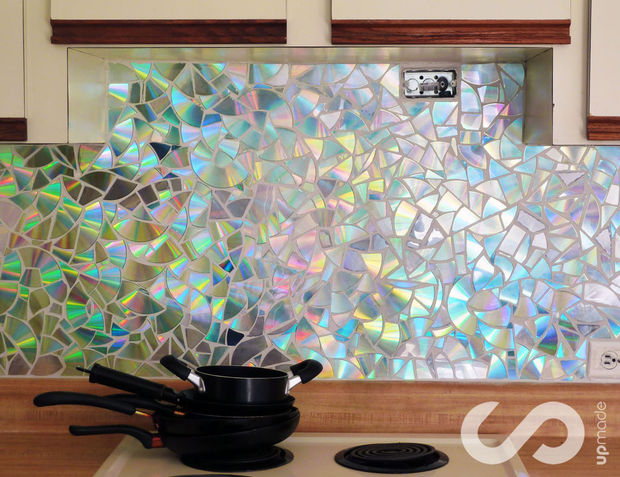
The perfect kitchen backsplash has nothing to do with tile!

Related Posts:
- 3 X 6 Subway Tile Kitchen Backsplash
- Blue Green Glass Tile Kitchen Backsplash
- Tin Kitchen Backsplash Ideas
- Architectural Digest Kitchen Backsplash
- How High Should A Backsplash Be In A Kitchen
- Dark Tile Kitchen Backsplash
- Kitchen Cabinet Tile Backsplash
- Kitchen Backsplash With White Countertops
- Kitchen Backsplash Patterns With Tile
- Kitchen Backsplash Design Software