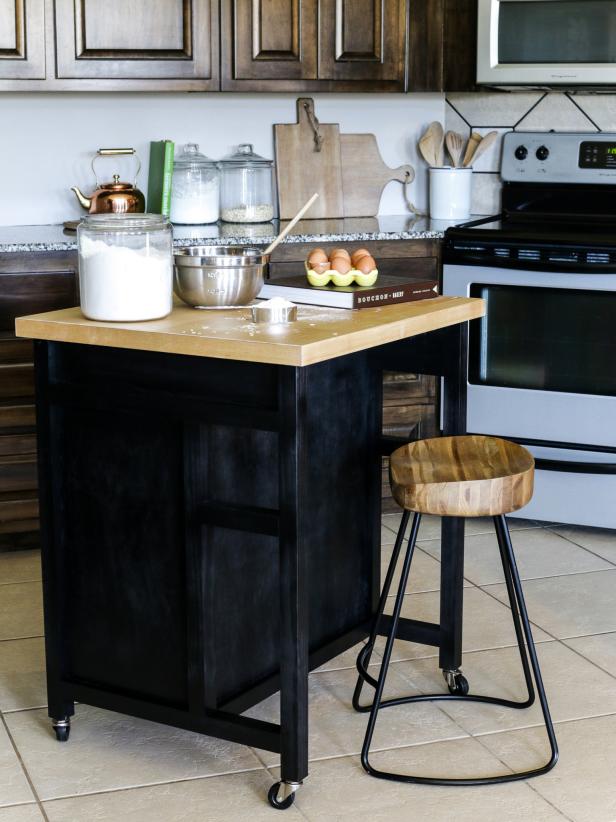
A portable kitchen island is a versatile addition to any kitchen, providing extra storage, workspace, and seating. Unlike fixed islands, portable kitchen islands offer the flexibility to move them around or even remove them when not in use. Building a portable kitchen island can be a rewarding DIY project that enhances your kitchen’s functionality and aesthetics. Let me walk you through the process, from planning and materials selection to construction and finishing touches.

Planning and Design
Assessing Your Needs and Space
Before starting the construction of a portable kitchen island, it is crucial to assess your needs and the available space in your kitchen. Consider how you plan to use the island—whether for additional prep space, storage, or seating—and how much room you have to accommodate it. Measure your kitchen area carefully, taking note of existing cabinetry, appliances, and traffic flow.
Determine the ideal size for your island. A common size for a portable kitchen island is around 2 feet by 4 feet, but this can vary based on your kitchen’s dimensions. Ensure there is enough clearance around the island for easy movement, typically a minimum of 36 inches on all sides.
Consider the style and design that will best complement your kitchen. Whether you prefer a modern, rustic, or traditional look, the design should blend seamlessly with your existing decor. Sketch a rough design or use online tools to visualize the island in your space.

Choosing Materials
Selecting the right materials is essential for building a durable and attractive portable kitchen island. Common materials for the island frame include hardwood, plywood, and MDF (medium-density fiberboard). Hardwood is sturdy and offers a high-quality finish, while plywood is a cost-effective and durable alternative. MDF is affordable and easy to work with but may not be as durable as hardwood or plywood.
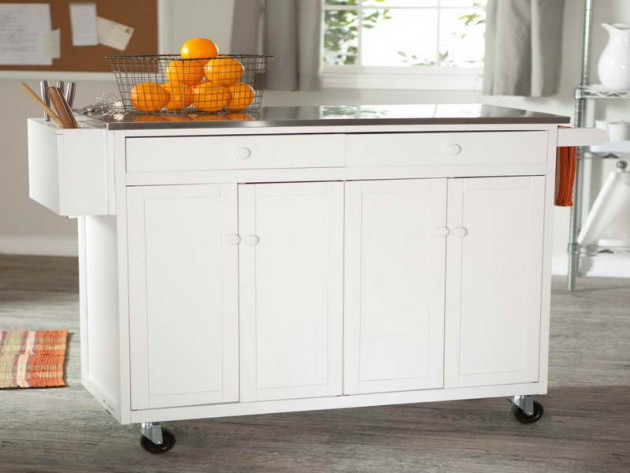
For the countertop, options include butcher block, granite, quartz, stainless steel, and laminate. Butcher block provides a warm, classic look and is excellent for food preparation. Granite and quartz are durable and stylish but can be heavy and expensive. Stainless steel offers a modern, professional look and is easy to clean, while laminate is budget-friendly and available in various designs.
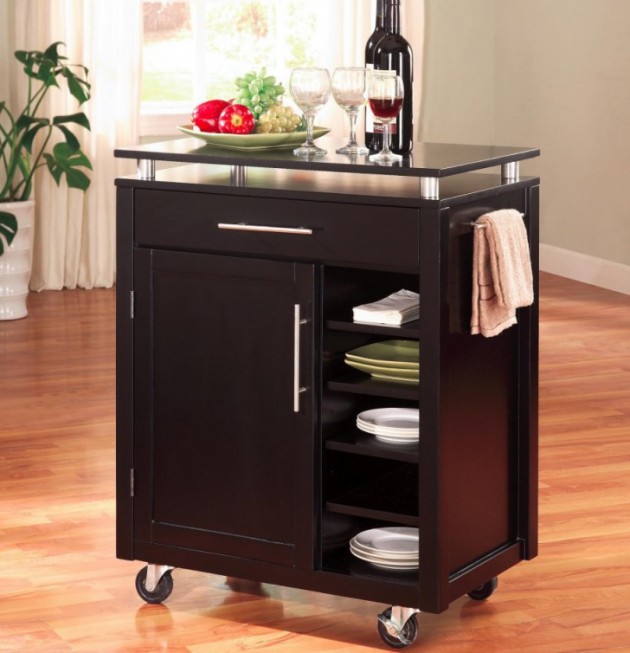
Consider additional materials such as wheels or casters for mobility, storage components like shelves and drawers, and finishing materials like paint, stain, or varnish. Choose wheels that lock to ensure stability when the island is in use.

Gathering Tools and Supplies
To build a portable kitchen island, you will need various tools and supplies. Basic tools include a tape measure, pencil, carpenter’s square, circular saw, jigsaw, drill, screwdriver, hammer, and clamps. You may also need a sander or sandpaper, wood glue, screws, nails, and finishing materials like paint or stain.
Ensure you have safety equipment such as safety goggles, ear protection, and work gloves. Having all necessary tools and supplies on hand before starting the project will help streamline the construction process and prevent delays.
Create a detailed list of materials based on your design and measurements. Purchase high-quality materials to ensure the island’s durability and aesthetic appeal. If you are using specific hardware or accessories, check that they are compatible with your design and materials.

Creating a Step-by-Step Plan
Developing a step-by-step plan is essential for an organized and efficient build. Break down the construction process into manageable steps, from cutting and assembling the frame to attaching the countertop and adding finishing touches. A detailed plan will help you stay on track and ensure you don’t overlook any critical steps.
Start by cutting the frame components according to your design measurements. Assemble the frame, ensuring all joints are secure and square. Attach shelves, drawers, and other storage components as per your design.
Next, prepare and attach the countertop. If using a heavy material like granite or quartz, ensure the frame can support the weight. Install wheels or casters on the base for mobility, making sure they are sturdy and lockable.
Finish by sanding the surfaces smooth and applying paint, stain, or varnish. Allow adequate drying time between coats and follow the manufacturer’s instructions for the best results. Install any additional hardware, such as handles or hooks, to complete your portable kitchen island.

Building the Frame
Cutting and Assembling the Base
The first step in constructing the frame of your portable kitchen island is to cut the base components to size. Using your design measurements, cut the base pieces from your chosen material, whether it’s hardwood, plywood, or MDF. Ensure that the cuts are precise and square for a stable structure.
Assemble the base by attaching the sides, back, and front panels. Use wood glue and screws for a strong bond. Clamps can help hold the pieces in place while the glue dries. Check that the base is square using a carpenter’s square, and make any necessary adjustments before the glue sets.
Reinforce the base with additional supports or cross braces if needed. This is especially important if your island is large or holds heavy items. Once the base is assembled and secure, you can proceed to build the frame.
Constructing the Frame
Constructing the frame involves building the upright supports and horizontal braces that will form the skeleton of your kitchen island. Cut the frame components to size according to your design. Upright supports should be sturdy and evenly spaced to provide stability.
Attach the upright supports to the base using wood glue and screws. Ensure they are level and square. Next, attach the horizontal braces between the upright supports to form the frame’s top and bottom edges. These braces will provide additional support and help distribute the weight of the countertop and any stored items.
Check the frame for stability and make any necessary adjustments. The frame should be rigid and able to support the weight of the countertop and any additional components.
Adding Shelves and Storage
Once the frame is assembled, you can add shelves and storage components. Shelves can be fixed or adjustable, depending on your preference. Cut the shelves to size and attach them to the frame using brackets, screws, or shelf pins.
If your design includes drawers, install the drawer slides according to the manufacturer’s instructions. Ensure the drawers open and close smoothly and are properly aligned. Additional storage options, such as hooks or racks for utensils, can also be added at this stage.
Ensure that all shelves and storage components are securely attached and able to support the weight of the items you plan to store. Consider lining shelves with non-slip material to prevent items from sliding when the island is moved.
Attaching Wheels or Casters
To make your kitchen island portable, attach wheels or casters to the base. Choose heavy-duty wheels that can support the weight of the island and its contents. Locking wheels are ideal for stability, allowing you to secure the island in place when needed.
Position the wheels at the corners of the base and attach them using screws or bolts. Ensure that the wheels are evenly spaced and properly aligned. Test the island’s mobility by rolling it across the floor and adjusting the wheels if necessary.
Check that the wheels lock securely and that the island remains stable when the locks are engaged. Properly installed wheels will ensure that your portable kitchen island can be easily moved and securely positioned.
Installing the Countertop
Choosing the Right Countertop Material
Selecting the right countertop material is crucial for both functionality and aesthetics. Consider how you plan to use the countertop and choose a material that suits your needs. Butcher block is a popular choice for its warmth and durability, making it ideal for food preparation. Granite and quartz offer a high-end look and are extremely durable but can be heavy and expensive.
Stainless steel is another excellent option, providing a modern, professional appearance and easy maintenance. Laminate is budget-friendly and comes in various designs, but it may not be as durable as other materials.
Ensure the chosen material complements your kitchen’s design and meets your functional requirements. Keep in mind the weight of the countertop and whether your frame can support it.
Preparing the Countertop
Once you have chosen your countertop material, prepare it for installation. Measure and cut the countertop to fit the frame of your kitchen island. If using a heavy material like granite or quartz, you may need professional help to cut and transport it safely.
Sand the edges of the countertop to smooth out any rough spots and ensure a clean, finished look. If you are using a wooden countertop, consider applying a food-safe sealant to protect the surface from moisture and stains.
Drill any necessary holes for fixtures or attachments, such as a sink or cooktop, if your design includes these features. Ensure all cutouts are accurately positioned and sized.
Attaching the Countertop to the Frame
To attach the countertop to the frame, position it carefully on top of the frame, ensuring it is centered and aligned. Use brackets or screws to secure the countertop to the frame from underneath. If using screws, pre-drill holes to prevent the wood from splitting.
For heavy countertops, additional support may be needed. Use cleats or additional braces to provide extra stability. Ensure that the countertop is firmly attached and does not shift or wobble.
Check that the countertop is level and make any necessary adjustments. A level countertop is essential for both aesthetics and functionality.
Finishing Touches
With the countertop securely attached, you can add finishing touches to complete your portable kitchen island. Sand the entire island to smooth out any rough edges and prepare it for finishing. Apply paint, stain, or varnish according to your preference and allow it to dry thoroughly between coats.
Install any additional hardware, such as handles, hooks, or towel racks. These accessories can enhance the island’s functionality and aesthetic appeal. If your design includes electrical outlets or lighting, install these features according to safety guidelines.
Add any final decorative touches, such as trim or molding, to give the island a polished look. Step back and admire your completed portable kitchen island, ensuring that all components are securely attached and functioning properly.

Common Mistakes to Avoid
Inaccurate Measurements
One of the most common mistakes in building a portable kitchen island is taking inaccurate measurements. Incorrect measurements can lead to misaligned components, an unstable structure, and a poor fit within your kitchen space. Always double-check your measurements and use precise tools to ensure accuracy.
Using Incompatible Materials
Using incompatible or low-quality materials can compromise the durability and appearance of your kitchen island. Choose materials that are suitable for the intended use and can withstand weight and wear. Avoid cutting costs on essential components, as this can lead to frequent repairs and replacements.
Neglecting Structural Support
Neglecting structural support is a critical mistake that can result in an unstable island. Ensure that the frame is robust and that the base can support the countertop and any additional weight. Reinforce the frame with cross braces and supports as needed.
Skipping the Finishing Process
Skipping the finishing process can leave your kitchen island looking incomplete and unprotected. Sanding, painting, staining, or varnishing not only enhances the appearance but also protects the wood from moisture and wear. Take the time to apply finishes properly and allow adequate drying time.

How much does it cost to build a portable kitchen island?
The cost of building a portable kitchen island varies depending on the materials and features you choose. Basic models using affordable materials like plywood and laminate can cost as little as $100 to $200. High-end models with hardwood, granite, or quartz countertops can cost upwards of $500 to $1000. Additional features like drawers, shelves, and hardware will also impact the overall cost.
Can I add electrical outlets to my portable kitchen island?
Yes, you can add electrical outlets to your portable kitchen island. This is especially useful if you plan to use small appliances on the island. To add outlets, you will need to run electrical wiring through the island and connect it to your home’s electrical system. This can be a complex task and may require a licensed electrician to ensure it is done safely and according to local codes.
What type of wheels should I use for my portable kitchen island?
Choose heavy-duty wheels or casters that can support the weight of the island and its contents. Look for wheels that are designed for furniture and can lock in place to provide stability. Rubber or polyurethane wheels are a good choice as they roll smoothly and do not damage the flooring. Ensure the wheels are securely attached to the base and properly aligned.
How can I ensure my kitchen island is stable?
To ensure stability, make sure the base and frame are constructed from sturdy materials and that all joints are securely fastened. Use additional supports or cross braces if necessary. Locking wheels can also help stabilize the island when in use. Regularly check and tighten any loose screws or fittings to maintain stability over time.
Can I customize my portable kitchen island with specific features?
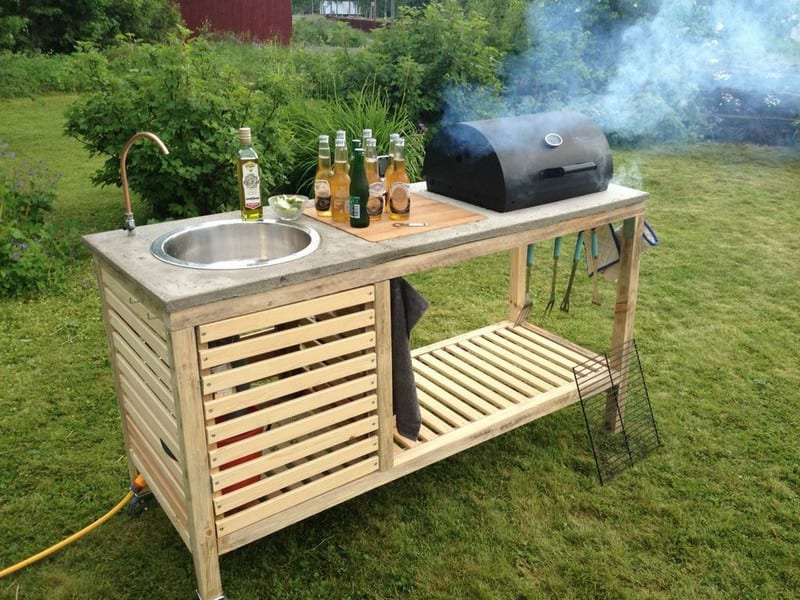
Yes, you can customize your portable kitchen island with various features to suit your needs. Common customizations include adding shelves, drawers, hooks, towel racks, and built-in appliances like sinks or cooktops. Plan your design carefully to incorporate these features and ensure that the frame can support any additional weight. Customizing your island can enhance its functionality and make it a valuable addition to your kitchen.
Portable Kitchen Island Designs

Kitchen Island Plans: Pictures, Ideas & Tips

Related Posts:
- How To Install A Kitchen Island To The Floor
- Used Kitchen Cabinets Long Island
- Lighting A Kitchen Island
- 8 Foot Island Kitchen
- Distressed Oak Kitchen Island
- Make A Kitchen Island Out Of An Old Dresser
- 10 By 10 Kitchen Layout With Island
- How To Build A Mobile Kitchen Island
- Parallel Kitchen With Island
- Outdoor Kitchen Island Plans Free