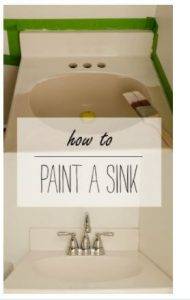
Spray painting a kitchen sink is a budget-friendly and creative way to refresh the look of your kitchen without the expense and hassle of replacing the entire sink. This DIY project allows you to customize the color and finish of your sink to match your kitchen decor and personal style, making it a popular choice for homeowners looking to update their kitchen on a budget.
Before beginning the spray painting process, it’s essential to properly prepare the sink surface to ensure optimal adhesion and long-lasting results. This typically involves thorough cleaning and degreasing to remove any dirt, grime, or residue that may interfere with the paint’s ability to adhere to the surface. Additionally, sanding the sink with fine-grit sandpaper helps create a rough texture for better paint adhesion.
Once the sink is clean and dry, it’s important to protect surrounding surfaces and fixtures from overspray by covering them with plastic sheeting or painter’s tape. This helps prevent accidental damage and ensures a clean and professional-looking finish.

Choosing the right spray paint is crucial for achieving the desired results. Look for a high-quality spray paint specifically formulated for use on metal surfaces, as these paints offer better durability and resistance to water, heat, and household chemicals. Additionally, consider the finish you prefer, whether it’s matte, satin, or glossy, and select a paint that matches your desired aesthetic.
Before applying the spray paint to the sink, it’s recommended to apply a primer designed for metal surfaces. Priming helps improve paint adhesion and ensures a smooth and even finish. Be sure to follow the manufacturer’s instructions for proper application and drying times.
When it comes to applying the spray paint, it’s best to work in thin, even coats to prevent drips, runs, and uneven coverage. Hold the spray can approximately 6-8 inches away from the sink surface and use smooth, overlapping strokes to ensure uniform coverage. Allow each coat to dry completely before applying the next one, typically following the drying time specified on the paint can.
Depending on the color and coverage you desire, you may need to apply multiple coats of spray paint to achieve the desired look. Take your time and be patient, as rushing the process can result in uneven or streaky results.
Once you’ve achieved the desired color and coverage, allow the final coat of spray paint to dry thoroughly according to the manufacturer’s instructions. This typically involves allowing the paint to cure for at least 24 hours before exposing it to water or heavy use.
To protect the newly painted surface and enhance its durability, consider applying a clear topcoat designed for use with spray paint. This adds an extra layer of protection against scratches, stains, and fading, ensuring your newly painted sink looks great for years to come.

After the paint has fully cured and dried, carefully remove any protective coverings and painter’s tape from surrounding surfaces and fixtures. Inspect the sink for any touch-ups or imperfections that may need to be addressed before reassembling and using the sink.
Proper maintenance is essential for preserving the appearance and longevity of your newly painted kitchen sink. Avoid using abrasive cleaners or harsh chemicals that may damage the painted surface, and instead opt for gentle cleaners and non-abrasive sponges or cloths to clean the sink.
With proper care and maintenance, a spray-painted kitchen sink can provide years of durable and stylish use, allowing you to enjoy a refreshed and updated look in your kitchen without breaking the bank. Whether you’re looking to add a pop of color or refresh an outdated sink, spray painting offers a cost-effective and creative solution for transforming your kitchen space.

Kitchen Sink Sprayers

Remodelaholic $30 DIY Faux Marble Countertops

How to Clean Paint Off a Porcelain Sink – Clever Housewife

Party dress, children party dresses, women party dresses, prom dresses, Baby Dresses, Bridesmaid

Party dress, children party dresses, women party dresses, prom dresses, Baby Dresses, Bridesmaid

Party dress, children party dresses, women party dresses, prom dresses, Baby Dresses, Bridesmaid

Party dress, children party dresses, women party dresses, prom dresses, Baby Dresses, Bridesmaid

Party dress, children party dresses, women party dresses, prom dresses, Baby Dresses, Bridesmaid

Related Posts: