A decorative kitchen backsplash can significantly enhance the overall look and feel of your kitchen. It serves both aesthetic and functional purposes, protecting your walls from spills and splashes while adding a stylish element to your kitchen design. Let’s explore different decorative kitchen backsplash ideas, materials, installation tips, and maintenance practices to help you make an informed decision.

Exploring Backsplash Materials
Ceramic and Porcelain Tiles
Ceramic and porcelain tiles are among the most popular materials for kitchen backsplashes due to their versatility, durability, and wide range of design options. These tiles are available in numerous colors, shapes, and sizes, allowing homeowners to create unique and personalized designs.
One of the main advantages of ceramic and porcelain tiles is their resistance to moisture and stains. This makes them an excellent choice for areas exposed to water and food splatters. Additionally, these tiles are easy to clean and maintain, requiring only a mild detergent and water for regular upkeep.
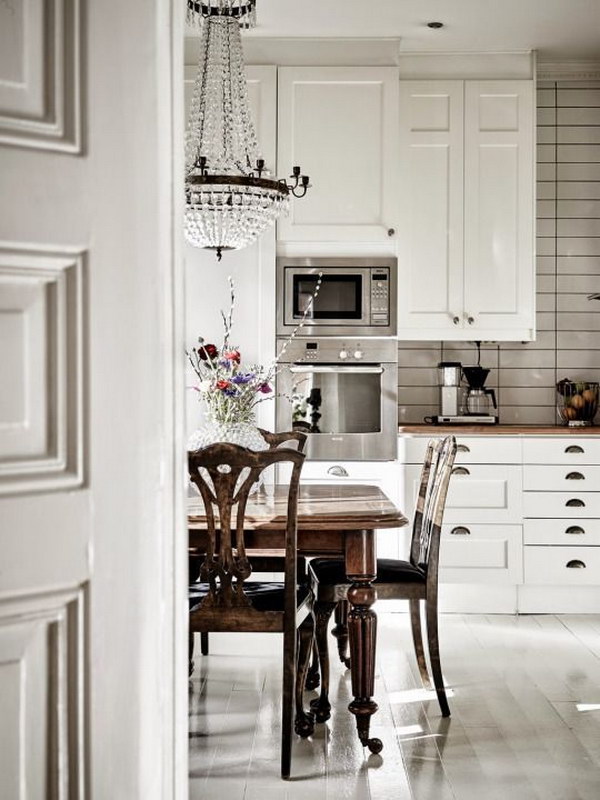
Ceramic and porcelain tiles can be arranged in various patterns, such as subway, herringbone, or mosaic, providing endless design possibilities. Subway tiles, in particular, are a classic choice that offers a timeless and elegant look. For a more contemporary feel, consider using large-format tiles or mixing different shapes and colors.
Another benefit of ceramic and porcelain tiles is their affordability. They offer a cost-effective way to enhance your kitchen without compromising on style or quality. The wide range of options ensures that you can find a design that fits your budget and aesthetic preferences.
However, the installation of ceramic and porcelain tiles requires precision and expertise. Proper alignment and spacing are crucial to achieving a polished look. It’s advisable to hire a professional installer to ensure a flawless finish and avoid any issues with grout lines or tile placement.

Glass Tiles
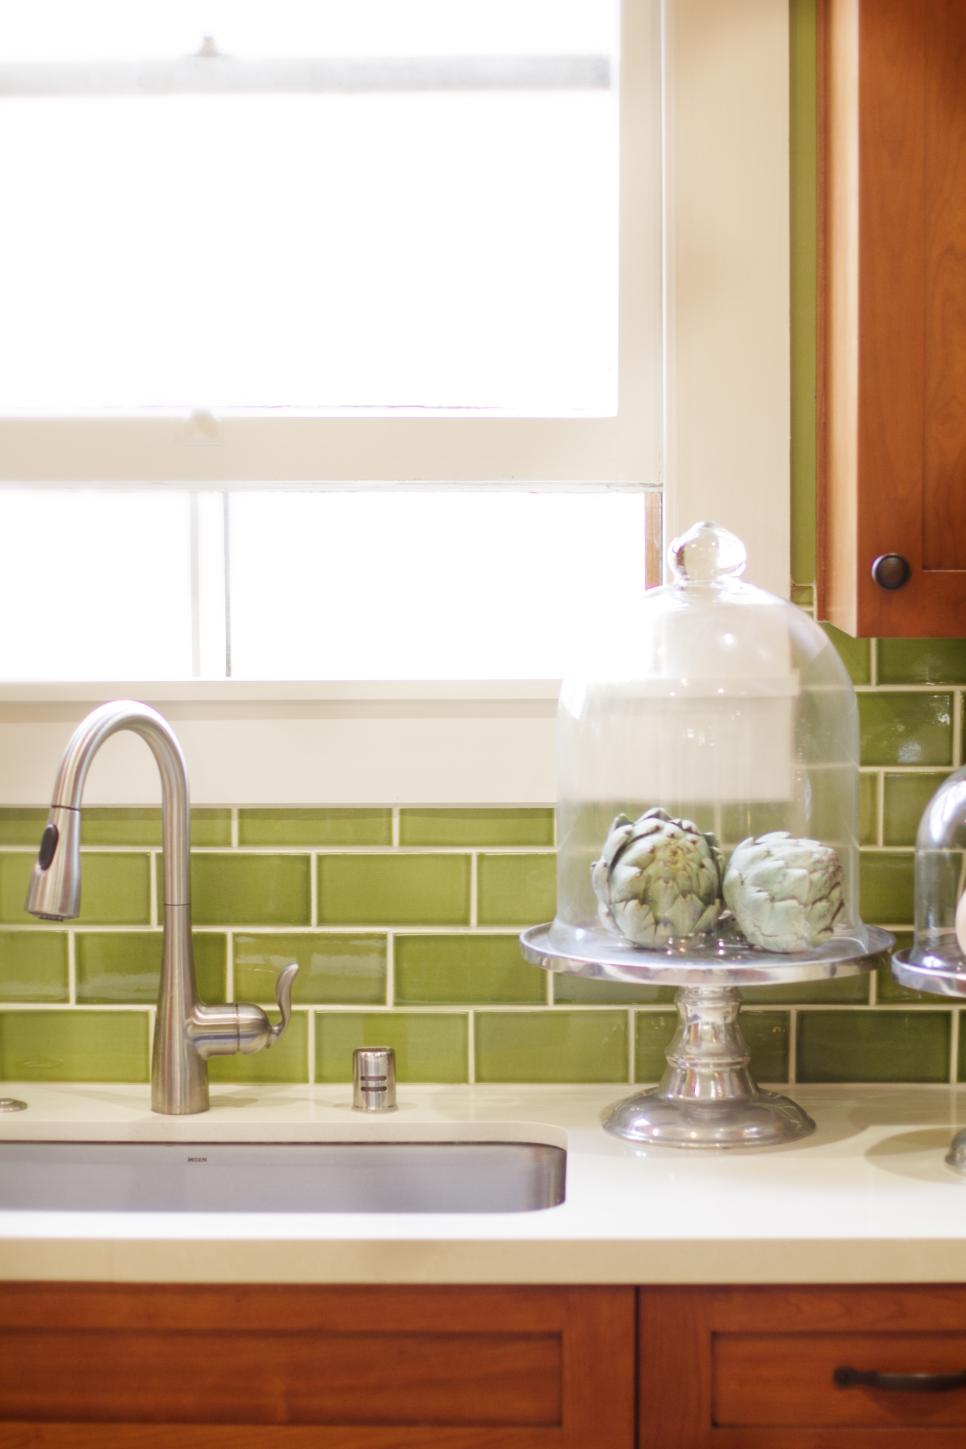
Glass tiles are a popular choice for kitchen backsplashes due to their sleek, modern appearance and reflective properties. These tiles can add a touch of elegance and sophistication to any kitchen design. They are available in various colors, finishes, and sizes, making it easy to find the perfect match for your kitchen.
One of the key advantages of glass tiles is their ability to reflect light, which can make a kitchen appear brighter and more spacious. This is particularly beneficial for smaller kitchens or those with limited natural light. The reflective surface of glass tiles can also add depth and dimension to your backsplash design.
Glass tiles are highly resistant to stains, mold, and mildew, making them a practical choice for kitchen environments. They are also easy to clean, requiring only a mild glass cleaner and a soft cloth. However, it’s important to avoid abrasive cleaners or scrubbing pads that can scratch the surface of the tiles.
In terms of design, glass tiles can be used to create a variety of looks, from sleek and modern to vibrant and artistic. Consider using clear glass tiles for a minimalist design or colored glass tiles to add a pop of color. Mosaic glass tiles can also create intricate and eye-catching patterns.
The installation of glass tiles can be more challenging compared to other materials. The tiles must be cut precisely to avoid chipping, and the adhesive must be applied carefully to prevent it from showing through the transparent tiles. It’s recommended to hire a professional installer with experience in working with glass tiles.
Despite their higher cost compared to ceramic or porcelain tiles, glass tiles can be a worthwhile investment due to their durability and visual impact. They can elevate the overall design of your kitchen and create a stunning focal point.
Natural Stone
Natural stone backsplashes, such as marble, granite, and travertine, offer a luxurious and timeless appeal. Each stone has its unique characteristics, providing a distinctive look that can enhance the elegance of your kitchen. Natural stone is available in various finishes, including polished, honed, and tumbled, allowing you to achieve the desired aesthetic.
Marble is known for its beautiful veining and classic appeal. It adds a touch of sophistication and can create a stunning focal point in your kitchen. However, marble is porous and can stain easily, so it requires regular sealing and maintenance to keep it looking its best.
Granite is another popular choice for kitchen backsplashes due to its durability and variety of colors and patterns. It is highly resistant to heat and scratches, making it a practical option for busy kitchens. Granite also requires sealing to protect against stains and moisture.
Travertine offers a more rustic and earthy look with its natural pitting and color variations. It can add warmth and texture to your kitchen design. Travertine is also porous and requires sealing to prevent stains and moisture damage.
Natural stone backsplashes can be used to create various design styles, from traditional to modern. Consider using large stone slabs for a seamless and dramatic look or smaller stone tiles for a more intricate design. Pairing natural stone with complementary materials, such as wood or metal, can enhance the overall aesthetic.
The installation of natural stone backsplashes requires careful planning and precision. The weight and thickness of the stone must be considered to ensure proper support and adhesion. It’s advisable to hire a professional installer with experience in working with natural stone to achieve the best results.
While natural stone backsplashes can be more expensive compared to other materials, they offer a timeless and luxurious appeal that can increase the value of your home. With proper care and maintenance, a natural stone backsplash can provide many years of beauty and functionality.

Stainless Steel
Stainless steel backsplashes are a popular choice for modern and industrial kitchen designs. They offer a sleek, clean, and contemporary look that can complement stainless steel appliances and fixtures. Stainless steel is available in various finishes, including brushed, polished, and matte, allowing you to achieve the desired aesthetic.
One of the main advantages of stainless steel backsplashes is their durability. They are resistant to heat, stains, and corrosion, making them a practical choice for kitchen environments. Stainless steel is also easy to clean and maintain, requiring only a mild detergent and water for regular upkeep.
Stainless steel backsplashes can be used to create various design styles, from minimalist to industrial. Consider using large stainless steel panels for a seamless and modern look or smaller stainless steel tiles for a more textured design. Stainless steel can also be combined with other materials, such as glass or wood, to create a unique and customized look.
The reflective surface of stainless steel can make a kitchen appear brighter and more spacious. However, it can also show fingerprints and smudges more easily, so regular cleaning is necessary to maintain its pristine appearance. Using a microfiber cloth can help minimize streaks and smudges.
The installation of stainless steel backsplashes requires precision and expertise. The panels or tiles must be cut accurately to fit the space, and proper adhesive must be used to ensure a secure and stable installation. It’s advisable to hire a professional installer with experience in working with stainless steel to achieve the best results.
While stainless steel backsplashes can be more expensive compared to other materials, they offer a modern and durable option that can enhance the overall design of your kitchen. Their sleek and contemporary appeal can create a stylish and functional space.

Peel and Stick Backsplashes
Peel and stick backsplashes are a convenient and cost-effective option for homeowners looking to update their kitchen without the hassle of traditional tile installation. These backsplashes come in various materials, including vinyl, metal, and gel, and are designed to mimic the look of more expensive materials like ceramic, glass, and stone.
One of the main advantages of peel-and-stick backsplashes is their ease of installation. They come with a self-adhesive backing that allows you to simply peel off the protective layer and stick the tiles to the wall. This makes them an excellent option for DIY enthusiasts and renters who want to update their kitchens without making permanent changes.
Peel and stick backsplashes are available in a wide range of designs and patterns, allowing you to achieve the desired look for your kitchen. From classic subway tiles to intricate mosaic designs, there are options to suit various styles and preferences. These backsplashes can be cut to fit any space, making them versatile and customizable.
While peel-and-stick backsplashes are easy to install, it’s important to ensure that the wall surface is clean, dry, and smooth before applying the tiles. Any dust, grease, or unevenness can affect the adhesive and lead to peeling or falling tiles. It’s also advisable to use a level to ensure proper alignment and spacing.
Peel and stick backsplashes are easy to clean and maintain, requiring only a damp cloth and mild detergent for regular upkeep. However, they may not be as durable as traditional tiles and can be more susceptible to heat and moisture damage. It’s important to avoid placing them near high-heat areas, such as behind the stove.
Despite their lower cost and ease of installation, peel and stick backsplashes can provide a stylish and functional update to your kitchen. They offer a quick and affordable way to refresh your space and can be easily removed or replaced when desired.
Creative Design Ideas
Geometric Patterns
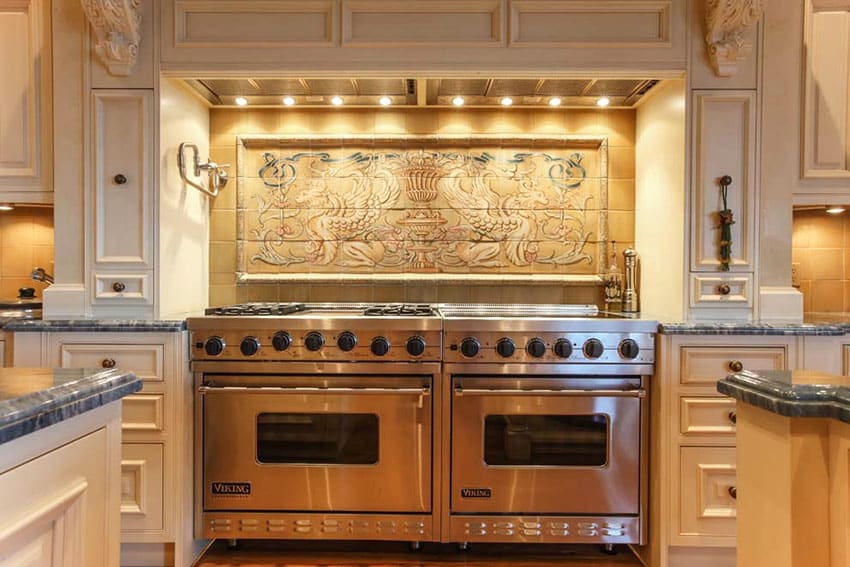
Geometric patterns are a popular choice for decorative kitchen backsplashes due to their modern and visually striking appeal. These patterns can be created using various materials, such as ceramic, porcelain, glass, and metal tiles, and can range from simple shapes to intricate designs.
One of the key advantages of geometric patterns is their ability to add depth and dimension to your kitchen design. They can create a sense of movement and energy, making the space feel more dynamic and interesting. Geometric patterns can also be used to highlight specific areas, such as the stove or sink, creating a focal point in your kitchen.
Popular geometric patterns include hexagons, chevrons, diamonds, and triangles. Hexagon tiles, for example, can be arranged in a honeycomb pattern for a modern and sophisticated look. Chevron patterns, created by arranging tiles in a V-shape, offer a sense of direction and flow. Diamond and triangle patterns can add a touch of elegance and intricacy.
When choosing a geometric pattern for your backsplash, consider the overall style and color scheme of your kitchen. Bold and contrasting colors can create a dramatic effect, while neutral tones can offer a more subtle and harmonious look. Mixing different shapes and sizes can also add complexity and interest to the design.
Geometric patterns can be used in various design styles, from modern and contemporary to traditional and eclectic. They offer a versatile and customizable option that can be tailored to fit your unique preferences and kitchen layout. Consider using geometric patterns in combination with other design elements, such as open shelving or under-cabinet lighting, to enhance the overall aesthetic.
While geometric patterns can be visually stunning, it’s important to ensure that the tiles are installed with precision and care. Proper alignment and spacing are crucial to achieving a polished and professional look. Hiring a professional installer can help ensure that the geometric pattern is executed flawlessly.
Bold Colors
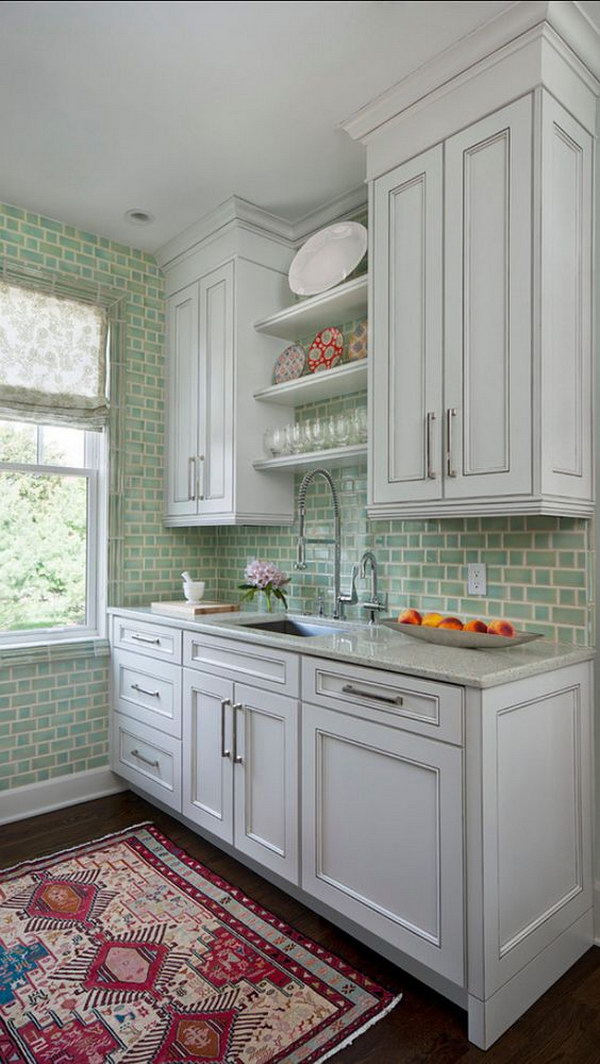
Incorporating bold colors into your kitchen backsplash can create a vibrant and eye-catching design that adds personality and character to your space. Bold colors can range from deep blues and rich greens to bright yellows and fiery reds, offering a wide spectrum of options to suit your style.
One of the main advantages of using bold colors in your backsplash is their ability to make a statement. They can serve as the focal point of your kitchen, drawing attention and creating a lively and energetic atmosphere. Bold colors can also complement other design elements, such as cabinets, countertops, and appliances, creating a cohesive and harmonious look.
When choosing bold colors for your backsplash, consider the overall color scheme of your kitchen. Select colors that complement or contrast with your existing decor to create the desired effect. For example, a deep blue backsplash can add a touch of elegance to a white kitchen, while a bright yellow backsplash can add a pop of color to a neutral space.
Bold colors can be used in various design styles, from modern and contemporary to traditional and eclectic. They offer a versatile option that can be tailored to fit your unique preferences and kitchen layout. Consider using bold colors in combination with other design elements, such as open shelving or under-cabinet lighting, to enhance the overall aesthetic.
One approach to incorporating bold colors is to use them as an accent. For example, you can create a bold backsplash behind the stove or sink while keeping the rest of the kitchen more neutral. This creates a striking focal point without overwhelming the space. Another option is to use bold colors throughout the entire backsplash for a more dramatic and cohesive look.
While bold colors can create a stunning effect, it’s important to ensure that the tiles are installed with precision and care. Proper alignment and spacing are crucial to achieving a polished and professional look. Hiring a professional installer can help ensure that the bold color design is executed flawlessly.

Mosaic Designs
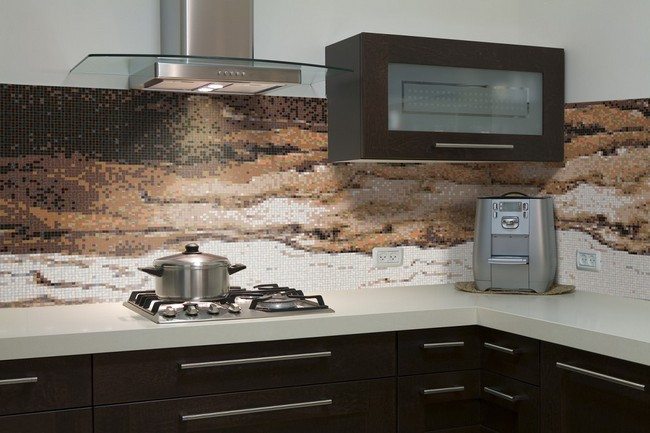
Mosaic designs offer a creative and artistic option for kitchen backsplashes, allowing you to create intricate patterns and images using small tiles. These designs can be made from various materials, including glass, ceramic, porcelain, and natural stone, offering a wide range of colors, textures, and finishes.
One of the key advantages of mosaic designs is their ability to add visual interest and complexity to your kitchen. They can create a unique and personalized look that reflects your style and taste. Mosaic designs can range from simple and geometric patterns to detailed and elaborate images, offering endless possibilities for customization.
When choosing a mosaic design for your backsplash, consider the overall style and color scheme of your kitchen. Select colors and patterns that complement your existing decor to create a cohesive and harmonious look. For example, a mosaic design with blue and white tiles can add a touch of elegance to a coastal-themed kitchen, while a colorful mosaic design can create a lively and energetic atmosphere.
Mosaic designs can be used in various design styles, from traditional and classic to modern and contemporary. They offer a versatile and customizable option that can be tailored to fit your unique preferences and kitchen layout. Consider using mosaic designs in combination with other design elements, such as open shelving or under-cabinet lighting, to enhance the overall aesthetic.
One approach to incorporating mosaic designs is to use them as an accent. For example, you can create a mosaic backsplash behind the stove or sink while keeping the rest of the kitchen more neutral. This creates a striking focal point without overwhelming the space. Another option is to use mosaic designs throughout the entire backsplash for a more dramatic and cohesive look.
While mosaic designs can create a stunning effect, it’s important to ensure that the tiles are installed with precision and care. Proper alignment and spacing are crucial to achieving a polished and professional look. Hiring a professional installer can help ensure that the mosaic design is executed flawlessly.

Metallic Accents
Metallic accents can add a touch of glamour and sophistication to your kitchen backsplash. These accents can be made from various materials, including stainless steel, copper, brass, and aluminum, offering a range of colors and finishes to suit your style.
One of the main advantages of metallic accents is their ability to reflect light, creating a bright and spacious feel in your kitchen. They can add depth and dimension to your backsplash design, making the space feel more dynamic and interesting. Metallic accents can also complement other design elements, such as stainless steel appliances and fixtures, creating a cohesive and harmonious look.
When choosing metallic accents for your backsplash, consider the overall style and color scheme of your kitchen. Select colors and finishes that complement your existing decor to create the desired effect. For example, copper accents can add warmth and elegance to a traditional kitchen, while stainless steel accents can create a sleek and modern look.
Metallic accents can be used in various design styles, from traditional and classic to modern and contemporary. They offer a versatile option that can be tailored to fit your unique preferences and kitchen layout. Consider using metallic accents in combination with other design elements, such as open shelving or under-cabinet lighting, to enhance the overall aesthetic.
One approach to incorporating metallic accents is to use them as an accent. For example, you can create a metallic backsplash behind the stove or sink while keeping the rest of the kitchen more neutral. This creates a striking focal point without overwhelming the space. Another option is to use metallic accents throughout the entire backsplash for a more dramatic and cohesive look.
While metallic accents can create a stunning effect, it’s important to ensure that the tiles are installed with precision and care. Proper alignment and spacing are crucial to achieving a polished and professional look. Hiring a professional installer can help ensure that the metallic accent design is executed flawlessly.
Natural Materials
Incorporating natural materials into your kitchen backsplash can create a warm and inviting atmosphere that reflects the beauty of nature. These materials can include natural stone, wood, bamboo, and reclaimed materials, offering a range of colors, textures, and finishes to suit your style.
One of the key advantages of natural materials is their ability to add warmth and texture to your kitchen. They can create a cozy and comfortable feel, making the space more inviting and enjoyable. Natural materials can also complement other design elements, such as wood cabinets and countertops, creating a cohesive and harmonious look.
When choosing natural materials for your backsplash, consider the overall style and color scheme of your kitchen. Select colors and finishes that complement your existing decor to create the desired effect. For example, a natural stone backsplash can add elegance and sophistication to a traditional kitchen, while a wood or bamboo backsplash can create a rustic and earthy feel.
Natural materials can be used in various design styles, from traditional and classic to modern and contemporary. They offer a versatile option that can be tailored to fit your unique preferences and kitchen layout. Consider using natural materials in combination with other design elements, such as open shelving or under-cabinet lighting, to enhance the overall aesthetic.
One approach to incorporating natural materials is to use them as an accent. For example, you can create a natural material backsplash behind the stove or sink while keeping the rest of the kitchen more neutral. This creates a striking focal point without overwhelming the space. Another option is to use natural materials throughout the entire backsplash for a more dramatic and cohesive look.
While natural materials can create a stunning effect, it’s important to ensure that the tiles are installed with precision and care. Proper alignment and spacing are crucial to achieving a polished and professional look. Hiring a professional installer can help ensure that the natural material design is executed flawlessly.
Installation and Maintenance Tips
Preparing the Surface
Proper preparation of the surface is crucial for a successful backsplash installation. Ensuring that the wall is clean, smooth, and dry will help the tiles adhere properly and result in a durable and long-lasting backsplash.
Start by removing any existing backsplash or wall coverings. This may involve scraping off old tiles, wallpaper, or paint. Use a putty knife or scraper to carefully remove any adhesive or residue, and sand the wall to create a smooth surface. If there are any holes or cracks in the wall, fill them with spackling compound and sand them smooth.
Next, clean the wall thoroughly to remove any dust, grease, or debris. Use a mild detergent and water to wipe down the surface, and allow it to dry completely before proceeding. If you are installing the backsplash in a high-moisture area, such as behind the sink or stove, consider applying a primer or sealant to protect the wall from moisture damage.
It’s also important to measure and mark the layout of the backsplash before starting the installation. Use a level and a pencil to draw horizontal and vertical guidelines on the wall. This will help ensure that the tiles are aligned properly and evenly spaced. Take accurate measurements to determine the number of tiles needed and plan the placement of any cut tiles.
For larger or more complex installations, consider using a temporary template or mock-up to visualize the layout. This can help you make any necessary adjustments before committing to the final installation. A template can also be useful for planning the placement of decorative elements or patterns.
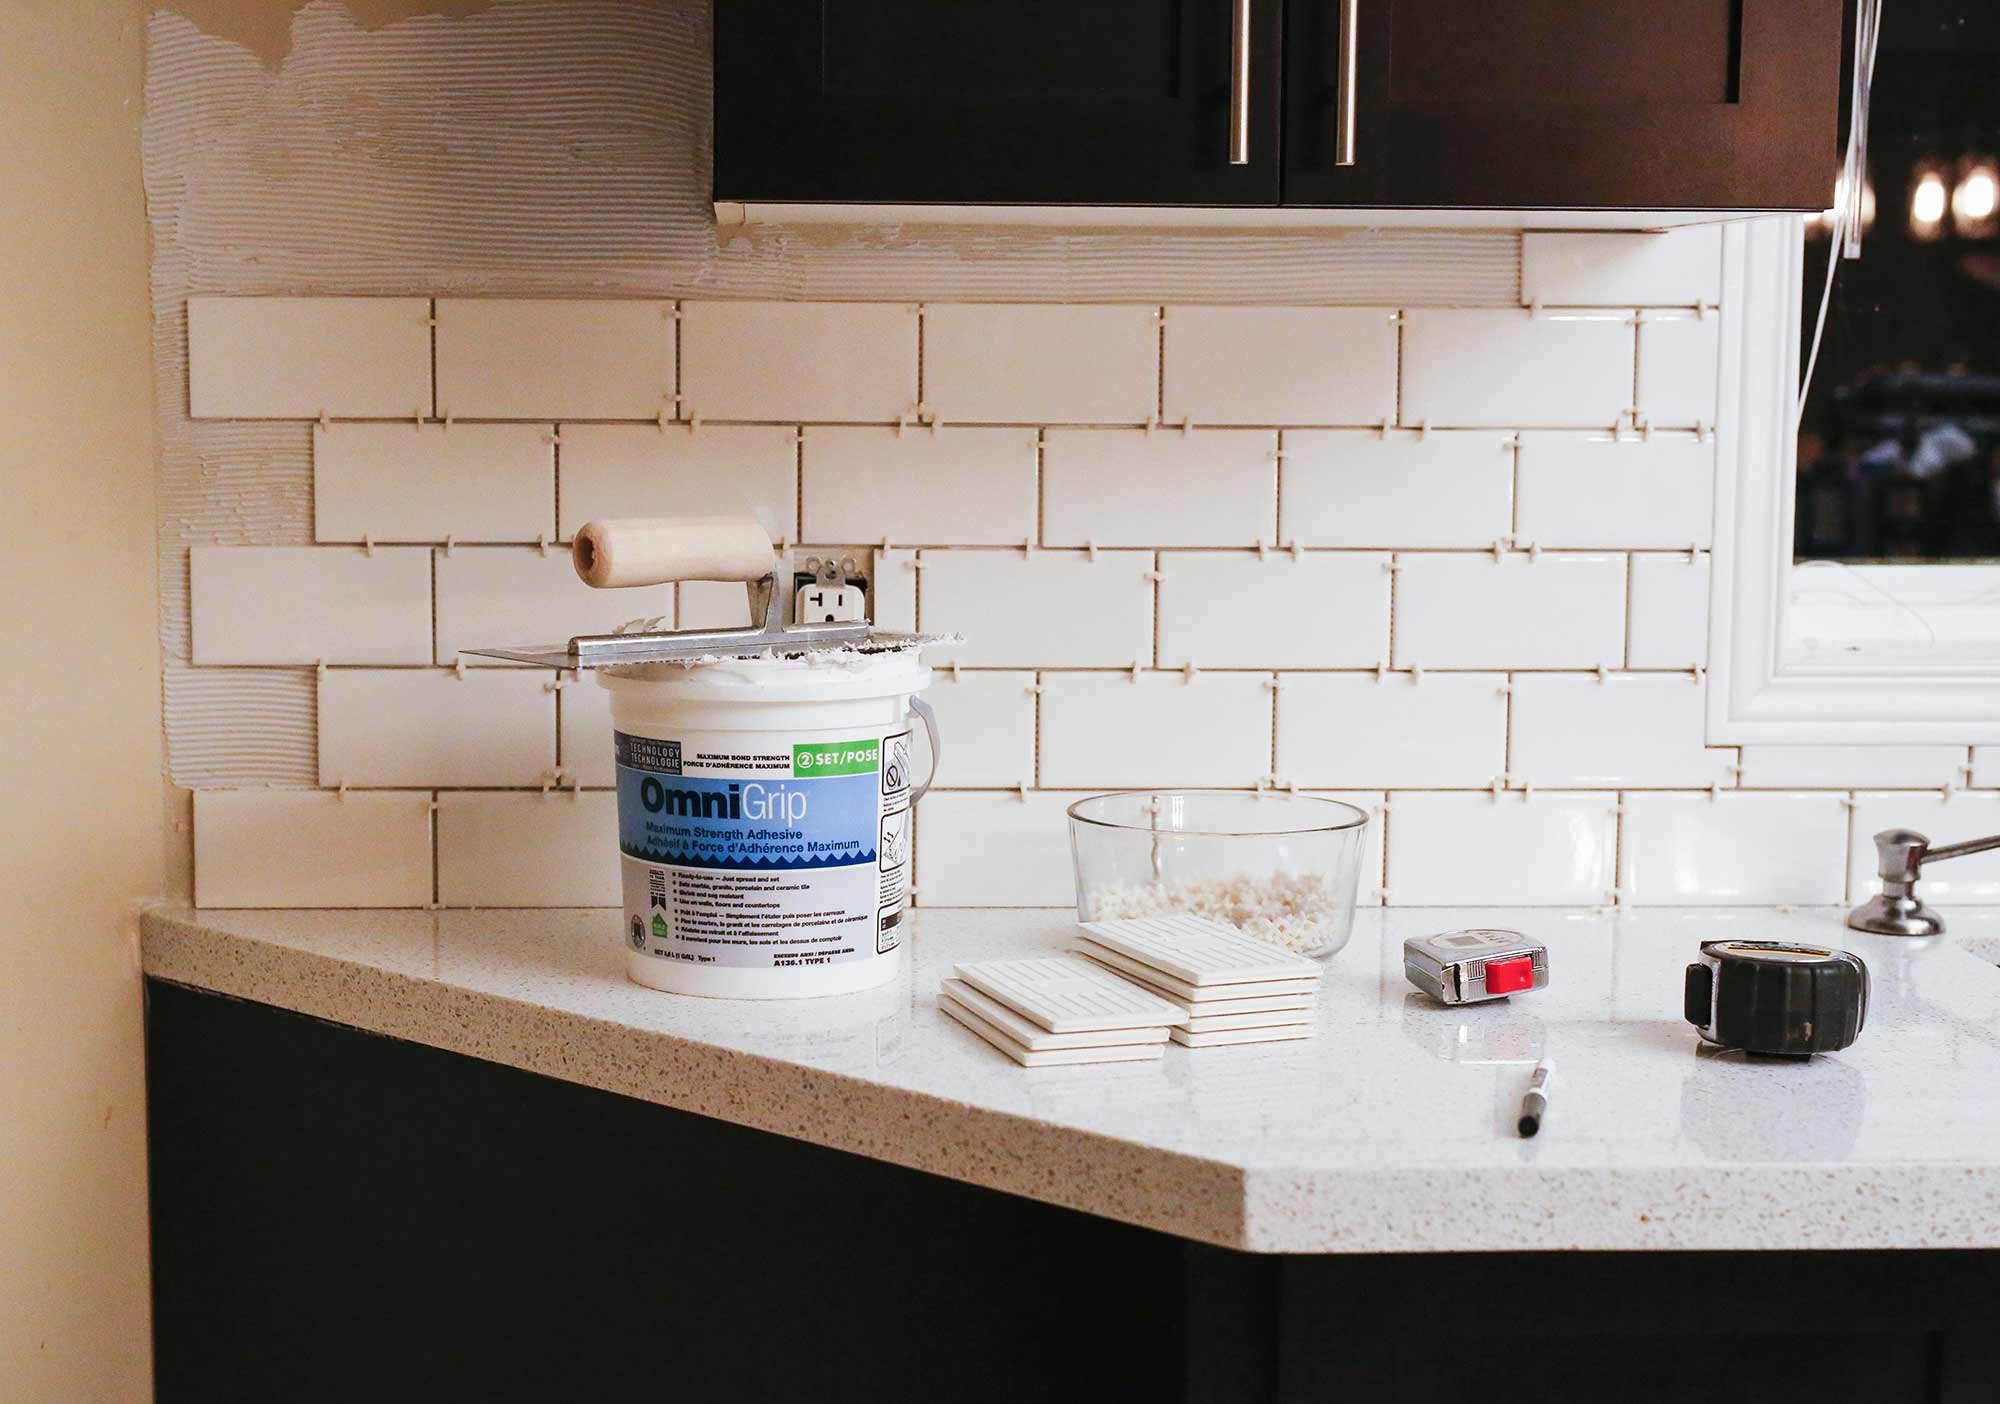
Finally, gather all the necessary tools and materials for the installation. This may include tiles, adhesive, grout, spacers, a notched trowel, a tile cutter, and a sponge. Having everything prepared and organized will help streamline the installation process and ensure a smooth and efficient workflow.

Installing the Backsplash
The installation of a kitchen backsplash involves several steps, each requiring careful attention to detail to achieve a professional finish. Here’s an overview of the typical installation process:
-
Applying Adhesive: Start by applying adhesive to the wall using a notched trowel. Spread the adhesive evenly over a small section of the wall, working in manageable areas to prevent the adhesive from drying out before the tiles are placed. The notches in the trowel will create grooves in the adhesive, helping the tiles adhere more securely.
-
Placing the Tiles: Begin placing the tiles on the wall, starting at the bottom and working your way up. Press each tile firmly into the adhesive, using spacers to ensure even spacing between the tiles. Follow the guidelines you marked earlier to keep the tiles aligned properly. For larger tiles, it may be helpful to use a rubber mallet to gently tap the tiles into place.
-
Cutting Tiles: As you reach the edges of the wall or around obstacles, such as electrical outlets or fixtures, you may need to cut tiles to fit. Use a tile cutter or wet saw to make precise cuts, and smooth any rough edges with a tile file or sandpaper. Measure carefully and take your time to ensure accurate cuts.
-
Allowing Adhesive to Cure: Once all the tiles are in place, allow the adhesive to cure for the recommended time, usually 24 hours. Avoid touching or disturbing the tiles during this period to ensure a strong bond.
-
Applying Grout: After the adhesive has cured, remove the spacers and prepare the grout according to the manufacturer’s instructions. Use a grout float to apply the grout, spreading it evenly over the tiles and pressing it into the gaps. Work in small sections, and use a diagonal motion to avoid dislodging the tiles. Remove excess grout with a damp sponge, rinsing it frequently to keep it clean.
-
Sealing the Grout: Once the grout has dried, usually after 24 hours, apply a grout sealer to protect it from stains and moisture. Follow the manufacturer’s instructions for application and drying times. Sealing the grout will help maintain its appearance and durability.
Maintaining Your Backsplash
Proper maintenance is essential to keep your kitchen backsplash looking its best and to ensure its longevity. Regular cleaning and periodic sealing can help protect the tiles and grout from stains, moisture, and damage.
Regular Cleaning: Clean your backsplash regularly to prevent the buildup of grease, grime, and food splatters. Use a mild detergent and water to wipe down the tiles with a soft cloth or sponge. Avoid using abrasive cleaners or scrubbers that can scratch the surface of the tiles. For tougher stains, a mixture of baking soda and water can be used as a gentle abrasive cleaner.
Cleaning Grout: Grout can be more susceptible to stains and discoloration, especially in high-moisture areas. To clean grout, use a mixture of baking soda and water or a commercial grout cleaner. Apply the cleaner with a toothbrush or grout brush, scrubbing gently to remove stains. Rinse with clean water and wipe dry.
Sealing Grout: To protect grout from stains and moisture, it’s important to apply a grout sealer periodically. Follow the manufacturer’s instructions for application and drying times. Depending on the type of grout and the level of use, sealing may be required every six months to a year.
Addressing Damage: If any tiles become cracked or damaged, it’s important to address the issue promptly to prevent further damage. Remove the damaged tile and clean the area thoroughly. Apply adhesive and replace the tile, ensuring it is properly aligned and spaced. Allow the adhesive to cure and reapply grout as needed.
Avoiding Harsh Chemicals: Avoid using harsh chemicals, such as bleach or ammonia, on your backsplash. These chemicals can damage the tiles and grout, leading to discoloration and deterioration. Stick to mild detergents and natural cleaning solutions to maintain the integrity of your backsplash.
Preventing Moisture Damage: In high-moisture areas, such as behind the sink or stove, take extra precautions to prevent moisture damage. Use a caulk or silicone sealant around the edges of the backsplash to create a watertight seal. This will help prevent water from seeping behind the tiles and causing damage.

Related Posts:
- Ceramic Subway Tiles For Kitchen Backsplash
- Popular Backsplashes In Kitchen Design
- Cheap And Easy Backsplashes For Kitchens
- Kitchen Backsplash Pictures With White Cabinets
- Punched Tin Backsplash Kitchen
- Kitchen Tile Backsplash Design Ideas
- Kitchen Backsplash Installation Contractor
- Metal Kitchen Backsplash Ideas
- How To Clean Kitchen Backsplash Tiles
- Blue Glass Subway Tile Kitchen Backsplash