Embarking on a do-it-yourself (DIY) kitchen sink installation project can be a rewarding endeavor for homeowners looking to enhance their kitchen space. However, it’s crucial to approach this task with careful planning, attention to detail, and the right tools. A successful DIY kitchen sink installation involves several key steps, from selecting the right sink to ensuring proper plumbing connections.
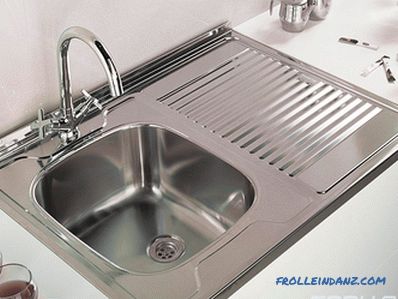
The first step in a DIY kitchen sink installation is choosing the right sink for your space. Consider factors such as size, style, and material. Stainless steel, granite, and porcelain are popular choices, each offering unique benefits. Measure the available space in your kitchen to ensure the selected sink fits seamlessly into the countertop.
Once you’ve chosen the sink, prepare the installation area by clearing out the cabinet under the sink and disconnecting the plumbing. It’s essential to turn off the water supply to the kitchen before beginning the installation. Have a bucket and towels on hand to catch any residual water in the pipes.
Ensure that the sink’s cutout template aligns with your countertop. Use a jigsaw to carefully cut along the marked lines. Take your time during this step to achieve clean and precise cuts. Wear safety goggles and gloves to protect yourself from debris.

Before placing the sink into the cutout, apply a thin bead of silicone caulk around the perimeter of the opening. This creates a watertight seal between the sink and the countertop. Gently lower the sink into place, double-checking that it fits snugly. Wipe away any excess caulk with a damp cloth.
Securing the sink is a critical step. Depending on the type of sink and countertop, this may involve tightening clips, brackets, or adhesive. Follow the manufacturer’s instructions for your specific sink model. Ensure the sink is level and flush with the countertop for a professional finish.
With the sink securely in place, reconnect the plumbing. Install the sink strainer and tailpiece, applying plumber’s putty for a watertight seal. Tighten all connections but avoid over-tightening, which could damage the sink or pipes. Reconnect the water supply lines and check for any leaks.
Consider installing a garbage disposal if you haven’t already. This involves connecting the disposal unit to the sink’s drain and securing it in place. Follow the manufacturer’s guidelines for proper installation and use.

To enhance the aesthetics of your DIY kitchen sink installation, apply a bead of caulk along the seam between the sink and countertop. Smooth the caulk with a damp cloth or your finger for a clean and finished look. Allow the caulk to dry completely before using the sink.
Regular maintenance is key to prolonging the life of your DIY-installed kitchen sink. Clean the sink and surrounding area regularly using mild soap and water. Avoid abrasive cleaners that could scratch or damage the sink’s surface. Periodically check for leaks and address any issues promptly.
If your DIY installation involves new faucets or fixtures, follow the manufacturer’s instructions for proper installation. This may include connecting water supply lines, securing the faucet in place, and checking for leaks. Consider upgrading to water-efficient fixtures to promote sustainability in your kitchen.
Taking a DIY approach to kitchen sink installation allows for customization and personalization. You have the freedom to choose a sink that complements your style and meets your specific needs. Whether you prefer a single-basin farmhouse sink or a sleek double-basin design, the DIY route puts you in control of your kitchen’s aesthetic.

Before starting the DIY installation, familiarize yourself with local building codes and regulations. Ensure that your installation complies with these standards, especially when it comes to plumbing connections. If you’re uncertain about any aspect of the installation, consult with a professional plumber or contractor to avoid costly mistakes.
A DIY kitchen sink installation can be a fulfilling project that adds value to your home and enhances your daily kitchen activities. By carefully selecting the right sink, following proper installation steps, and ensuring attention to detail, you can achieve a professional-looking result. Regular maintenance and adherence to local regulations contribute to the long-term success of your DIY kitchen sink installation, allowing you to enjoy a functional and aesthetically pleasing kitchen space.

How to Install a Moen Centerset Faucet

How to not install a kitchen sink!! 🤣 – YouTube

how to change out a kitchen sink – Best Template

Organizing Corner Kitchen Cabinets Beautiful Under Cabinet Storage Kitchen Sink Storage Ideas

Running Copper Supply Lines – How to Install a New Bathroom

How to Plumb in a Dishwasher or Washing Machine

How to choose a sink for the kitchen – practical tips
Installing a kitchen sink.

Related Posts: