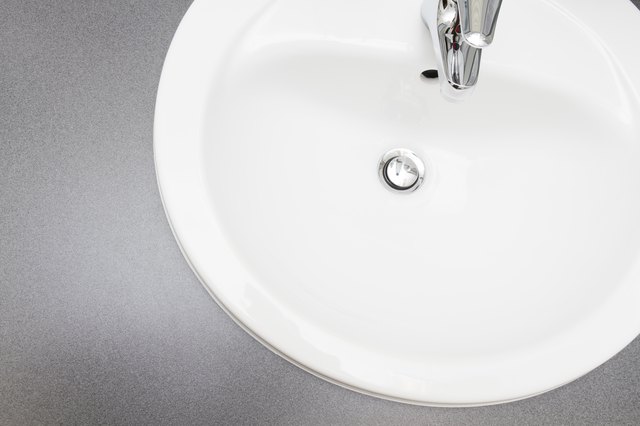
A kitchen sink stopper is a small yet essential component in every kitchen. It allows for easy filling of the sink with water, helps in soaking dishes, and prevents unwanted items from going down the drain, which could cause clogs. Although there are many commercially available sink stoppers, making a DIY kitchen sink stopper can be a practical and satisfying solution, especially when the original stopper is lost or broken. DIY sink stoppers are not only cost-effective but can also be made using materials that are readily available at home. This flexibility allows homeowners to create a customized solution that fits their specific needs and sink dimensions.
Creating a DIY kitchen sink stopper starts with understanding the shape and size of your sink drain. Most kitchen sink drains are either standard-sized or custom, so it is important to measure the drain opening accurately. This ensures that the stopper will fit snugly and prevent water from leaking out. You can use a ruler or measuring tape to measure the diameter of the drain opening. Once you have the measurements, you can decide on the materials to use for your DIY sink stopper. Common household items, such as rubber, cork, or even a plastic lid, can be repurposed to create an effective stopper.

One simple and popular DIY method is to use a rubber jar opener or a rubber sink mat. These items are typically made from flexible, durable rubber that can create a good seal over the drain. To use a rubber jar opener, simply place it over the drain opening, ensuring it covers the entire area. The flexibility of the rubber allows it to conform to the shape of the drain, effectively blocking water from flowing down. Rubber sink mats can be cut into circular shapes to fit over the drain opening, creating a similar effect. This method is not only easy but also allows for quick adjustments if the initial size does not fit perfectly.
Another common DIY method involves using a cork. Cork is a great material for a sink stopper because it is buoyant, flexible, and water-resistant. To make a cork stopper, find a cork that fits the diameter of your sink drain. You may need to trim or shape the cork to fit properly. A sharp knife or a sandpaper block can be used to adjust the cork’s size. Once the cork is fitted, it can be inserted into the drain, creating a tight seal that prevents water from escaping. This method is particularly useful for those who prefer a more natural or rustic look in their kitchen.

For a more permanent DIY solution, consider using a PVC pipe and a rubber gasket. This method involves cutting a piece of PVC pipe to fit snugly into the drain opening and attaching a rubber gasket to the end of the pipe. The rubber gasket will create a seal against the sink’s surface, preventing water from flowing down the drain. This type of stopper can be made to fit various drain sizes and is highly durable, making it an excellent choice for long-term use. PVC pipes and rubber gaskets can be found at most hardware stores and are relatively inexpensive.
Repurposing a plastic bottle cap is another creative way to make a DIY sink stopper. Select a bottle cap that matches the size of your drain opening. You may need to add some weight to the cap to ensure it stays in place and does not float away when the sink is filled with water. This can be done by attaching a small washer or nut to the underside of the cap using waterproof glue. Once the weight is added, the cap can be placed over the drain, effectively blocking the flow of water. This method is both simple and eco-friendly, as it involves reusing materials that would otherwise be discarded.

Silicone baking mats or trivets can also be used to create a flexible and reliable sink stopper. Silicone is known for its heat resistance and durability, making it an excellent material for kitchen use. To create a stopper, cut a circular piece from a silicone baking mat or trivet that matches the size of your sink drain. The silicone piece can be placed over the drain, forming a tight seal that prevents water from escaping. Silicone stoppers are easy to clean and maintain, and they do not absorb odors or stains, making them a hygienic option for kitchen use.
A DIY sink stopper can also be made using a plastic or rubber suction cup. Suction cups are readily available and come in various sizes, making them a versatile option for different sink drains. To create a stopper, choose a suction cup that fits snugly over the drain opening. Press the suction cup down onto the drain, ensuring that it adheres to the surface and creates a seal. This method is effective for temporary use and is easy to remove and clean. Suction cups can also be used in combination with other materials, such as rubber or silicone, to enhance their sealing capabilities.
Another innovative DIY solution is to use a tennis ball cut in half. Tennis balls are made of rubber and felt, which provide a good grip and seal. To make a stopper, cut a tennis ball in half and use one of the halves as the stopper. Place the cut side of the ball over the drain opening, pressing it down to create a seal. The curved shape of the tennis ball half allows it to fit over the drain, and the rubber material ensures it stays in place. This method is particularly useful for larger drains or when a more substantial stopper is needed.

For a quick and temporary solution, a small plastic bag filled with water or sand can be used as a DIY sink stopper. Simply fill a plastic sandwich bag with water or sand, seal it, and place it over the drain. The weight of the water or sand will hold the bag in place, effectively blocking the drain. This method is ideal for situations where a more permanent solution is not available, such as when traveling or camping. However, it is important to ensure that the bag is securely sealed to prevent leaks.
If you have a sink strainer, it can also double as a DIY sink stopper. Sink strainers are designed to fit into the drain and catch food particles, but they can also be used to block the drain. To use a sink strainer as a stopper, simply flip it upside down and place it over the drain. The strainer will act as a barrier, preventing water from flowing down. This method is convenient as it uses an item already present in most kitchens, and it can easily be removed and cleaned.
Repurposing a kitchen sponge is another practical approach to making a DIY sink stopper. Choose a thick, dense sponge that can create a good seal over the drain. Cut the sponge to fit the size of the drain opening, and press it down to block the flow of water. The sponge will absorb some water, creating a seal that prevents leaks. This method is effective for short-term use and is easy to implement using materials commonly found in the kitchen.
For those who prefer a more stylish DIY sink stopper, consider using a decorative glass or ceramic bowl. Choose a small bowl that fits over the drain opening. Place the bowl upside down on the drain, ensuring that it covers the entire area. The weight of the bowl will keep it in place, and its decorative design can add a touch of elegance to the kitchen. This method combines functionality with aesthetics, making it a unique and attractive option.
Using a piece of natural clay is another eco-friendly way to create a DIY sink stopper. Natural clay can be molded to fit the shape of the drain opening, creating a customized stopper. To use clay, mold it into a circular shape that fits snugly over the drain. Press the clay down onto the drain to create a seal. Natural clay is biodegradable and non-toxic, making it a safe and sustainable option for the kitchen. This method allows for creativity, as different shapes and designs can be molded to suit personal preferences.
A fabric sink stopper can also be made using a piece of thick, waterproof fabric, such as neoprene or oilcloth. Cut a circular piece of fabric that fits over the drain opening, and place it on the drain. The fabric will create a barrier that prevents water from escaping. This method is easy to implement and allows for customization, as different colors and patterns can be used to match the kitchen décor. Fabric stoppers are also easy to clean and store, making them a practical option for everyday use.
Finally, a DIY sink stopper can be made using a rubber glove. Cut a finger off a rubber glove, and fill it with water to create a small water balloon. Tie the end of the glove finger to seal it, and place it over the drain. The weight of the water will hold the glove finger in place, creating a seal that prevents water from flowing down the drain. This method is quick, easy, and uses materials that are readily available in most homes. It is an effective solution for temporary use and can be easily replaced when needed.
Common Mistakes to Avoid
When creating a DIY kitchen sink stopper, one common mistake is not measuring the drain opening accurately. A stopper that is too small or too large will not create an effective seal, resulting in leaks and water loss. It’s important to measure the drain opening carefully and choose or create a stopper that fits snugly.
Another mistake is using materials that are not water-resistant or durable. Materials that absorb water or degrade over time can lead to ineffective sealing and frequent replacements. Choosing materials like rubber, silicone, or plastic can ensure the stopper lasts longer and remains effective.
Another common mistake is neglecting to test the stopper before relying on it for use. It’s important to test the stopper by filling the sink with water and checking for leaks. If the stopper does not hold water effectively, adjustments or replacements may be needed.
Additionally, using materials that are difficult to clean or maintain can lead to hygiene issues. It’s important to choose materials that are easy to clean and do not harbor bacteria or mold. Regular cleaning and maintenance of the stopper can ensure it remains effective and safe for use.

Why should I consider making a DIY kitchen sink stopper?
Making a DIY kitchen sink stopper can be a practical and cost-effective solution, especially when the original stopper is lost or broken. DIY stoppers can be made using materials that are readily available at home, allowing for quick and easy solutions without the need to purchase new products. Additionally, DIY stoppers can be customized to fit specific sink dimensions and personal preferences, providing a tailored solution that meets individual needs. DIY sink stoppers also offer a creative outlet, allowing homeowners to repurpose materials and reduce waste.
What materials are best for a DIY sink stopper?
The best materials for a DIY sink stopper are those that are water-resistant, durable, and easy to clean. Rubber, silicone, and plastic are commonly used materials that create effective seals and are easy to maintain. Cork is another great option for those who prefer natural materials. These materials are flexible, allowing them to conform to the shape of the drain and create a tight seal. It’s important to choose materials that do not degrade over time and can withstand regular use to ensure the stopper remains effective.
How can I ensure my DIY sink stopper fits properly?
To ensure a DIY sink stopper fits properly, start by measuring the diameter of the sink drain accurately. Use a ruler or measuring tape to get the exact dimensions of the drain opening. Once you have the measurements, choose or create a stopper that matches the size of the drain. It’s important to test the stopper by filling the sink with water and checking for leaks. If the stopper does not fit snugly or allow water to escape, adjustments or replacements may be needed. A properly fitting stopper will create a tight seal that prevents water from leaking out.

Can I use a DIY sink stopper for a long-term solution?
Yes, a DIY sink stopper can be used as a long-term solution, provided that it is made from durable materials and fits the sink drain properly. Using high-quality materials like rubber, silicone, or PVC can ensure the stopper lasts longer and remains effective over time. Regular maintenance and cleaning can also help prolong the life of the stopper. However, it’s important to inspect the stopper periodically for signs of wear or damage and replace it if necessary to maintain its effectiveness.
How do I clean and maintain my DIY sink stopper?
Cleaning and maintaining a DIY sink stopper is important to ensure its effectiveness and hygiene. Most DIY stoppers can be cleaned using warm, soapy water and a soft brush or cloth. It’s important to rinse the stopper thoroughly to remove any soap residue. For materials like rubber or silicone, using a mild bleach solution can help disinfect and remove any odors. Regular cleaning can prevent the buildup of bacteria or mold and keep the stopper in good condition. Storing the stopper in a dry place when not in use can also help prolong its lifespan.
What should I do if my DIY sink stopper leaks?
If your DIY sink stopper leaks, it may not be fitting the drain properly, or the material may not be creating an effective seal. Start by checking the fit of the stopper and adjusting it to ensure it covers the entire drain opening. If the stopper is too small or too large, consider using a different material or creating a new stopper that fits better. Testing the stopper by filling the sink with water and checking for leaks can help identify any issues. If the stopper continues to leak, replacing it with a more suitable material or design may be necessary to achieve an effective seal.

Related Posts:
- Kitchen Sink Plumbing Code
- Galvanized Wash Tub Kitchen Sink
- Kitchen Sink Plumbing With Garbage Disposal And Dishwasher
- 29 Inch Undermount Kitchen Sink
- How To Remove Limescale From Kitchen Sink
- Cast Iron Double Bowl Kitchen Sink
- Plumbing Kitchen Sink Drain Vent
- Stainless Steel Single Bowl Apron Farmhouse Kitchen Sink
- Kitchen Sink Pipe Burst
- Kitchen Sink Odor Remedy