Planning Your Custom Kitchen Island: Design and Functionality
A custom kitchen island can transform your cooking space, adding both style and practicality. Planning is the key to creating an island that suits your needs and complements your kitchen. Here are the essential steps to consider during the planning phase.
Assessing Your Space
Before diving into design, evaluate the space available in your kitchen. Measure the area where you plan to install the island and consider the flow of movement around it. Ensure there is enough clearance on all sides for easy access to appliances, cabinets, and seating areas. Typically, you should allow for at least 36 inches of clearance on all sides.
Defining the Island’s Purpose
Determine how you will use the kitchen island. Will it serve as a cooking station, a prep area, additional storage, or a dining space? Your island’s purpose will influence its size, shape, and features. For example, if you plan to use it for cooking, you might want to include a cooktop and a prep sink. If it’s primarily for dining, consider including an overhang for seating.
Selecting the Shape and Size
Choose a shape that fits your kitchen layout. Rectangular islands are the most common, but L-shaped, U-shaped, and circular designs can also work well depending on your space. The size of your island should be proportional to your kitchen. An oversized island can overwhelm a small kitchen, while a tiny island might look out of place in a large one. Standard dimensions range from 2×4 feet for smaller kitchens to 4×8 feet for larger spaces.
Considering Utility Connections
Plan for any utility connections needed for your island. If you’re installing a sink, cooktop, or outlets, you’ll need plumbing, gas, and electrical connections. Factor these requirements into your design and budget. Consulting with a professional can help ensure that these elements are safely and correctly installed.
Choosing Features and Storage Options
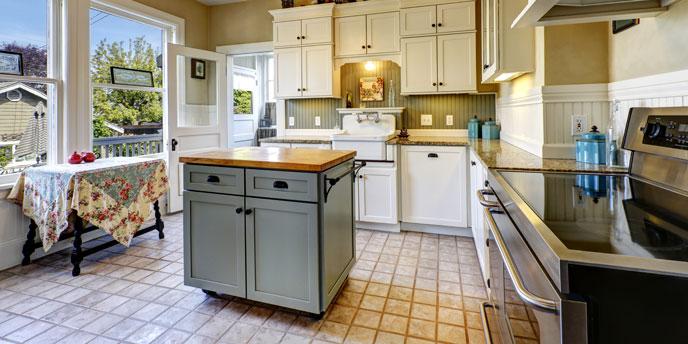
Decide on the features and storage options you want to include. Drawers, cabinets, shelves, and pull-out bins can provide valuable storage space. Consider incorporating specialized storage solutions like spice racks, utensil organizers, or wine racks. If you’re adding appliances, ensure there’s adequate space for them and that they’re easily accessible.
Designing for Aesthetics
Your kitchen island should blend seamlessly with your existing kitchen decor. Choose materials, colors, and finishes that complement your cabinetry and countertops. Adding decorative elements such as beadboard, molding, or custom hardware can enhance the visual appeal. Also, consider the lighting above your island—pendant lights are popular for their style and functionality.
Choosing the Right Materials for Your Kitchen Island
Selecting the right materials for your custom kitchen island is crucial to ensure durability, functionality, and aesthetic appeal. Here are some considerations to guide you in making the best choices for your kitchen island.
Countertop Materials
The countertop is one of the most visible and frequently used parts of your kitchen island, so choosing a durable and attractive material is essential. Popular options include:
- Granite: Known for its durability and variety of colors, granite is a timeless choice.
- Quartz: Engineered quartz is non-porous and low-maintenance, offering a wide range of styles.
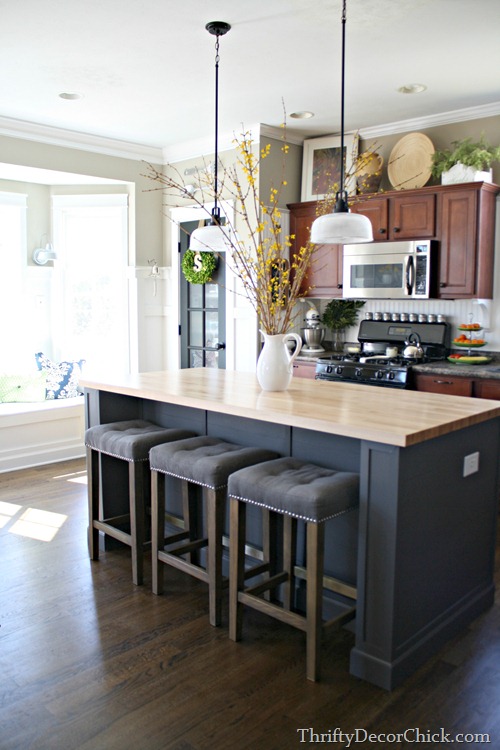
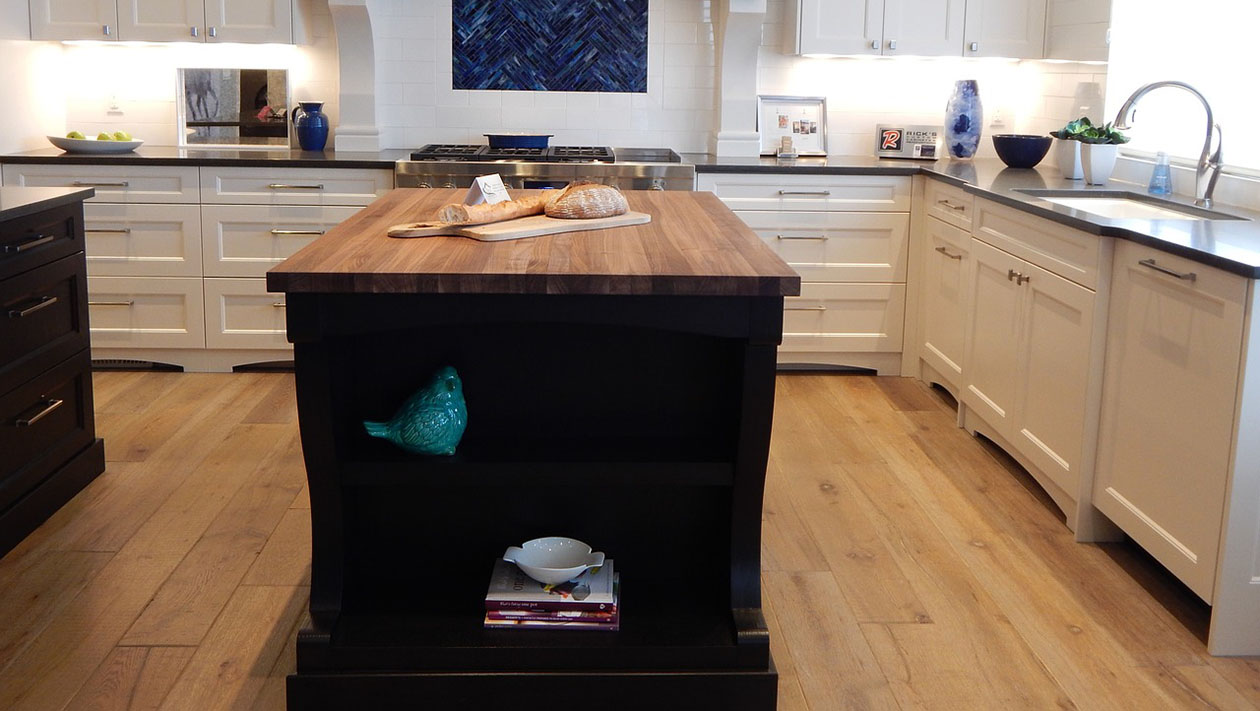
- Butcher Block: Provides a warm, rustic look and is excellent for food prep, though it requires regular maintenance.
- Marble: Luxurious and elegant, but prone to staining and scratching.
- Concrete: Offers a modern, industrial look and can be customized with pigments and textures.
Cabinet Materials
The material for your island’s base cabinets should be sturdy and coordinate with the rest of your kitchen. Common materials include:
- Solid Wood: Durable and available in various finishes, solid wood can be a more expensive option.
- Plywood: A strong and stable option that’s often used for cabinet construction.
- MDF (Medium-Density Fiberboard): Smooth and uniform, MDF is a more affordable choice but less durable than plywood.
- Particleboard: The most economical option, though not as durable or moisture-resistant as other materials.

Hardware and Fixtures
The hardware and fixtures you choose can add both functionality and style to your kitchen island. Consider the following:
- Handles and Knobs: Available in various styles and finishes, they should match or complement your existing kitchen hardware.
- Sink and Faucet: If including a sink, choose a durable material like stainless steel or composite granite and a faucet that offers the features you need, such as a pull-out sprayer.
- Drawer Slides and Hinges: Opt for high-quality, soft-close mechanisms to ensure smooth and quiet operation.
Flooring Considerations
If your kitchen island includes built-in appliances or seating, the flooring underneath should be durable and easy to clean. Popular flooring options for kitchens include:
- Tile: Durable and available in many styles, tile is easy to clean but can be hard underfoot.
- Hardwood: Provides a warm and classic look, though it requires maintenance to protect against water damage.
- Vinyl: A cost-effective and resilient option that’s available in a variety of designs.
- Laminate: Affordable and easy to install, laminate can mimic the look of wood or stone.
Lighting Fixtures
Good lighting is essential for a functional and attractive kitchen island. Consider pendant lights, recessed lighting, or a combination of both. Pendant lights provide focused illumination and come in various styles to match your decor. Recessed lighting offers a cleaner look and can provide even lighting across the island surface.
Paints and Finishes
The color and finish of your kitchen island can significantly impact its appearance. Choose paint or stain that complements your kitchen’s color scheme. For a more durable finish, consider using a high-quality enamel paint or a protective topcoat on stained wood. Finishing touches like beadboard panels, decorative molding, or a contrasting countertop edge can add character and charm.

Step-by-Step Guide to Building the Base of Your Kitchen Island
Building the base of your custom kitchen island is a fundamental step in creating a sturdy and functional piece. Here’s a step-by-step guide to help you through the process.
Gather Your Tools and Materials
Before you begin, gather all the necessary tools and materials. You’ll need:
- Materials: Plywood or MDF for the base, 2x4s for framing, screws, nails, and wood glue.
- Tools: Measuring tape, circular saw, drill, screwdriver, level, clamps, carpenter’s square.
Having everything on hand will make the process smoother and more efficient.
Measure and Cut the Pieces
Start by measuring and cutting the plywood or MDF panels for the sides, back, and bottom of the island base. Use a circular saw for precise cuts. Typically, the base should be 24 inches deep and can be customized to your desired height and width. Cut 2x4s for the frame, ensuring they fit the dimensions of your panels.
Assemble the Frame
Construct the frame using the 2x4s. Create a rectangle for the base and additional vertical supports for the corners and center of the frame. Secure the pieces together with screws and wood glue. Use a level and carpenter’s square to ensure the frame is straight and square.
Attach the Panels
Once the frame is assembled, attach the plywood or MDF panels to the frame. Start with the back panel, securing it to the frame with screws. Then, attach the side panels, ensuring they are flush with the edges of the frame. Finally, attach the bottom panel, securing it to the base frame. Use clamps to hold the panels in place while you screw them in to ensure a tight fit.
Install Shelving and Dividers
If your design includes shelves or dividers, now is the time to install them. Measure and cut the pieces for the shelves and dividers, ensuring they fit snugly within the frame. Secure them in place with screws and wood glue. Make sure the shelves are level and evenly spaced.
Finish the Base
After the base structure is assembled, inspect it for any gaps or uneven edges. Fill any gaps with wood filler and sand the entire base to create a smooth surface. This will ensure a professional finish once you paint or stain the base. If you plan to add decorative trim or molding, now is the time to cut and attach these pieces.

Adding Storage and Features to Your Kitchen Island
Enhancing your custom kitchen island with storage and additional features can significantly increase its functionality and convenience. Here are some ideas and steps to help you optimize your kitchen island.
Installing Cabinets and Drawers
Cabinets and drawers are essential for maximizing storage in your kitchen island. Consider installing deep drawers for pots and pans, shallow drawers for utensils, and cabinets for larger items like small appliances. Soft-close mechanisms can enhance the quality and usability of the drawers and cabinets. When planning, ensure there is enough space for the doors and drawers to open fully without obstruction.
Incorporating Open Shelving
Open shelving can provide easy access to frequently used items and add a decorative element to your kitchen island. Use open shelves to store cookbooks, display decorative dishes, or keep everyday items like bowls and mugs within reach. Shelving can be added to the ends of the island or underneath the countertop overhang. Ensure the shelves are sturdy and properly anchored to support the weight of the items.
Adding a Sink or Cooktop
If you have the necessary plumbing and electrical connections, consider adding a sink or cooktop to your island. A prep sink can make food preparation more convenient, while a cooktop can create a dedicated cooking area. Ensure that there is enough counter space around these features for prep work and that they are installed by a professional to ensure safety and functionality.
Including Specialized Storage Solutions
Specialized storage solutions can help keep your kitchen organized and efficient. Consider adding:
- Pull-out Trash and Recycling Bins: Keep your kitchen tidy with built-in bins that can be concealed when not in use.
- Spice Racks: Install pull-out spice racks to keep your spices organized and easily accessible.
- Wine Racks: Add a wine rack or wine cooler to store and display your wine collection.
- Cutting Board and Knife Storage: Incorporate dedicated slots or drawers for cutting boards and knives for quick and safe access.
Adding Seating
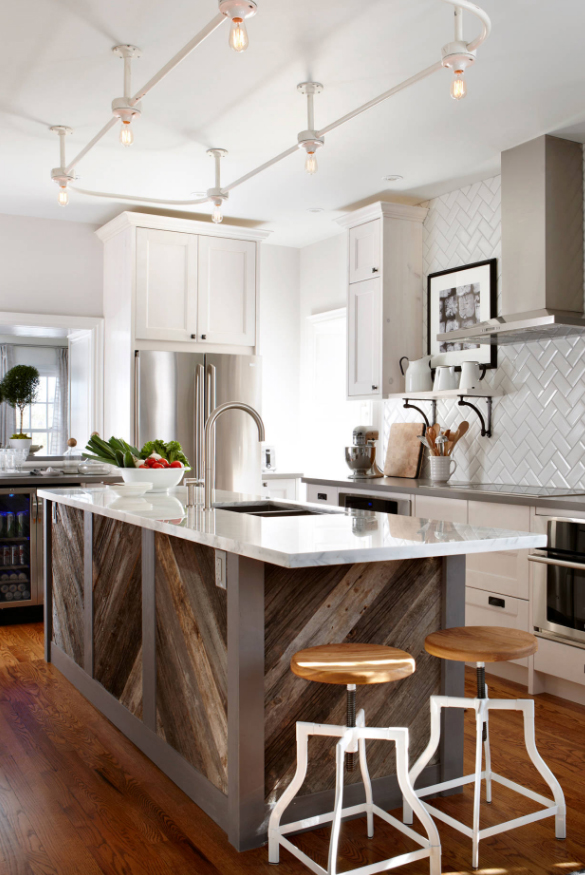
If you want your kitchen island to serve as a dining or gathering spot, include seating options. An overhang on one or more sides of the island can create space for bar stools or chairs. Ensure the overhang is deep enough to provide comfortable legroom, typically around 12-15 inches. Choose seating that complements your kitchen’s style and is durable for everyday use.
Integrating Electrical Outlets
Incorporating electrical outlets into your kitchen island can increase its functionality. Outlets can be used for small appliances, charging devices, or additional lighting. Ensure the outlets are placed in convenient locations and that the installation complies with local electrical codes. Adding USB ports can also be a useful feature for modern kitchens.
Installing Countertops and Finishing Touches
The countertop is the crowning feature of your custom kitchen island, and the finishing touches will complete its look and functionality. Here’s how to install your countertop and add those final details.
Choosing the Right Countertop
Selecting the right countertop material is crucial for both aesthetics and durability. Popular choices include:
- Granite: Offers a high-end look with excellent durability.
- Quartz: Non-porous and low-maintenance with a wide range of styles.
- Butcher Block: Provides a warm, natural appearance but requires regular maintenance.
- Concrete: Customizable with pigments and textures for a modern look.
- Marble: Elegant and luxurious, though it needs more care to prevent staining.
Preparing the Base
Before installing the countertop, ensure the base is level and secure. Any uneven surfaces should be sanded down or shored up to provide a stable foundation. Use a level to check for any discrepancies and make necessary adjustments. This step is critical to avoid future issues with your countertop.
Installing the Countertop
Carefully place the countertop onto the base, ensuring it fits perfectly. Depending on the material, you may need to use adhesive or screws to secure it in place. For heavier materials like granite or quartz, professional installation is recommended to ensure safety and precision. If installing a butcher block countertop, apply a food-safe sealant to protect the wood from moisture and stains.
Adding Backsplashes and Edges
If your kitchen island includes a sink or cooktop, consider adding a backsplash to protect the walls from splashes and stains. Backsplashes can be made from the same material as the countertop or a complementary one, such as tile or glass. Additionally, consider the edge profile of your countertop—options like beveled, bullnose or ogee edges can add a decorative touch.
Painting and Finishing the Base
Once the countertop is installed, finish the base of the island. Sand any rough spots and apply a primer before painting or staining. Choose a color that complements your kitchen decor. For a professional finish, use high-quality paint or stain and apply multiple coats, allowing each to dry thoroughly. Adding a protective topcoat can enhance durability.
Installing Hardware and Accessories
The final step is to install hardware and accessories. Attach cabinet handles and drawer pulls that match your kitchen’s style. Install any additional features like towel bars, hooks, or built-in cutting boards. If your island includes seating, add protective pads to the bottom of the stools or chairs to prevent scratching the floor.

Tips and Tricks for a Successful Custom Kitchen Island Project
Creating a custom kitchen island can be a rewarding project, enhancing both the functionality and aesthetic of your kitchen. Here are some tips and tricks to ensure your project is successful.
Plan Thoroughly
A successful project starts with thorough planning. Take the time to design your island, considering its purpose, size, and features. Create detailed drawings or use design software to visualize the final product. Planning helps avoid mistakes and ensures that the finished island meets your needs.
Measure Twice, Cut Once
Accurate measurements are crucial for a custom kitchen island. Double-check all dimensions before cutting materials to avoid costly mistakes. Use a measuring tape, level, and carpenter’s square to ensure precision. This practice helps ensure that all components fit together perfectly.
Use Quality Materials
Invest in high-quality materials for your kitchen island. While it might be tempting to save money with cheaper options, quality materials will ensure durability and longevity. This applies to everything from the countertop and cabinetry to the hardware and finishes.
Focus on Functionality
While aesthetics are important, functionality should be a priority. Consider how you’ll use the island and include features that enhance its practicality. Ample storage, convenient electrical outlets, and easy-to-clean surfaces are all valuable additions that can make your island more useful.
Pay Attention to Lighting
Good lighting is essential for a functional kitchen island. Plan for adequate lighting above the island, whether through pendant lights, recessed lighting, or a combination of both. Proper lighting enhances both the functionality and the aesthetic appeal of the island.
Get Professional Help When Needed
Some aspects of building a custom kitchen island, such as electrical and plumbing work, may require professional expertise. Don’t hesitate to hire professionals for these tasks to ensure safety and compliance with building codes. Professional help can also be beneficial for tasks like installing heavy countertops or custom cabinetry.
On the V Side: DIY Kitchen Island Update

17 Gorgeous DIY Kitchen Island Plans & Ideas
Small Kitchen Project: Adding an Island
The Schorr Thing: Kitchen Island DIY – How we created our dream kitchen island for under $80

Large Family Kitchen and Island Design Options Design Build Planners

granite waterfall edge – Countertops, Waterfall edge, Kitchen remodel

Stylish Kitchens with Concealed Range Hoods Kitchen range hood

White Oak Island in White Kitchen – MDM Design Studio
Kitchen Design Fix: How to Fit an Island Into a Small Kitchen
Kitchen Banquette Table With a Hexagon Shaped Top – Mortise & Tenon

Related Posts: