Installing an electrical outlet in a kitchen island is a practical and often necessary addition to enhance the functionality of this central workspace. Before embarking on the installation process, it’s crucial to adhere to local building codes and regulations, ensuring that the work is done safely and up to standard.
Begin by carefully planning the placement of the electrical outlet on the kitchen island. Consider the intended use of the island, including whether it will be used for cooking, food preparation, or other activities. The outlet should be conveniently located to accommodate various appliances and devices without impeding the island’s functionality.
Turn off the power to the kitchen island at the circuit breaker to ensure safety during the installation process. Use a non-contact voltage tester to verify that the power is indeed off before proceeding. Safety should always be the top priority when working with electrical components.
Once the power is off, determine the type of electrical box needed for the installation. For kitchen islands, a standard electrical box may be suitable, but if the island has a stone or solid surface countertop, a floor box or pop-up receptacle box specifically designed for these surfaces may be required.

Cut an opening in the kitchen island countertop for the electrical box. This can be done using a jigsaw or a reciprocating saw, depending on the material of the countertop. Take care to make precise and clean cuts to ensure a proper fit for the electrical box.
Insert the electrical box into the opening, securing it in place according to the manufacturer’s instructions. If the box is designed for a stone or solid surface countertop, follow the specific installation guidelines provided with the box.
Run electrical wiring from the existing power source to the location of the electrical box in the kitchen island. This may involve drilling holes through the floor or running the wiring through the wall, depending on the kitchen’s layout. Use appropriate wiring methods and materials to comply with local electrical codes.
Connect the wiring to the electrical outlet, following standard electrical procedures and safety guidelines. Ensure that the wires are securely connected, with proper insulation and protection. Use wire nuts to secure the connections and prevent any exposed wires.
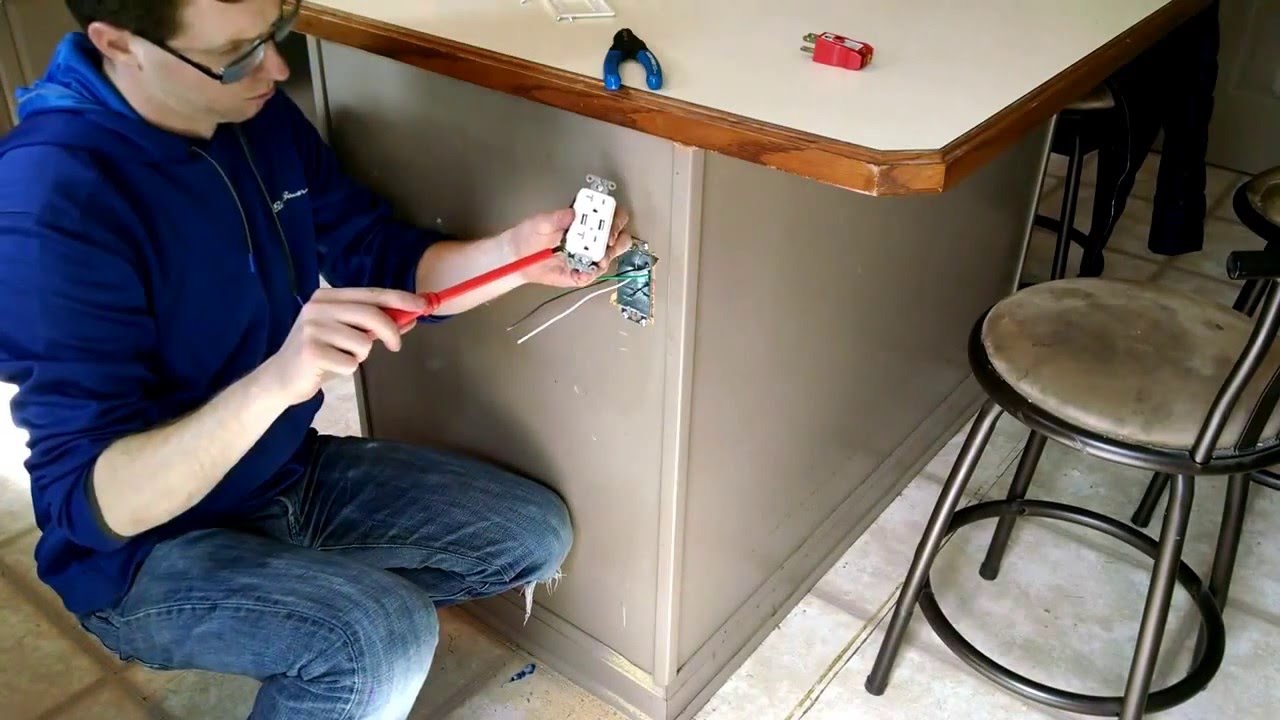
Install the electrical outlet into the electrical box, securing it in place with the provided screws. Ensure that the outlet is level and fits snugly into the box. Tighten the screws according to the manufacturer’s specifications.
Test the electrical outlet before securing the cover plate. Turn the power back on at the circuit breaker and use a voltage tester to verify that the outlet is receiving power. Test the outlet with a small device to ensure it is functioning correctly.
Once the outlet has been tested and confirmed operational, install the cover plate. The cover plate not only provides a finished and aesthetic look but also adds an extra layer of safety by concealing the electrical components.
Secure the cover plate with the provided screws, making sure it sits flush against the countertop. Use a screwdriver to tighten the screws without over-tightening, as this could damage the cover plate or the electrical outlet.

Inspect the entire installation to ensure all components are secure and properly aligned. Double-check the wiring connections, the outlet, and the cover plate for any issues. Address any discrepancies promptly to guarantee the safety and functionality of the electrical outlet.
Consider additional safety measures, such as installing ground-fault circuit interrupter (GFCI) outlets in the kitchen island. GFCI outlets are designed to quickly disconnect power in the event of a ground fault, providing an extra layer of protection in areas where water and electricity may come into contact.
Last, document the installation, including the location of the electrical outlet and any additional safety features, for future reference. This documentation can be valuable for homeowners, future renovations, or if any electrical work needs to be performed in the kitchen.
Installing an electrical outlet on a kitchen island requires careful planning, adherence to safety protocols, and compliance with local building codes. By following these step-by-step guidelines, homeowners can successfully add a convenient and functional electrical outlet to their kitchen island, enhancing the versatility and usability of this central space. Always consult with a qualified electrician or professional if you are uncertain about any aspect of the installation process.

enzy living: Alternatives to Ugly Outlets in Kitchen Islands

kitchen island electrical outlet placement – Google Search Muebles dormitorio juvenil, Muebles

How to Install Electric Outlets on a Kitchen Island Home Guides SF Gate

How to Install Electric Outlets on a Kitchen Island eHow

Ikea island power outlet – YouTube

7 Kitchen island ideas electrical outlets, kitchen, kitchen outlets

Mainline Power sockets installed into kitchen island. A powerful way to live and work

Kitchen Design Idea – Install A Pop-Up Outlet Directly Into Your Countertop CONTEMPORIST

Kitchen Island Electrical Outlet Ideas – Tentang Kitchen

Kitchen island has functional and decorative functions, but not all of them created equal

Related Posts: