Understanding the Basics of Kitchen Faucet Leaks
Kitchen faucets are essential fixtures in our homes, providing water for cooking, cleaning, and drinking. Over time, however, they can develop leaks due to wear and tear or damage. Understanding the basics of kitchen faucet leaks is crucial for timely repairs and preventing further damage.
A leaking faucet can be caused by various factors, including worn-out seals, damaged cartridges, loose parts, or corrosion. Identifying the source of the leak is the first step in repairing the faucet. Leaks can occur at the base of the faucet, the spout, or the handles. Each location may indicate a different underlying issue that needs to be addressed.

Common symptoms of a leaking faucet include water pooling around the base, a persistent drip from the spout, or water leaking from the handles when they are turned on or off. Ignoring these signs can lead to more significant problems, such as water damage to cabinets and countertops or increased water bills due to wasted water. Early detection and repair can save time, and money, and prevent further damage.
Different types of faucets have different mechanisms and parts, which can affect how they are repaired. The four main types of kitchen faucets are compression, ball, cartridge, and disc faucets. Each type has its unique components and methods of repair. Knowing what type of faucet you have is essential for selecting the right replacement parts and following the correct repair procedures.

Before attempting any repairs, it’s important to gather the necessary tools and materials. Common tools needed for faucet repair include an adjustable wrench, screwdrivers, pliers, and a plumber’s tape. Replacement parts such as O-rings, cartridges, or seals may also be needed depending on the type and extent of the leak. Having these tools and parts ready can make the repair process smoother and more efficient.
Safety is another crucial aspect to consider when repairing a leaking faucet. Before starting any repair work, make sure to turn off the water supply to the faucet to prevent accidental flooding. This can usually be done by turning the shut-off valves located under the sink. Additionally, it’s a good idea to place a bucket or towels under the sink to catch any water that may drip during the repair process. Ensuring a safe and prepared workspace can help prevent accidents and make the repair process more manageable.

Identifying the Type of Faucet
Identifying the type of kitchen faucet is a crucial step before starting any repair work. Each type of faucet has different mechanisms and components, and knowing which type you have will guide you in selecting the right repair techniques and replacement parts.
Compression faucets are one of the oldest types and are commonly found in older homes. They operate using a screw that compresses a rubber washer, creating a seal to stop the flow of water. Compression faucets have separate hot and cold handles, and they tend to develop leaks more frequently due to the wear and tear of the rubber washers. Identifying a compression faucet is straightforward; if your faucet has two separate handles and you feel resistance when turning them off, it’s likely a compression faucet.
Ball faucets are a common type of single-handle faucet. They use a ball joint to control the flow and temperature of the water. The ball mechanism is housed within the faucet body and is operated by a single lever. Ball faucets are prone to leaks due to the wear of the internal seals and springs. Identifying a ball faucet is easy if your faucet has a single handle that moves in a spherical motion to adjust the water flow and temperature.

Cartridge faucets can be either single-handle or double-handle. They use a movable cartridge to control the flow of water. The cartridge can be made of brass, plastic, or ceramic. Cartridge faucets are known for their durability and ease of repair. To identify a cartridge faucet, look for a smooth, consistent action when turning the handle(s) on and off, with no noticeable resistance or grinding.
Disc faucets are a modern and durable type of faucet that uses a pair of ceramic discs to control the flow of water. These faucets are usually single-handle and are known for their reliability and low maintenance. Identifying a disc faucet involves checking for a wide, cylindrical body that houses the ceramic disc cartridge. The handle typically moves in a smooth, up-and-down, and side-to-side motion to control the water flow and temperature.
Once you have identified the type of faucet, the next step is to gather the appropriate replacement parts. Most faucet manufacturers provide detailed diagrams and part numbers for their products, which can be found online or in the product manual. Using these resources can help you find the exact parts needed for your specific faucet model, ensuring a proper fit and a successful repair.

Step-by-Step Guide to Repairing Different Faucet Types
Repairing a leaking kitchen faucet involves different steps depending on the type of faucet. Here is a detailed guide for each type of faucet to help you address the most common issues.
Compression Faucets
Turn Off the Water Supply: Locate the shut-off valves under the sink and turn them off. Open the faucet to release any remaining water in the lines.
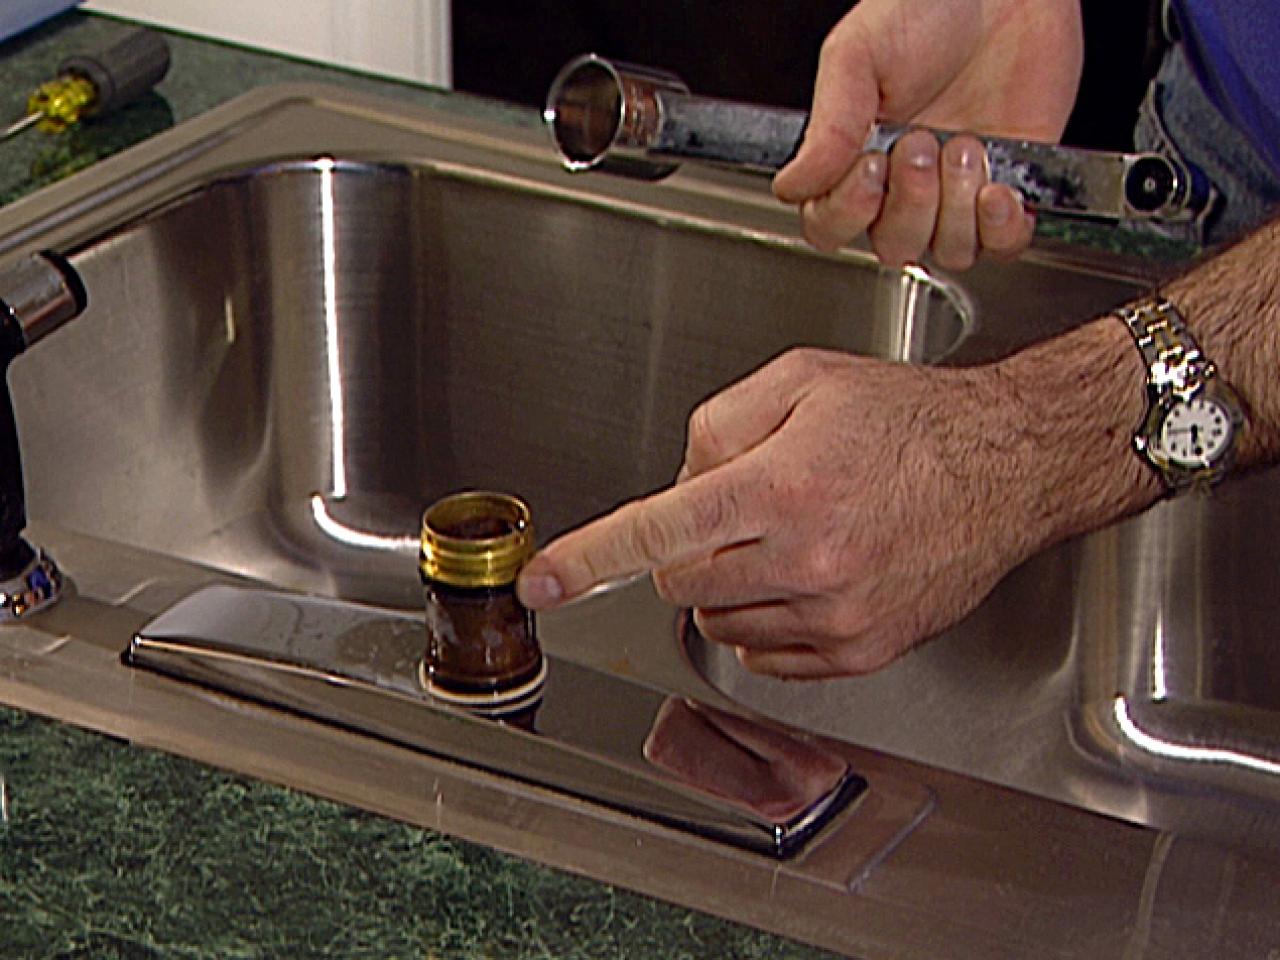
Remove the Handles: Use a screwdriver to remove the screws holding the handles in place. Lift the handles off to expose the valve stems.
Remove the Valve Stem: Use an adjustable wrench to loosen and remove the valve stem. Inspect the valve seat for any signs of damage or wear.
Replace the Washer and O-Ring: Remove the old rubber washer and O-ring from the valve stem. Replace them with new ones that match the size and type of the old parts.
Reassemble the Faucet: Reattach the valve stem, tighten it with the wrench, and replace the handles. Turn on the water supply and test the faucet for leaks.

Ball Faucets
Turn Off the Water Supply: Shut off the water supply valves under the sink and open the faucet to drain any remaining water.
Disassemble the Faucet: Use an Allen wrench to remove the handle set screw and lift off the handle. Use pliers to remove the cap and collar.
Remove the Ball Assembly: Lift out the ball assembly and inspect it for wear or damage. Remove the seals and springs using needle-nose pliers.
Replace the Seals and Springs: Install new seals and springs into the faucet body. Ensure they are seated correctly.
Reassemble the Faucet: Reinsert the ball assembly, replace the cap and collar, and tighten them with pliers. Reattach the handle and secure it with the set screw. Turn on the water supply and check for leaks.

Cartridge Faucets
Turn Off the Water Supply: Turn off the shut-off valves under the sink and open the faucet to release any pressure.
Remove the Handle: Use a screwdriver or Allen wrench to remove the handle screw and lift off the handle.
Remove the Cartridge: Use pliers or a cartridge puller tool to remove the retaining nut or clip. Pull out the old cartridge and inspect it for damage.
Install the New Cartridge: Insert the new cartridge into the faucet body, ensuring it is aligned correctly. Replace the retaining nut or clip.
Reassemble the Faucet: Reattach the handle and secure it with the screw. Turn on the water supply and test the faucet for proper operation.

Disc Faucets
Turn Off the Water Supply: Shut off the water supply valves and open the faucet to drain any remaining water.
Remove the Handle: Use an Allen wrench to remove the handle set screw and lift off the handle.
Remove the Cartridge: Use pliers to remove the cap and collar. Lift out the ceramic disc cartridge and inspect it for damage or debris.
Clean or Replace the Cartridge: If the cartridge is dirty, clean it with a vinegar solution to remove mineral deposits. If it is damaged, replace it with a new one.
Reassemble the Faucet: Reinsert the cartridge, replace the cap and collar, and reattach the handle. Turn on the water supply and check for leaks.
Preventative Maintenance Tips
Preventative maintenance can extend the lifespan of your kitchen faucet and prevent leaks from occurring. Regular maintenance helps identify and address potential issues before they become major problems.
One of the simplest preventative maintenance tasks is regularly cleaning the faucet aerator. The aerator is a small screen located at the tip of the faucet spout that can become clogged with mineral deposits and debris over time. Removing and cleaning the aerator every few months ensures a steady water flow and prevents blockages that can lead to leaks.
Another important maintenance task is inspecting and replacing O-rings and seals periodically. These small rubber components can wear out over time, leading to leaks around the handles or base of the faucet. Checking these parts annually and replacing them as needed can prevent leaks and extend the life of your faucet.

Maintaining proper water pressure is also crucial for preventing leaks. Excessively high water pressure can cause stress on the faucet’s internal components, leading to leaks. Using a water pressure gauge, check the pressure of your home’s water supply and adjust it to a safe level, typically between 40 and 60 psi. Installing a pressure-reducing valve if necessary can help maintain optimal water pressure.
Regularly checking for signs of corrosion is another key preventative measure. Corrosion can weaken the faucet’s components and lead to leaks. Inspect the faucet body, handles, and spout for any signs of rust or corrosion, and address any issues promptly. Using a mild cleaning solution and a soft cloth can help remove surface corrosion and prevent further damage.
Lubricating the faucet’s moving parts is also essential for smooth operation and preventing leaks. Over time, the internal components of the faucet can become stiff or worn. Applying a silicone-based lubricant to the O-rings, seals, and other moving parts during regular maintenance can ensure smooth operation and reduce wear and tear.
Finally, it’s important to be mindful of how you use the faucet. Avoid using excessive force when turning the handles on or off, as this can damage the internal components. Teach all household members to use the faucet gently and to report any signs of leaks or issues immediately. Proper usage and prompt attention to any problems can prevent minor issues from becoming major repairs.

Common Mistakes to Avoid
When repairing a leaking kitchen faucet, avoiding common mistakes can save time, money, and frustration. Being aware of these pitfalls can help ensure a successful repair and prevent further issues.
Incorrectly Identifying the Faucet Type: One of the most common mistakes is failing to correctly identify the type of faucet. Each type has different repair procedures and parts, so misidentifying the faucet can lead to incorrect repairs and wasted effort. Take the time to accurately identify the type of faucet before starting any repair work.
Not Turning Off the Water Supply: Attempting to repair a faucet without turning off the water supply can result in water spraying everywhere and potential flooding. Always locate and turn off the shut-off valves under the sink before beginning any repairs. Open the faucet to release any remaining water pressure.
Using the Wrong Tools: Using inappropriate tools can damage the faucet’s components and make repairs more difficult. Ensure you have the correct tools for the job, such as adjustable wrenches, pliers, and screwdrivers. Using the right tools helps prevent damage and ensures a more efficient repair process.

Forgetting to Check for Replacement Parts Compatibility: Installing incompatible replacement parts can lead to persistent leaks or new issues. When purchasing replacement parts, ensure they are compatible with your specific faucet model. Check the manufacturer’s guidelines or bring the old parts to the store for comparison.
Overtightening Components: Overtightening screws, nuts, and other components can strip threads or crack parts, leading to new leaks or damage. Tighten components just enough to create a secure seal without applying excessive force. Using a gentle touch and checking for proper alignment can prevent overtightening.
Neglecting to Inspect Other Components: When repairing a leaking faucet, it’s essential to inspect other components for wear and tear. Focusing solely on the immediate issue and neglecting other potential problem areas can lead to future leaks. Inspect all seals, O-rings, and moving parts, and replace any worn or damaged components to ensure a comprehensive repair.

How do I know what type of faucet I have?
Identifying the type of faucet is essential for proper repair. Look for distinguishing features such as the number of handles, the movement of the handle(s), and the internal components. Compression faucets have separate hot and cold handles and a noticeable resistance when turned off. Ball faucets have a single handle that moves in a spherical motion. Cartridge faucets can have single or double handles with smooth operation. Disc faucets have a wide, cylindrical body and a single handle that moves in a smooth motion.
Why is my faucet still leaking after replacing the cartridge?
If your faucet is still leaking after replacing the cartridge, there could be several reasons. Ensure that the new cartridge is properly aligned and seated. Check for any debris or mineral deposits inside the faucet body that may be preventing a proper seal. Inspect the O-rings and seals for wear and replace them if necessary. Additionally, make sure the retaining nut or clip is securely tightened.
Can I repair a leaking faucet myself, or should I hire a professional?
Many faucet leaks can be repaired by homeowners with basic tools and replacement parts. If you feel comfortable identifying the faucet type, gathering the necessary tools, and following repair instructions, you can likely fix the leak yourself. However, if the issue is complex or if you are unsure about the repair process, hiring a professional plumber can ensure a proper and lasting fix.
What should I do if I cannot find the shut-off valves for my faucet?
If you cannot locate the shut-off valves under the sink, you may need to turn off the main water supply to your home. The main shut-off valve is typically located near the water meter or where the main water line enters the house. Turning off the main water supply will stop the flow of water to all fixtures, allowing you to safely repair the faucet. Once the repair is complete, turn the main water supply back on and check for leaks.
How often should I perform maintenance on my kitchen faucet?
Regular maintenance can help prevent leaks and extend the life of your kitchen faucet. It’s a good idea to inspect and clean the faucet aerator every few months, check and replace O-rings and seals annually, and lubricate moving parts as needed. Additionally, periodically inspect the faucet for signs of corrosion or wear and address any issues promptly. Regular maintenance can help keep your faucet in good working condition and prevent unexpected repairs.

Related Posts:
- Kitchen Sink Faucet Replacement Parts
- Boharers Kitchen Faucet
- Moen Anabelle Kitchen Faucet Reviews
- Ultimate Kitchen Faucet
- Pfister Ainsley Kitchen Faucet
- Kitchen Faucet Splashing
- Kitchen Faucet Hot Water Pressure Low
- How To Tighten Loose Moen Kitchen Faucet Handle
- Kohler Vs Moen Vs Delta Kitchen Faucets
- Delta Vs Kohler Kitchen Faucets