A leaking kitchen faucet can be more than just an annoyance; it can lead to wasted water, increased utility bills, and even water damage to cabinets and countertops. Fortunately, most faucet leaks are fixable with a few tools and some basic knowledge. Understanding the type of faucet you have—whether it’s a compression, ball, cartridge, or ceramic disk faucet—is the first step in determining the proper repair process. Each type has unique components and mechanisms that can wear down over time, causing leaks. For example, a compression faucet uses washers that can deteriorate, while a cartridge faucet may have worn O-rings. Knowing the specific type helps target the right parts and methods for repair.
One of the first steps in fixing a leaking faucet is to shut off the water supply to prevent any unwanted mess. Most kitchen sinks have shut-off valves located under the sink, and turning these off stops water from flowing to the faucet. If these valves are not present or not working, you may need to turn off the main water supply to your house. Shutting off the water also allows you to inspect the faucet without worrying about excess water, which is especially helpful when you start disassembling the faucet parts to find the root cause of the leak.

After turning off the water, it’s helpful to plug the sink drain. This prevents small parts, such as screws or washers, from falling down the drain during the repair process. A cloth or towel can also be placed over the drain to catch any debris or excess water. This simple step can save a lot of hassle later on and make it easier to keep track of parts as you work on the faucet. Organization is key during a repair, so lay out all the tools and materials you’ll need beforehand, such as an adjustable wrench, screwdrivers, replacement parts, and plumber’s tape.
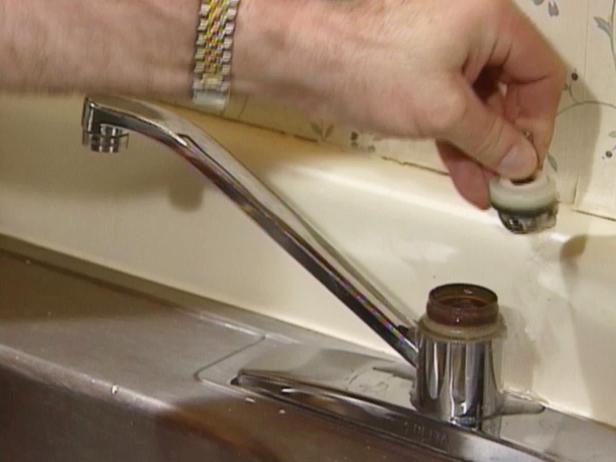
With the faucet disassembled, inspect each part carefully to identify any visible signs of wear or damage. Leaks often occur due to worn washers, O-rings, or seals, which are relatively inexpensive and easy to replace. Compression faucets, for example, usually leak when the rubber washers are worn out, causing a poor seal. Similarly, cartridge and ball-type faucets may have degraded O-rings that lead to dripping. Once you’ve identified the problem area, you can purchase replacement parts from a hardware store. Bringing the old parts with you can help ensure you get the correct size and type.

Once you’ve identified and gathered the replacement parts, clean the inside of the faucet to remove any buildup of mineral deposits or debris that may interfere with the new parts. Mineral deposits are common, especially in areas with hard water, and they can prevent parts from sealing properly. Use a vinegar solution or a commercial descaler to gently clean these areas, making sure not to scratch or damage the faucet’s surface. Removing buildup allows the new components to fit snugly, reducing the chances of future leaks.
After cleaning, it’s time to install the new parts. For a compression faucet, this typically means replacing the washers and potentially the valve seat, while for cartridge and ball faucets, the O-rings or seals will need replacement. Apply a small amount of plumber’s grease to the new parts to help them fit smoothly and improve their longevity. Make sure each component is securely seated, as a loose washer or O-ring can cause further leaks or drips. This step ensures that the faucet will be leak-free once reassembled.

Reassembling the faucet involves carefully putting each part back in its correct place. It’s helpful to follow a reverse order of disassembly, ensuring that each component is properly aligned and tightened. Avoid over-tightening, as this can damage the faucet parts or create excess pressure that leads to further leaks. Use the wrench or pliers sparingly and gently, as most parts only need to be snug to form a watertight seal. Proper reassembly is crucial to ensure that all parts work in harmony and prevent new leaks.
After reassembly, turn the water supply back on slowly, checking for any signs of leakage as water flows through the faucet. Open the faucet completely to allow any trapped air to escape, and observe if the dripping has stopped. Sometimes, leaks may still persist if parts are not properly aligned, in which case a minor adjustment may be needed. Watching closely for any small leaks or drips helps confirm that the repair was successful or if further troubleshooting is needed.
In cases where leaks persist even after replacing common parts, it may be necessary to check the faucet’s valve seat or consult a professional plumber. The valve seat, which connects the faucet to the spout, can become corroded over time, especially with constant water exposure. This corrosion can prevent the faucet from forming a watertight seal, leading to leaks. Replacing or resurfacing the valve seat can resolve the issue in more severe cases, but it may require specialized tools or professional assistance.

A leaking kitchen faucet can also be due to high water pressure, which forces water out even if the faucet is turned off. Checking the home’s water pressure and adjusting it as needed can sometimes solve the problem without any faucet repair. High water pressure not only increases the likelihood of leaks but can also wear out faucet components faster. Installing a pressure regulator on the main water line may be a wise investment if pressure issues are a recurring problem.
For faucets with additional features like pull-out sprayers, check the connections and hoses for signs of leaks. Sometimes, the leak is not within the faucet but in the hose or connection that supplies water to the sprayer. These hoses can wear out, especially if they’re frequently extended or retracted. Replacing a leaking hose is relatively straightforward, usually involving unscrewing the old hose and attaching a new one. This check ensures that the entire faucet system is in good condition and prevents future issues.
Regular maintenance can prevent leaks in the first place. Cleaning faucet aerators, checking for mineral buildup, and occasionally replacing worn parts keep a faucet in good working order. Even with high-quality materials, regular wear and tear can lead to minor leaks over time. Staying proactive with these maintenance steps can extend the faucet’s lifespan, reduce water waste, and help avoid unexpected repairs. By catching minor issues early, you can prevent them from developing into more significant problems that require more complex fixes.

Understanding when to call a professional plumber is important. While many faucet repairs can be done at home, some leaks stem from more complex issues within the plumbing system. For instance, if replacing faucet parts doesn’t stop the leak, there could be a problem with the pipes themselves. A plumber can identify and resolve these issues, ensuring a long-term fix and avoiding potential water damage to cabinets or flooring.
If you’re replacing the faucet entirely due to persistent leaks, consider selecting a high-quality faucet with durable components, as it will be more resistant to leaks. Stainless steel, brass, or ceramic disk faucets are good options as they are known for longevity and low maintenance. Many newer faucets also feature design innovations that reduce wear on parts and include extended warranties, giving added peace of mind for homeowners. Investing in a durable faucet can save time and money in the long run, as well as minimize water waste.
Repairing a leaking kitchen faucet involves identifying the type of faucet, shutting off the water supply, disassembling the faucet, replacing worn parts, and reassembling it with care. With the right tools and replacement parts, most faucet leaks are relatively easy to fix. Regular maintenance and addressing minor issues promptly prevent leaks and help keep the faucet functioning smoothly. Knowing when to seek professional help also ensures that more serious plumbing problems are addressed appropriately, ultimately preserving the functionality and appearance of your kitchen.

Common Mistakes to Avoid
One common mistake is not identifying the correct faucet type, which can lead to buying the wrong replacement parts and making the problem worse. Another is using excessive force when tightening or loosening faucet components; over-tightening can damage the threads or seals, causing additional leaks.
Many people also forget to shut off the water supply, which can result in water flooding during disassembly. Ignoring buildup in the faucet is another issue, as mineral deposits can interfere with the seals, so cleaning these thoroughly is essential. Lastly, neglecting to check the hoses and connections for additional leaks can lead to missed issues, especially in faucets with sprayers or extendable hoses.

How can I identify my faucet type?
Identifying the faucet type involves looking at the handle mechanism and internal components. Compression faucets have separate hot and cold handles, while cartridge, ball, and ceramic disk faucets often have a single handle. Checking the manufacturer’s manual or contacting them with a model number can also help determine the faucet type.
Why does my faucet still leak after replacing parts?
Persistent leaks may be due to a corroded valve seat or high water pressure. If replacing washers, O-rings, or cartridges doesn’t work, the issue might be within the plumbing or valve seat, which may require professional assistance. Sometimes, hidden damage within the faucet’s housing also causes ongoing leaks.
Can I use vinegar to clean my faucet parts?
Yes, vinegar can effectively remove mineral buildup from faucet parts, especially aerators. However, avoid using it on rubber or delicate materials that could degrade in acidity. Soaking parts like cartridges or O-rings in vinegar for too long might weaken them, so use it sparingly and rinse thoroughly.

What tools do I need for faucet repair?
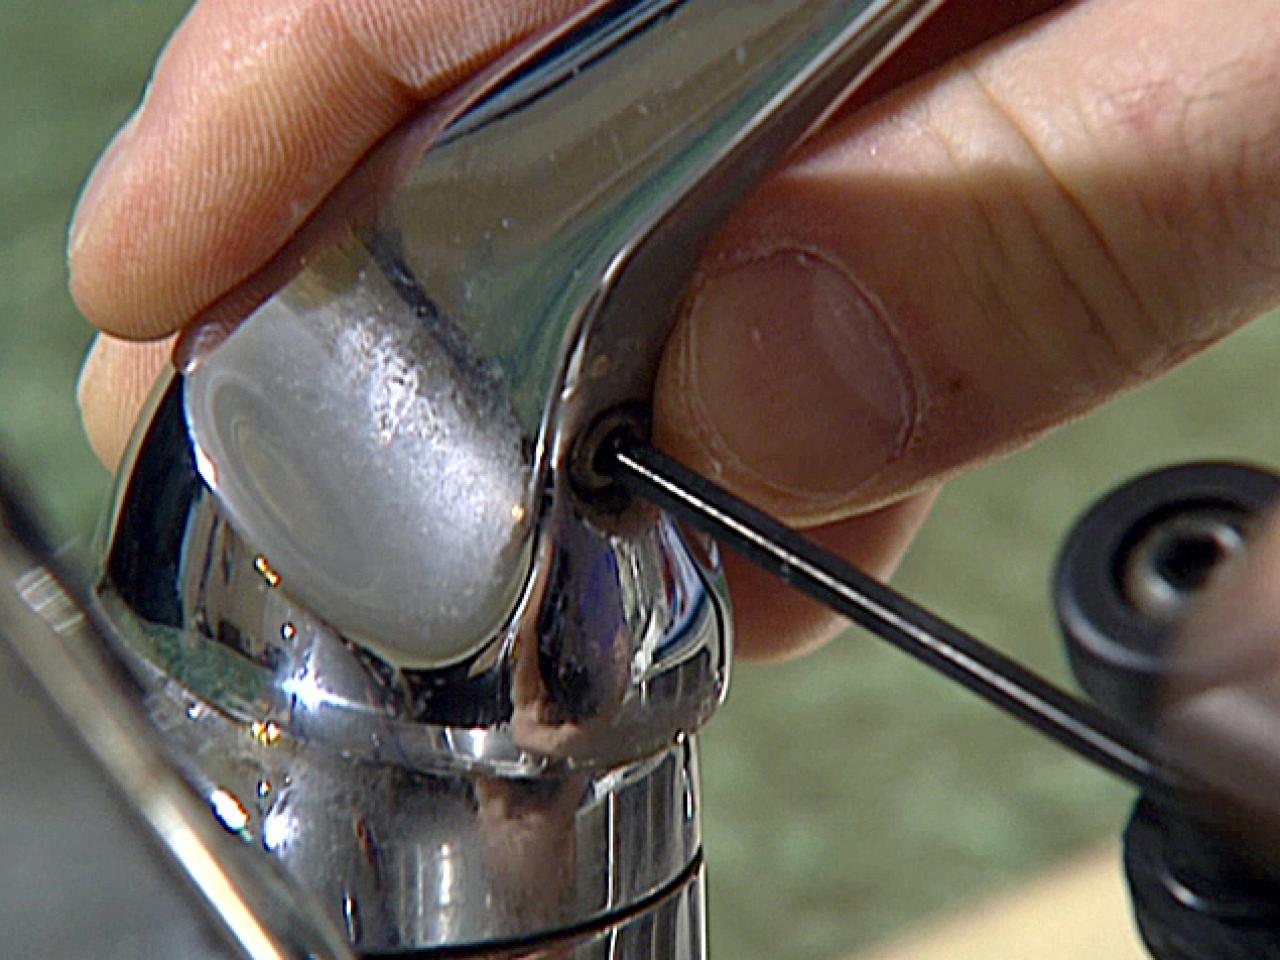
For most faucet repairs, you’ll need an adjustable wrench, screwdrivers, plumber’s tape, replacement washers or O-rings, and a cloth to protect the sink area. Specialty tools, such as an Allen wrench or cartridge puller, may be necessary depending on the faucet model, so check the faucet manually.
How often should I replace faucet components to prevent leaks?
Routine maintenance every few years can help prevent leaks, depending on the water quality and usage frequency. Washers, O-rings, and seals tend to wear out fastest and may need replacement every 3–5 years. Regularly cleaning aerators and checking for buildup extends the life of the faucet components.
When should I call a plumber for faucet repairs?
If the leak persists despite replacing basic components, or if you notice any signs of internal pipe damage or corrosion, it’s best to consult a plumber. Professional assistance ensures any underlying issues are addressed correctly, avoiding potential water damage or structural problems in your kitchen.

Moen Style Kitchen Faucet Repair

How to fix a leaky moen faucet

Repair Kitchen Faucet Leak

How To Remove A Kitchen Faucet With Spray
Related Posts:
- Ariza Kitchen Faucet With Spring Spout
- Delta Kitchen Faucet Leaking Under Sink
- Coralais Kitchen Faucet
- How Much To Change Kitchen Faucet
- My Kitchen Faucet Is Leaking At The Base
- Kohler Triton Kitchen Faucet
- Delta Leland Kitchen Faucet Repair
- How To Install A Moen Kitchen Sink Faucet
- Vigo Chrome Pull Down Spray Kitchen Faucet
- Dual Function Kitchen Drinking Filter Faucet