Elevating Your Kitchen with a Herringbone Pattern Backsplash
The kitchen backsplash serves both a practical and aesthetic purpose in the kitchen, protecting walls from splashes and spills while adding style and personality to the space. Among the myriad of design options available, the herringbone pattern stands out for its timeless elegance and visual appeal. In this comprehensive guide, we’ll show you the beauty of the herringbone pattern for kitchen backsplashes, explore design variations, discuss installation methods, and offer tips for maximizing its impact on your kitchen.
The Allure of the Herringbone Pattern
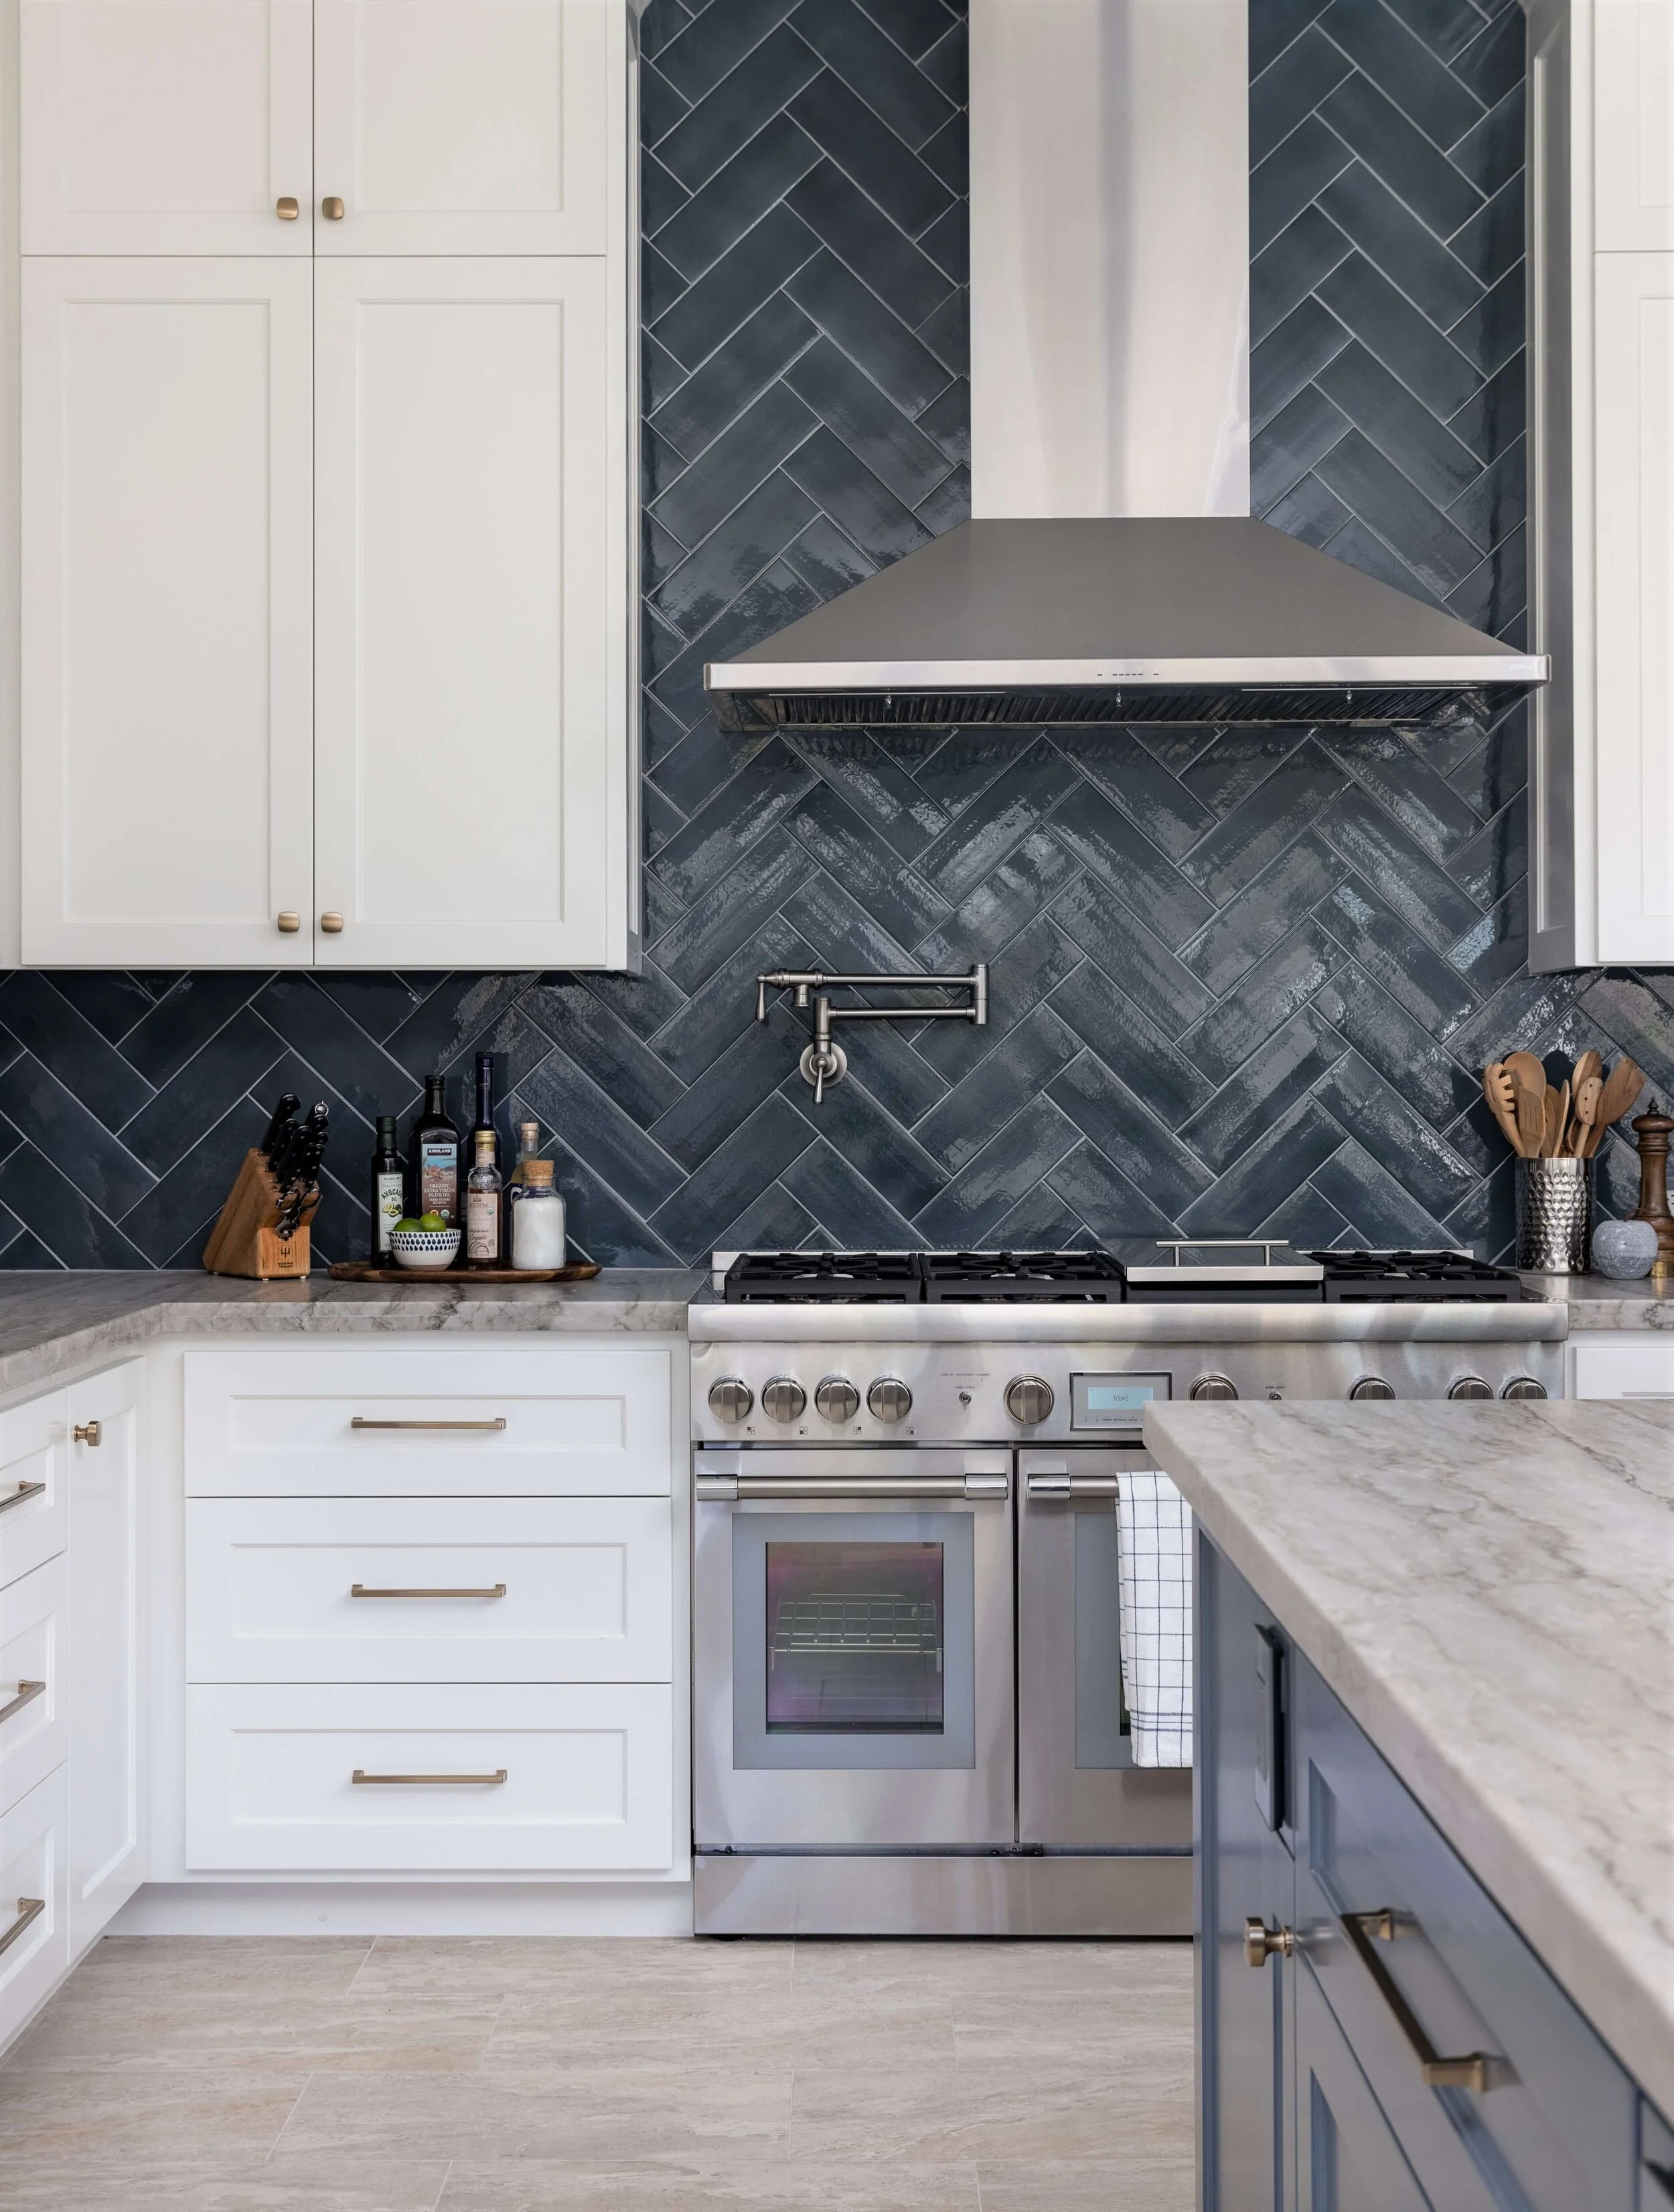
The herringbone pattern is characterized by its distinctive V-shaped arrangement of tiles or bricks, creating a visually striking and dynamic effect. Originating from the weaving technique used in herringbone textiles, this pattern adds depth and texture to kitchen backsplashes, making them a focal point of the room. Its classic yet contemporary appeal makes it a popular choice for homeowners seeking to infuse their kitchens with character and charm.
Design Variations for Herringbone Backsplashes
While the traditional herringbone pattern consists of rectangular tiles or bricks arranged at a 45-degree angle, there are several design variations to consider:
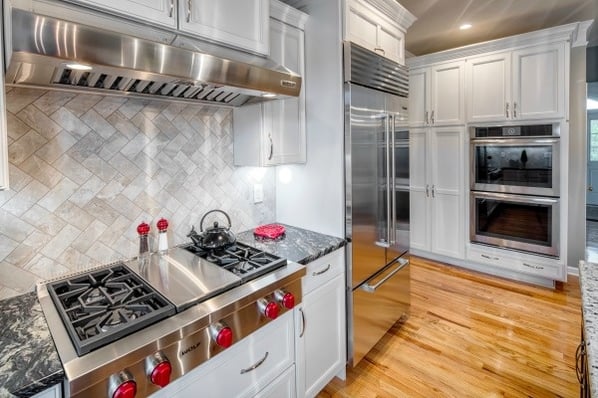
Tile size and material: Herringbone patterns can be created using tiles of various sizes, materials, and colors, allowing for endless design possibilities. From sleek subway tiles to rustic ceramic tiles, the choice of tile can significantly impact the overall look and feel of the backsplash.
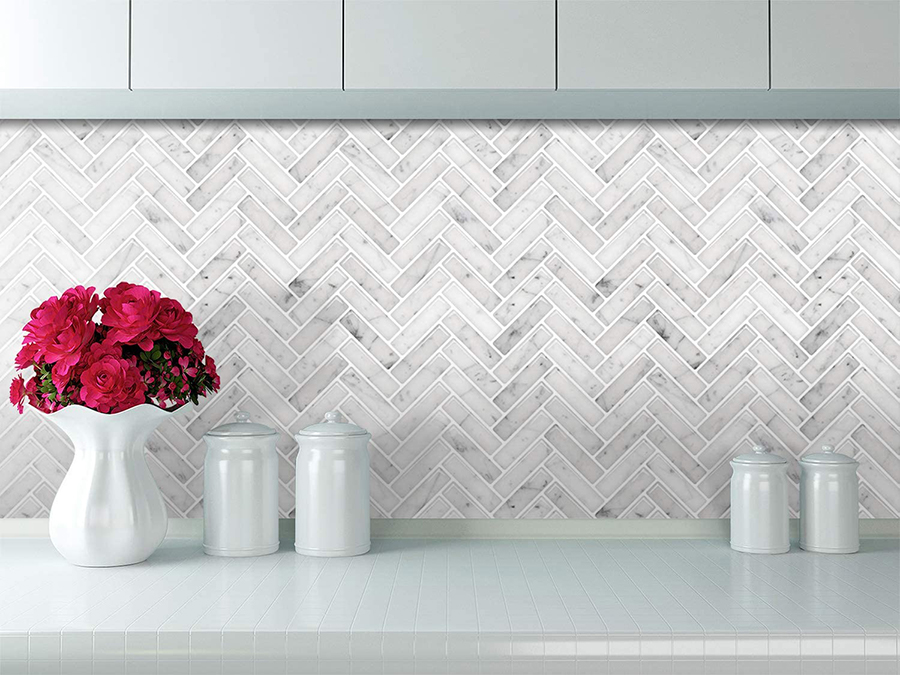
Color contrast: Experimenting with contrasting colors can enhance the visual impact of the herringbone pattern. Pairing light-colored tiles with dark grout or vice versa can create a dramatic and eye-catching effect, adding depth and dimension to the backsplash.
Border or frame: Adding a border or frame around the herringbone pattern can provide a polished and cohesive look. Consider using a different tile shape or color to outline the edges of the backsplash, creating a seamless transition between the pattern and the surrounding walls.
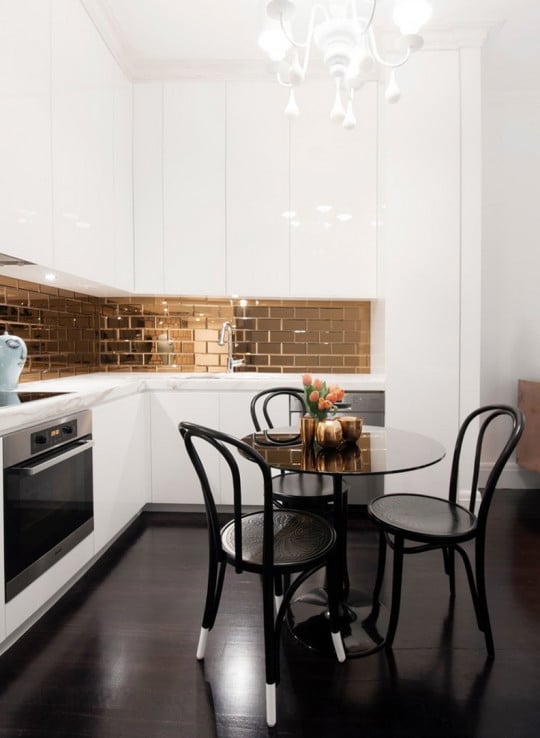
Mixed materials: Mixing different materials, such as glass, stone, or metal, within the herringbone pattern can add interest and texture to the backsplash. Incorporating metallic accents or iridescent tiles can introduce a touch of glamour and sophistication to the kitchen.

Installation Methods for Herringbone Backsplashes
Installing a herringbone pattern backsplash requires precision and attention to detail to ensure a seamless and professional finish. Here’s a step-by-step guide to the installation process:
Prepare the surface: Start by thoroughly cleaning and priming the wall surface to ensure proper adhesion of the tiles. If necessary, use a level and spacers to mark guidelines for the herringbone pattern to ensure even spacing and alignment.
Cut tiles to size: Use a tile cutter or wet saw to cut tiles to the appropriate size and shape for the herringbone pattern. Pay careful attention to the angle of the cuts to achieve the desired V-shaped arrangement.
Apply adhesive: Apply a thin layer of tile adhesive to the wall using a trowel, working in small sections at a time. Press the tiles firmly into place, following the marked guidelines for the herringbone pattern. Use tile spacers to maintain consistent spacing between tiles.
Grout the tiles: Once the adhesive has dried, remove the tile spacers and apply grout to the gaps between the tiles using a grout float. Use a damp sponge to remove excess grout and smooth the grout lines. Allow the grout to dry completely before sealing the backsplash.

Tips for Maximizing Impact
To make the most of your herringbone pattern backsplash, consider the following tips:
Lighting: Install under-cabinet lighting or pendant fixtures above the backsplash to highlight the intricate details of the herringbone pattern and create a warm and inviting ambiance in the kitchen.
Contrast: Pair the herringbone pattern backsplash with complementary countertop materials and cabinetry to create visual contrast and balance in the kitchen. Dark countertops can provide a striking backdrop for light-colored tiles, while light countertops can enhance the vibrancy of darker tiles.
Maintenance: Seal the grout lines regularly to protect against moisture and stains and keep the backsplash looking fresh and pristine. Use a mild detergent and water solution to clean the tiles and grout periodically, avoiding abrasive cleaners that can damage the surface.
Accessorize: Enhance the aesthetic appeal of the herringbone pattern backsplash by accessorizing with decorative elements such as ceramic vases, potted herbs, or artwork. Choose accessories that complement the colors and textures of the tiles to create a cohesive and harmonious look.

Common Mistakes to Avoid
Poor planning: Failing to plan the layout and design of the herringbone pattern backsplash can result in uneven spacing, misaligned tiles, or awkward cuts. Take the time to measure and mark guidelines before starting the installation to ensure a professional-looking finish.
Inadequate preparation: Skipping proper surface preparation can lead to adhesion issues and tile failure over time. Make sure to clean and prime the wall surface before installing the tiles to ensure they adhere properly and withstand daily wear and tear.
Incorrect tile cutting: Cutting tiles at the wrong angle or size can disrupt the herringbone pattern and detract from its visual appeal. Take care to measure and cut tiles accurately to maintain the integrity of the pattern and achieve a seamless finish.
Overlooking grout maintenance: Neglecting to seal and maintain the grout lines can result in discoloration, staining, and mold growth over time. Regularly seal the grout lines and clean them with a mild detergent to preserve the appearance of the backsplash.

Are herringbone pattern backsplashes difficult to clean?
Herringbone pattern backsplashes are relatively easy to clean with regular maintenance. Simply wipe down the tiles and grout lines with a mild detergent and water solution to remove dirt and grime. Avoid using abrasive cleaners that could damage the surface of the tiles.
Can herringbone pattern backsplashes be installed over existing tile?
Yes, herringbone pattern backsplashes can be installed over existing tile as long as the surface is clean, flat, and properly prepared. However, it’s essential to ensure that the new tiles adhere securely to the existing surface to prevent them from coming loose over time.
What types of tiles are suitable for herringbone pattern backsplashes?
Herringbone pattern backsplashes can be created using a variety of tile materials, including ceramic, porcelain, glass, and natural stone. Choose tiles that are suitable for use in kitchens and provide the desired aesthetic and durability for your space.
Is it necessary to use tile spacers when installing a herringbone pattern backsplash?
Yes, using tile spacers is essential when installing a herringbone pattern backsplash to ensure consistent spacing between tiles and achieve a professional-looking finish. Spacers help maintain even grout lines and prevent tiles from shifting or slipping during installation.
Can I create a herringbone pattern backsplash myself, or should I hire a professional?
While DIY installation is possible with careful planning and attention to detail, hiring a professional installer may be advisable for complex or large-scale projects. A professional can ensure the herringbone pattern is installed correctly and seamlessly, minimizing the risk of errors and achieving a flawless finish. Additionally, professionals have the necessary tools, expertise, and experience to handle challenging aspects of the installation process, such as cutting tiles and ensuring proper alignment.

Kitchen Backsplash Designs Back Splashes Herringbone Pattern 50+ New Ideas Kitchen wall design

Classic Kitchen Backsplash Ideas That Will Impress Your Guests Kitchen backsplash designs

How to Install Herringbone Backsplash Tile Recipe in 2020 Herringbone backsplash, Diy

Stylish Kitchen Tile Backsplash Ideas
Project of the Month: A Stylish and Practical Kitchen Addition
Herringbone backsplash! transitional kitchen by Von Fitz Design Kitchen Pinterest

2″x6″ White Herringbone Mosaic Tile Mercury Mosaics

Grey herringbone pattern kitchen backsplash. Kitchen ideas Pinterest Herringbone, Kitchen

Best Peel and Stick Backsplash Tile Options in 2024
Related Posts:
- Cheap DIY Kitchen Backsplash
- Vinyl Kitchen Tiles Backsplash
- Small Kitchen Backsplash Ideas
- Modern Farmhouse Kitchen Backsplash
- Green Kitchen Backsplash Ideas
- Mexican Tile Backsplash Kitchen Ideas
- Rustic Stone Kitchen Backsplash
- Kitchen Backsplash Tile Ideas
- Decorative Kitchen Backsplash Ideas
- Kitchen Backsplash Tile Designs