Building your own DIY kitchen sink cabinet can be a highly rewarding project, providing both a sense of accomplishment and a personalized touch to your kitchen. While it may seem daunting at first, with the right materials, tools, and planning, you can create a functional and aesthetically pleasing sink cabinet that fits perfectly into your space. The first step in any DIY kitchen sink cabinet project is to carefully measure your kitchen area and determine the size of the cabinet. You’ll need to consider the dimensions of the sink you plan to install and make sure the cabinet allows for adequate space for plumbing connections and storage. Careful measuring is crucial to ensure the sink cabinet fits seamlessly into your kitchen layout.
Once you have your measurements, it’s time to gather materials. Most DIY kitchen sink cabinets are built from plywood, as they offer a good balance of durability and workability. Plywood comes in different thicknesses, with ¾ inch being a common choice for the cabinet frame and sides. You’ll also need wood glue, screws, hinges, and handles or knobs for the doors. For the countertop, solid wood or laminate are popular choices, though some DIY enthusiasts opt for more high-end materials like quartz or granite. It’s important to choose materials that match the style of the rest of your kitchen and fit within your budget.

Cutting the wood pieces to size is one of the most important and precise parts of the process. If you’re using plywood for the cabinet box, you’ll need to cut the base, sides, back, and front panels to your measured specifications. For added support, you might want to include vertical dividers or braces, especially if the sink is heavy. The cutouts for the plumbing also need to be precise, as you’ll need enough space for the pipes to fit while ensuring the integrity of the cabinet remains strong. A jigsaw is typically used to cut out the holes for plumbing in the back panel or bottom of the cabinet.
Once your wood is cut, assembling the cabinet begins by building the basic frame. Start with the base and attach the sides, using wood glue and screws to secure them in place. Make sure to use a carpenter’s square to ensure that all the angles are perfectly square, as even a slight misalignment can cause issues when installing the sink or doors. After the sides are secured, the back panel is attached, followed by the front. Reinforcing the joints with screws will add extra stability to the structure.

Installing the sink itself is one of the more complex steps, as it involves precise placement and alignment. Before dropping the sink into place, you’ll need to ensure the opening on the countertop matches the sink’s dimensions. If the countertop needs cutting, use a jigsaw to carefully carve out the necessary space. For an undermount sink, you’ll also need to apply silicone adhesive around the rim to ensure a watertight seal before securing it with brackets underneath. Once the sink is installed, the plumbing connections can be made, including attaching the water supply lines and drain pipes.
The cabinet doors are usually the final component to be installed. For a clean and professional look, ensure that the doors are aligned perfectly with the cabinet frame. You can use concealed hinges, which are hidden inside the cabinet when closed, for a sleeker appearance. Attaching handles or knobs is the final touch, and it’s important to align them uniformly across both doors for consistency. If desired, you can add soft-close hinges to prevent the doors from slamming shut, adding a level of luxury to your DIY project.

Painting or staining your DIY kitchen sink cabinet is another important step, as this will determine the final look of the cabinet and how well it blends with the rest of your kitchen. Before applying any paint or stain, ensure that all surfaces are sanded smooth to eliminate any rough edges or splinters. Primer is recommended if you plan on painting the cabinet, as it helps the paint adhere better and prevents any wood grain from showing through. Staining, on the other hand, highlights the natural beauty of the wood and gives the cabinet a more rustic or classic look. Be sure to apply a protective sealant, especially for the countertop, to guard against water damage and wear.
One important aspect to remember in a DIY kitchen sink cabinet project is the ventilation and moisture control. Since the area under the sink is prone to water spills and humidity from the plumbing, proper moisture-resistant materials or finishes are essential to prevent mold or warping. Using moisture-resistant plywood or adding a waterproof liner under the sink can protect the cabinet from future damage. Additionally, leave some ventilation space inside the cabinet or install a small vent to help air circulate and keep the area dry.
Adding storage features to your DIY kitchen sink cabinet can enhance its functionality. Shelving units, pull-out trays, or even built-in trash bins can be integrated into the cabinet to optimize the space under the sink. Adjustable shelving is especially useful since it allows you to change the height based on what you need to store, such as cleaning supplies or larger items. If you plan to store heavy items, make sure the shelves are reinforced and can handle the weight without bowing over time.
For the more advanced DIYer, incorporating additional features such as lighting or built-in soap dispensers can elevate the cabinet’s functionality. LED strip lights placed inside the cabinet can illuminate the storage area, making it easier to find items in low light. Adding a pull-out towel bar or hooks on the inside of the cabinet doors can provide convenient access to dish towels or cleaning tools, making the space more organized and efficient.

To ensure your DIY kitchen sink cabinet stands the test of time, proper care and maintenance are key. Regularly check for any leaks or water damage under the sink, as small drips can cause significant damage if left unattended. Re-seal the countertop as needed, especially if it’s made of wood or laminate, to protect it from moisture. Additionally, periodically tightening screws or adjusting hinges will keep the doors operating smoothly and prevent them from becoming loose over time.
Safety is an important consideration during the construction and installation process. Wear appropriate protective gear, such as safety glasses and gloves, when handling power tools or cutting wood. If you’re not confident with the plumbing or electrical work involved in the project, it may be wise to hire a professional to assist with these aspects. This ensures that all connections are secure and prevents potential damage or accidents down the line.
Budgeting is a crucial aspect of any DIY project, and building your kitchen sink cabinet is no exception. While doing the work yourself can save money, it’s important to account for all materials and tools, as costs can add up quickly. If you already own basic woodworking tools, you’ll only need to purchase materials like wood, paint, and hardware. However, if you need to buy tools, such as saws or drills, this can significantly increase the overall cost. Planning and sticking to a budget can help you avoid unexpected expenses and ensure you have all the materials needed to complete the project.
Lastly, don’t rush the process. Building a DIY kitchen sink cabinet takes time and patience, especially if you’re new to woodworking or cabinetry. Rushing through the steps can lead to mistakes, such as misaligned pieces or incorrect measurements, which can be difficult to fix later on. Take the time to double-check measurements, use the right tools, and ensure each step is completed correctly. In the end, the time and effort you invest will pay off in a sturdy, functional, and attractive kitchen sink cabinet.

Common Mistakes to Avoid
One common mistake is not measuring correctly. Inaccurate measurements can lead to issues with fitting the sink, plumbing, or even the cabinet itself into the kitchen space. Another mistake is using low-quality materials. While saving money on cheaper wood or hardware may seem appealing, these materials can wear out quickly, leading to damage and the need for replacement sooner.
Improper sealing or waterproofing is another common oversight, which can result in water damage to the cabinet. Failing to reinforce the cabinet’s structure to support the weight of the sink and plumbing is another critical error, as this can lead to sagging or warping over time.

How difficult is it to build a DIY kitchen sink cabinet?
Building a DIY kitchen sink cabinet can range from moderately difficult to complex, depending on your skill level and the specific design you’re aiming for. For those with basic woodworking skills, constructing the cabinet frame and assembling the pieces is fairly straightforward. However, the challenge often comes with the precision required for sink installation, plumbing adjustments, and ensuring everything is square and aligned. Beginners might find it helpful to start with a simpler design before moving on to more complex features.
What materials should I use for a DIY kitchen sink cabinet?
Plywood is a popular choice for building the main structure of the cabinet due to its durability and workability. For the countertop, you can choose from materials like solid wood, laminate, or even quartz or granite if you want a more high-end look. It’s important to select moisture-resistant materials or finishes, especially around the sink area, to prevent warping or mold growth. Hardware such as hinges and handles should be durable and rust-resistant, as they will be exposed to moisture over time.
Can I install the plumbing myself for a DIY kitchen sink cabinet?
Yes, you can install the plumbing yourself if you’re comfortable working with water supply lines and drain pipes. However, if you’re unfamiliar with plumbing work, it may be beneficial to consult a professional to avoid potential leaks or misalignments. DIY plumbing requires precise measurements and connections to ensure that the sink drains properly and there are no water issues. Mistakes in plumbing can lead to costly repairs, so it’s important to proceed with caution if you’re not experienced.

How do I waterproof the inside of a kitchen sink cabinet?
To waterproof the inside of your kitchen sink cabinet, you can apply a waterproof sealant or liner to the surfaces under the sink. Using moisture-resistant plywood for the base and sides of the cabinet will also help. Additionally, installing a small vent can improve air circulation, which helps prevent moisture buildup. Be sure to check for leaks regularly and address any issues promptly to maintain the integrity of the cabinet.
How do I ensure the cabinet doors align properly?
To ensure cabinet doors align properly, start by installing the hinges carefully and adjusting them as needed. Use a carpenter’s level to make sure the doors are hung evenly. For concealed hinges, make sure they are properly fitted within the cabinet and adjusted to align the doors perfectly. After installation, check the door gaps and alignment, making any necessary adjustments to ensure that the doors open and close smoothly and are evenly spaced.
What tools are essential for building a DIY kitchen sink cabinet?
Essential tools for building a DIY kitchen sink cabinet include a saw for cutting wood (such as a circular saw or table saw), a drill for making pilot holes and attaching screws, a jigsaw for cutting out plumbing holes, a measuring tape for precise measurements, and a carpenter’s square to ensure angles are accurate. Additionally, having clamps, sandpaper, a paintbrush or roller for finishing, and a level to ensure everything is aligned properly will make the process smoother and more accurate.

DIY Kitchen Sink and Cabinet with Wooden top

Kitchen Sink Cabinet: Alternative Kitchen Sink Cabinet
stylish corner kitchen sink ideas with dining area

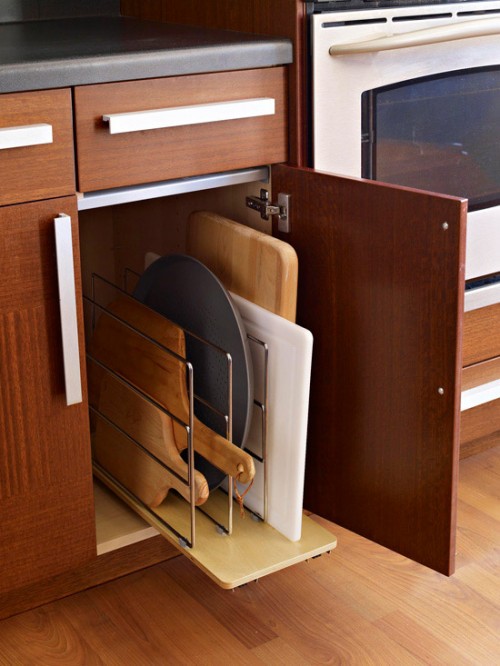
Creative Ideas To Organize Cutting Board Storage

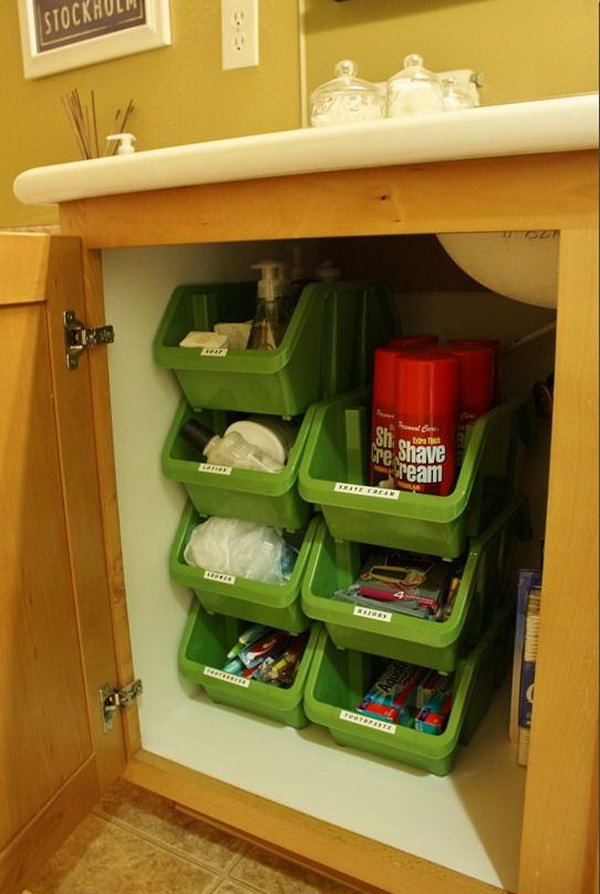
Creative Under Sink Storage Ideas

Related Posts:
- Spray Hose Attachment For Kitchen Sink
- Antique Copper Kitchen Sink Faucet
- Kitchen Sink Erator Not Working
- Kitchen Sink Moscato
- White Kitchen With Farm Sink
- Portable Kitchen Cart With Sink
- 18 Gauge Stainless Steel Undermount Kitchen Sink
- Kitchen Sink Online Shopping
- Sterling Kitchen Sink Clips
- 2nd Hand Single Sink Kitchen Cupboards In Cape Town