When I first encountered a kitchen sink leak, it wasn’t immediately obvious where the issue was coming from. The signs were subtle at first: a damp spot in the cabinet below, a musty smell, and, eventually, small puddles forming. It quickly became clear that what started as a minor annoyance had the potential to escalate into a serious problem, one that could damage cabinetry, and floors, and even lead to mold. Facing a leak under the kitchen sink can feel overwhelming, but understanding how to approach the repair made all the difference.
The first step was to identify the source of the leak. This can be tricky because water travels and can drip far from where it’s leaking. I turned off the water supply to prevent any further damage and used a flashlight to inspect the pipes and connections. In my experience, the most common sources of leaks are loose fittings, worn-out washers, and damaged pipes or connections. Sometimes, leaks are due to corrosion, while at other times, they’re as simple as a poorly fitted joint.

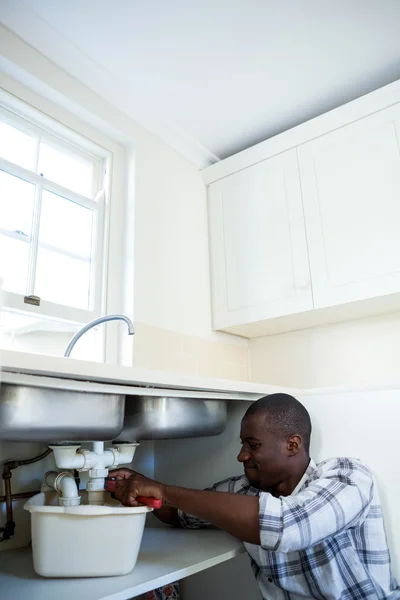
One of the most basic fixes for a kitchen sink leak is tightening the fittings. Compression fittings and slip nuts can loosen over time due to regular use, causing water to seep out. I found that using an adjustable wrench or a pair of pliers was enough to tighten these fittings securely. However, it’s important to be careful not to over-tighten, as this can crack the pipes or cause more damage. After tightening the fittings, I turned the water back on and checked for any lingering signs of leakage.
If tightening the fittings didn’t resolve the issue, the next step was to inspect the sink strainer. The sink strainer is the part of the sink where water drains through into the pipe below. Over time, the plumber’s putty or rubber gasket that seals the sink strainer can wear down, allowing water to seep around it. I removed the strainer by loosening the locknut underneath the sink and found that the putty was cracked and dry. Replacing it was straightforward: I applied a new layer of plumber’s putty, re-seated the strainer, and tightened the locknut back in place. This resolved the issue in cases where the leak was stemming from the strainer.

Leaks can also originate from the faucet itself, particularly if the base is not properly sealed or if the O-rings inside the faucet are worn out. In one instance, I noticed water pooling around the base of the faucet, which indicated a problem with the internal O-rings. To replace these, I turned off the water supply, disassembled the faucet, and swapped the old O-rings for new ones. A bit of plumber’s grease helped ensure a snug fit when I reassembled the parts.
Another common cause of kitchen sink leaks is the P-trap, the curved section of pipe under the sink that holds a small amount of water to block sewer gases from coming into the home. If this piece becomes clogged or cracked, it can lead to leaks. I carefully unscrewed the slip nuts holding the P-trap in place, checked for cracks, and cleaned out any debris or buildup inside. If the P-trap itself was damaged, replacing it was as simple as purchasing a new piece from the hardware store and screwing it back in place.

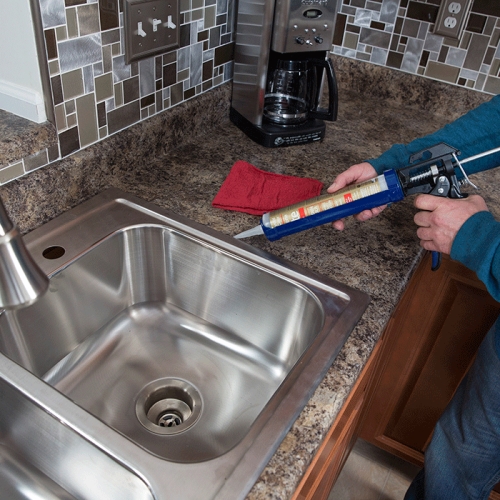
Sealant and caulking are critical components in preventing water damage. I learned that over time, the caulking around the sink or faucet can crack or deteriorate, creating gaps where water can seep through. Removing old caulking with a scraper and applying a fresh bead of waterproof silicone sealant around the sink edges was a simple and effective fix. Letting the sealant cure for 24 hours before using the sink again ensured a watertight seal.
One of the most frustrating leaks I encountered was a slow drip from the water supply line. These thin, flexible tubes connect the main water supply to the faucet and are often secured with compression fittings. A small crack or a worn-out washer in the supply line can lead to an unnoticeable but persistent drip. Replacing the supply line involved shutting off the water supply, disconnecting the old line, and installing a new one with fresh washers to prevent leaks.
Garbage disposals can also be a culprit for kitchen sink leaks, especially if the unit is old or poorly installed. When I found water leaking from the side of the disposal, it turned out that the seal connecting it to the sink drain had worn out. Replacing the seal involved detaching the disposal, installing a new rubber gasket, and remounting the unit. Checking for loose mounting screws and retightening them also helped to secure the connection.
I realized that not all leaks are immediately visible, and some may be hidden behind walls or cabinetry. If a leak is suspected but not obvious, using a moisture meter can help identify damp spots behind drywall or cabinets. This is particularly important for preventing mold and rot, which can be costly to remediate. Once a hidden leak is confirmed, opening up the affected area and repairing any damaged plumbing or drywall becomes necessary.

Proper inspection of valves and pipes is also crucial. The shut-off valves under the sink can sometimes develop leaks where the stem meets the valve body. When I encountered this issue, I tightened the packing nut slightly with a wrench. If the leak persisted, replacing the valve was the next step. It’s a straightforward process: turning off the main water supply, disconnecting the old valve, and attaching a new one securely.
Preventive measures can go a long way in avoiding future leaks. Ensuring all fittings are hand-tightened regularly and checking for corrosion or wear can prevent larger problems down the line. Installing water leak detectors under the sink was a game changer for me, as these devices provide an alert if water is detected, allowing me to address the issue before it worsens.
The lesson I learned was that while kitchen sink leaks can be stressful, most are manageable with a bit of patience and basic tools. It’s essential to address them as soon as they’re detected to prevent more severe water damage. Regular maintenance, such as resealing and tightening fittings, has become part of my routine to keep my kitchen sink in good condition.
Finally, although DIY repairs can be effective for common leaks, there are times when it’s wise to call a professional. If a leak persists despite my efforts or if it involves complicated pipe connections behind the walls, seeking expert help ensures the issue is resolved thoroughly. A professional plumber can assess whether there are deeper issues with the plumbing system that a simple repair might not address.

Common Mistakes to Avoid
One of the most common mistakes I made initially was not turning off the water supply before attempting a repair. Even a simple adjustment can cause water to spray unexpectedly, making a minor issue much messier. Always turning off the water supply at the shut-off valves under the sink is a critical first step that I now never skip.
Another mistake is over-tightening connections. It’s easy to assume that making something as tight as possible is better, but with pipes and fittings, this can actually cause cracks or damage to the threads, leading to future leaks. A snug fit is essential, but there’s a fine line between tight enough and too tight. I learned to use my hands first and finish with a tool just enough to secure it.
Using the wrong type of sealant was another pitfall I encountered. Not all sealants are created equal, and choosing a non-waterproof caulk can lead to water seeping through and causing leaks. Using a high-quality silicone sealant specifically meant for wet areas ensures a better, longer-lasting seal around the sink and faucet.
A common oversight is not inspecting all potential sources of leaks. Focusing only on the obvious spots, like the faucet or visible pipes, and ignoring components like the sink strainer or garbage disposal can mean missing hidden leaks. I now make it a habit to check all parts of the plumbing under the sink, not just the area where water is most evident.
Lastly, trying to patch up serious leaks without replacing faulty parts was a mistake that cost me time and frustration. Using temporary fixes, like tape or putty, may stop a leak for a short period, but they are not a permanent solution. Replacing a damaged section of pipe or a worn-out washer is the best way to ensure the problem doesn’t resurface.

What is the most common cause of kitchen sink leaks?
The most common cause of kitchen sink leaks is loose or worn-out fittings and connections. Over time, compression fittings and slip nuts can loosen due to regular use, causing water to leak. Other frequent causes include worn-out washers, faulty O-rings in the faucet, and degraded sealant around the sink.
How do I find the source of a kitchen sink leak?
Finding the source of a kitchen sink leak involves turning off the water supply, drying the area under the sink, and inspecting all pipes, fittings, and connections with a flashlight. Sometimes, the source is evident, like water dripping directly from a pipe, while at other times, it can be more subtle, such as moisture around the base of the faucet or the sink strainer. Using paper towels or a moisture meter can help identify hidden leaks.
Can I fix a kitchen sink leak myself, or should I call a plumber?
Most simple kitchen sink leaks can be fixed by homeowners with basic tools and some patience. Issues like tightening fittings, replacing washers, or resealing areas with caulking are manageable DIY tasks. However, if a leak persists, involves significant corrosion, or is hidden behind walls, calling a professional plumber is wise to ensure proper diagnosis and repair.

How often should I check for leaks under my kitchen sink?
It’s a good idea to check for leaks under your kitchen sink every few months or whenever you notice signs of dampness, such as a musty smell, water spots, or warped cabinet material. Regular inspections can catch small issues before they escalate into bigger problems that require more extensive repairs.
What type of sealant is best for kitchen sink repairs?
For kitchen sink repairs, a waterproof silicone sealant is the best choice. Silicone sealant is flexible, long-lasting, and resistant to mold and mildew, making it ideal for wet areas. Avoid using non-waterproof or low-quality sealants, as these can deteriorate quickly and lead to further leaks.
Why does my sink still leak after tightening the fittings?
If your sink still leaks after tightening the fittings, it could be due to a worn-out washer a crack in the pipe, or the fitting itself. It’s also possible that the issue lies with another component, such as the sink strainer or a damaged O-ring in the faucet. Inspecting each part and replacing damaged or worn-out pieces is essential to fully resolve the leak.

Kitchen Sink Leaking – Plumbing – DIY Home Improvement

How to Repair a leaking Kitchen Sink Drain

How to fix pipework to a tap (faucet) leaking under the sink!

How to Fix a Leaky Kitchen Faucet Pfister Cartridge

Trap leaking under bathroom vanity

Related Posts:
- Kitchen Sink Waste Pump
- D Shaped Stainless Steel Kitchen Sinks
- How To Unclog Double Kitchen Sink With Garbage Disposal
- Astracast Stainless Steel Kitchen Sinks
- Composite Drop In Kitchen Sinks
- Kitchen Sink Detergent Dispenser
- Kitchen Sink Faucet Accessories
- 24 Inch Double Kitchen Sink
- Granite Kitchen Sink Sale
- Crane Kitchen Sinks