Installing a two-handle kitchen faucet is a relatively straightforward process that can be completed by most homeowners with basic plumbing skills and tools. Two-handle faucets are a popular choice for kitchen sinks due to their classic design and separate handles for controlling hot and cold water. Whether you’re replacing an old faucet or installing a new one, following the proper steps will ensure a successful installation.
Before you begin, gather all the necessary tools and materials, including the new faucet, adjustable wrench, plumber’s tape, bucket, and towels. Start by shutting off the water supply to the kitchen sink. This can usually be done by turning off the shut-off valves located beneath the sink. Once the water is turned off, open the faucet to release any remaining water pressure in the lines.
Next, disconnect the supply lines from the old faucet using an adjustable wrench. Be sure to place a bucket or towel beneath the sink to catch any water that may spill out. Once the supply lines are disconnected, use the same wrench to loosen the nuts holding the faucet in place. With the nuts removed, you can lift the old faucet out of the sink.

Before installing the new faucet, clean the sink area thoroughly to remove any debris or old caulk. Apply plumber’s tape to the threads of the supply line connections on the new faucet to create a tight seal. Then, insert the faucet into the mounting holes in the sink, ensuring that it is positioned correctly and aligned with the backsplash.
Once the faucet is in place, secure it by tightening the mounting nuts underneath the sink with an adjustable wrench. Be careful not to over-tighten the nuts, as this could damage the faucet or the sink. Once the faucet is securely in place, reattach the supply lines to the corresponding hot and cold water valves, making sure to tighten them with the wrench.
With the supply lines connected, turn the water supply back on and check for any leaks around the connections. If you notice any leaks, tighten the connections further until they are secure. Once you’ve confirmed that there are no leaks, test the faucet by turning the handles to ensure that hot and cold water flow properly.

Finally, apply a bead of silicone caulk around the base of the faucet to create a watertight seal and prevent water from seeping beneath the sink. Smooth out the caulk with your finger or a caulking tool for a clean finish. Allow the caulk to dry completely before using the faucet.
Now that you’ve successfully installed your two-handle kitchen faucet, let’s discuss some common mistakes to avoid during the installation process. One mistake is not properly aligning the faucet with the backsplash or mounting holes in the sink, which can result in an uneven or unstable installation. Take the time to ensure that the faucet is correctly positioned before securing it in place.
Another common mistake is over-tightening the mounting nuts underneath the sink, which can damage the faucet or the sink itself. Be sure to tighten the nuts securely, but avoid applying too much force. Similarly, failing to use plumber’s tape on the supply line connections can result in leaks, so be sure to apply tape to create a tight seal.
Additionally, neglecting to clean the sink area thoroughly before installing the new faucet can prevent a proper seal from forming, leading to leaks or water damage over time. Take the time to clean and dry the sink area before beginning the installation process.
Furthermore, forgetting to test the faucet for leaks after installation can result in unnoticed leaks that could cause water damage over time. Be sure to turn the water supply back on and check for any leaks around the connections before considering the installation complete.

Do I need any special tools or skills to install a two-handle kitchen faucet?
While basic plumbing skills and tools are helpful, most homeowners can successfully install a two-handle kitchen faucet with a few simple tools like an adjustable wrench and plumber’s tape.
How long does it take to install a two-handle kitchen faucet?
The time it takes to install a two-handle kitchen faucet can vary depending on factors like the complexity of the installation and the skill level of the person performing the installation. In general, the process can take anywhere from 30 minutes to an hour.
Can I install a two-handle kitchen faucet on my own, or should I hire a professional?
While some homeowners may feel comfortable installing a faucet themselves, others may prefer to hire a professional plumber to ensure a proper and secure installation. If you’re unsure about your plumbing skills or the complexity of the installation, it’s always best to consult a professional.
What should I do if I encounter any difficulties during the installation process?
If you encounter any difficulties or complications during the installation process, such as stubborn mounting nuts or unexpected leaks, don’t hesitate to consult the manufacturer’s instructions or seek advice from a professional plumber for assistance.
Can I reuse the supply lines from my old faucet when installing a new two-handle faucet?
It’s generally not recommended to reuse old supply lines when installing a new faucet, as they may be worn or damaged and could lead to leaks. It’s best to use new supply lines to ensure a proper and secure connection.
Delta Faucet Stems & Cartridges Repair Parts at Equiparts

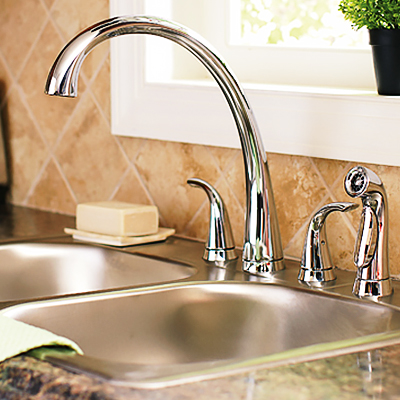
Project Source Pull Down Kitchen Faucet Instructions / Project Source White 1 Handle Deck Mount
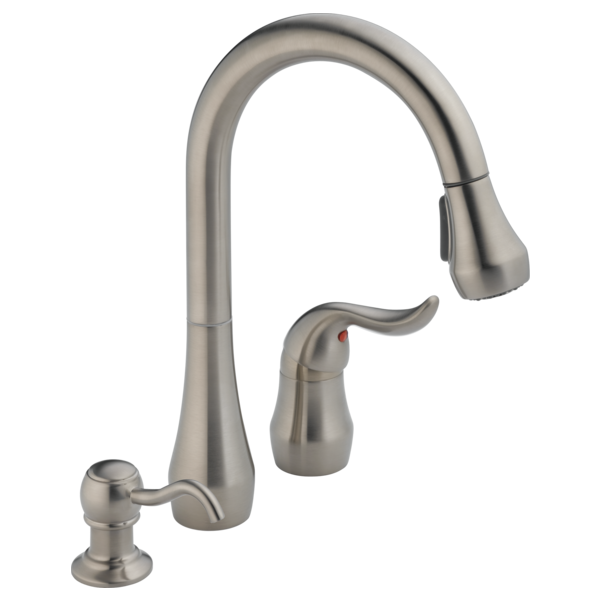
Pin on Kitchen Faucet Replacements

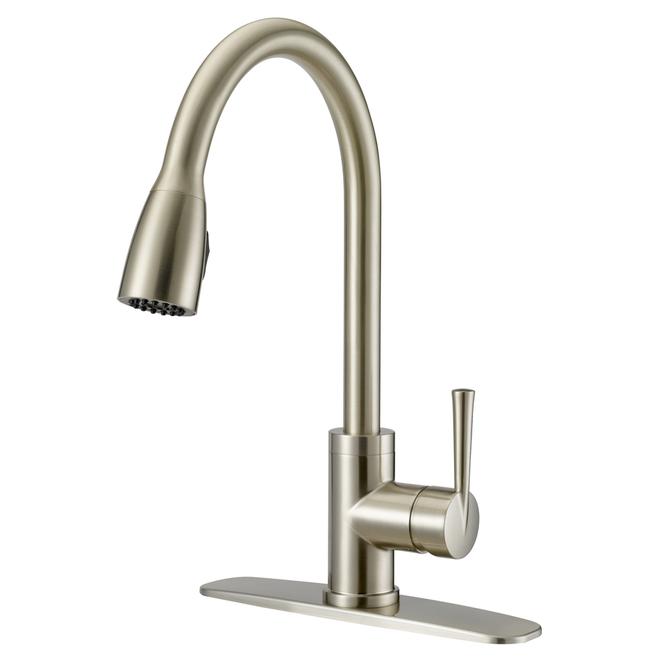
Kitchen Faucets – Kitchen RONA
How To Remove Valve Stem From Bathroom Faucet

How To Remove Bathroom Faucet Handle TcWorks.Org

Aquafaucet Led Waterfall Widespread Bathroom Sink Faucet Oil Rubbed Bronze Two Handles

Related Posts:
- Chrome Kitchen Sink Faucet
- Change Kitchen Faucet Hose
- Grohe Kitchen Sink Faucet
- My Kitchen Faucet Is Leaking
- Farm Style Kitchen Faucets
- Moen Matte Black Kitchen Faucet
- Kitchen Faucets Antique Brass Finish
- How To Repair A Leaking Kitchen Faucet
- How Much To Install New Kitchen Faucet
- Grohe Classic Kitchen Faucet