Comprehensive Guide to Kitchen Sink P-Trap Installation
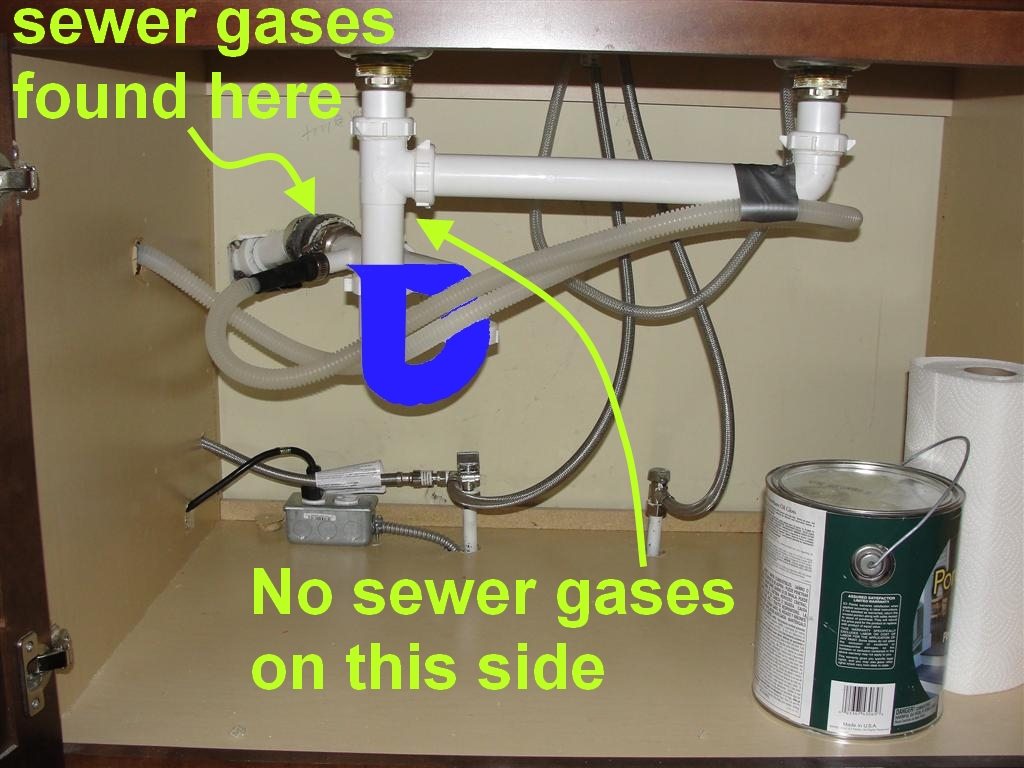
Installing a P-trap under your kitchen sink might seem like a daunting task, but with the right tools and know-how, it can be a straightforward DIY project. The P-trap is an essential component of your plumbing system, designed to prevent sewer gases from entering your home while allowing wastewater to flow freely. In this comprehensive guide, we’ll walk you through the steps of installing a P-trap under your kitchen sink, covering everything from gathering the necessary materials to troubleshooting common issues.

Understanding the Basics of a P-Trap
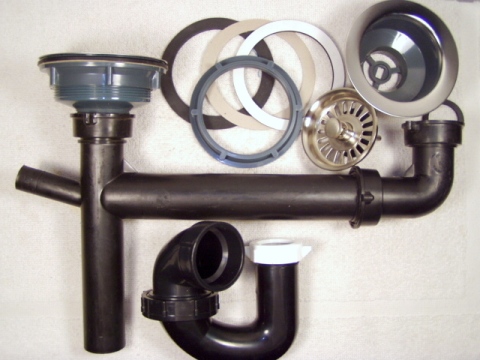
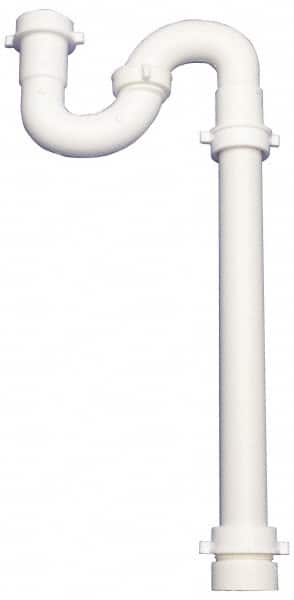
Before diving into the installation process, it’s crucial to understand the basic components of a P-trap. A P-trap is a U-shaped pipe that traps water, creating a barrier between your plumbing system and the outside environment. This water seal prevents foul odors and harmful gases from entering your home. In addition to the U-shaped pipe, a P-trap typically consists of two threaded connections for attaching to the sink drain and the main waste line.
Gathering the Necessary Materials
To begin the installation process, gather the following materials:
- P-trap kit (includes P-trap, extension pipes, and washers)
- Pipe wrench
- Plumber’s tape
- Bucket
- Towel or rag
Make sure to choose a P-trap kit that is compatible with your sink’s dimensions and the existing plumbing system. Additionally, it’s a good idea to wear gloves and eye protection to prevent injury during the installation process.

Step-by-Step Installation Process
Now that you have all the necessary materials, follow these steps to install the P-trap under your kitchen sink:
Step 1: Turn off the water supply: Locate the shut-off valve under the sink and turn it clockwise to shut off the water supply. If there isn’t a shut-off valve, you may need to turn off the main water supply to your home.
Step 2: Remove the old P-trap (if applicable): Use a pipe wrench to loosen the nuts connecting the old P-trap to the sink drain and the main waste line. Place a bucket under the P-trap to catch any water or debris that may spill out.
Step 3: Clean the area: Wipe down the area where the old P-trap was located with a towel or rag to remove any residue or debris.
Step 4: Install the new P-trap: Begin by attaching the P-trap to the sink drain, ensuring a secure connection. Next, connect the other end of the P-trap to the main waste line, again ensuring a tight seal. Use plumber’s tape to secure the connections and prevent leaks.
Step 5: Test for leaks: Once the P-trap is securely in place, turn the water supply back on and check for any leaks. If you notice any leaks, tighten the connections as needed until they are snug and secure.

Troubleshooting Common Issues
While installing a P-trap under your kitchen sink is relatively straightforward, you may encounter some common issues along the way. Here are a few troubleshooting tips:
Leaky connections: If you notice leaks around the connections, try tightening the nuts with a pipe wrench. If the leaks persist, you may need to replace the washers or use a plumber’s tape to create a tighter seal.
Clogs: If your sink is draining slowly or not draining at all, there may be a clog in the P-trap or the pipes leading to it. Try using a plunger or a plumbing snake to remove the clog. If the clog persists, you may need to disassemble the P-trap and remove the obstruction manually.
Odors: If you notice foul odors coming from your sink, it may indicate a problem with the P-trap’s water seal. Check to make sure the P-trap is filled with water, as this creates a seal that prevents odors from entering your home. If the water seal has dried out, simply run water down the drain to refill it.
Improper slope: The pipes leading to and from the P-trap should be sloped downward slightly to ensure proper drainage. If you notice standing water in the pipes, adjust the slope by loosening the connections and repositioning the pipes as needed.

Common Mistakes to Avoid
Using the wrong size P-trap: Make sure to choose a P-trap kit that is the correct size for your sink and plumbing system to ensure a proper fit and prevent leaks.
Failing to properly tighten connections: Always use a pipe wrench to tighten the connections between the P-trap and the sink drain and main waste line to prevent leaks.
Forgetting to test for leaks: Before calling the installation complete, always turn the water supply back on and check for any leaks around the connections. This will help catch any issues early on and prevent water damage.
Neglecting to clean the area: Before installing the new P-trap, take the time to clean the area where the old P-trap was located to ensure a secure and tight seal.

Why is there water leaking from my P-trap?
Leaks can occur due to loose connections or damaged washers. Make sure all connections are properly tightened, and replace any damaged washers as needed.
How often should I clean my P-trap?
It’s a good idea to clean your P-trap regularly to prevent clogs and odors. Aim to clean it every few months or as needed, depending on usage.
Can I install a P-trap myself, or do I need to hire a professional?
While installing a P-trap is a relatively simple DIY project, if you’re unsure or uncomfortable working with plumbing, it’s always best to hire a professional to ensure it’s done correctly.
What should I do if my sink is draining slowly even after installing a new P-trap?
Slow drainage can indicate a clog further down the line. Try using a plunger or plumbing snake to remove the clog, or consult a professional plumber for assistance.
Is it normal for there to be a slight odor coming from my sink even with a P-trap installed?
In some cases, odors may still be present due to bacteria or debris buildup in the pipes. Try running hot water and a mild detergent down the drain to help eliminate odors, and consider using a drain cleaner or deodorizer as needed. If the odor persists, there may be a problem with the P-trap’s water seal that requires attention.
Replace a Sink Trap – Fine Homebuilding

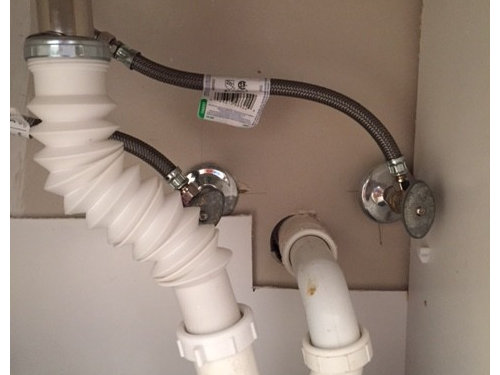
Replacing sink trap with a flexible one?

How to Remove & Fix a Kitchen Sink Drain – Mobile Home Repair

How to Install a Pedestal Sink

The Most Common Dishwasher Installation Defect

How To Replace A Bathroom Sink P Trap

Federal Process – Sink Trap – 82723115 – MSC Industrial Supply

Related Posts:
- Kitchen Sink Sprayer Replacement Head
- Kitchen Corner Sink Base Cabinet Dimensions
- Single Bowl Vs Double Bowl Kitchen Sink
- Crane Kitchen Sinks
- Kitchen Sink Vent Stack
- How To Fix Kitchen Sink Disposal
- Loss Of Hot Water Pressure In Kitchen Sink
- Kitchen Sink Science
- Small Kitchen Sink Dish Drainer
- Kohler 3 Compartment Kitchen Sink